How to Replace Door Frame? (Step-By-Step Tutorial)
Is your door frame damaged or looking haggard? Worn out jambs can make it difficult to open or close a door. Installing new ones can easily resolve the problem. Fortunately, with the right tools and a pinch of patience, this is a job you can complete on your own and save money on hiring a professional woodworker. Below we give you simple instructions on how to replace a door frame.
Tools for replacing door frame
To complete this project, you will need the following tools:
- Utility knife
- Protective gloves
- Safety goggles
- Panel saw or reciprocating saw
- Wood chisel
- Claw hammer
- Pry bar
- Tape measure
- Utility square
Step-by-Step Guide on how to replace door frame
The process of replacing a frame is more or less the same for interior and exterior doors.
How to remove an old door frame
Follow these simple steps to remove an old or damaged door frame.
Step 1. Remove the door
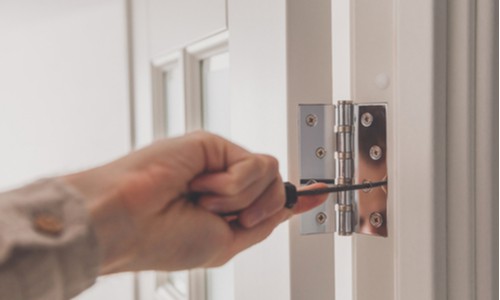
- With the door open, use a power drill or screwdriver to unscrew the hinges from the door jamb. To avoid possible injury, have someone hold the door while you loosen the hinges.
- Carefully lift the door, remove it from the frame, and set it aside in an out of the way location. Leave the hinges on the door.
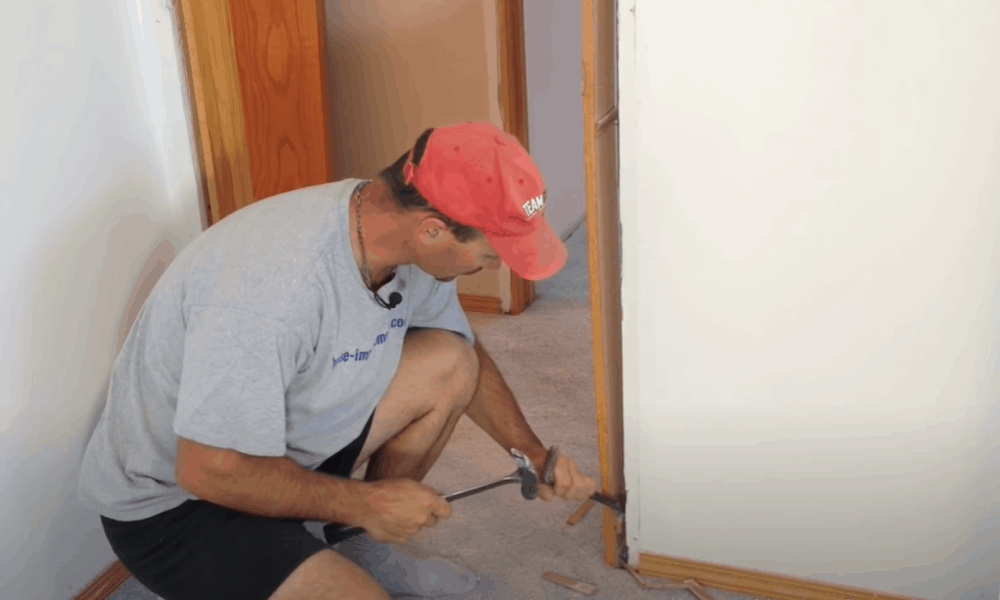
Step 2. Take out the trim
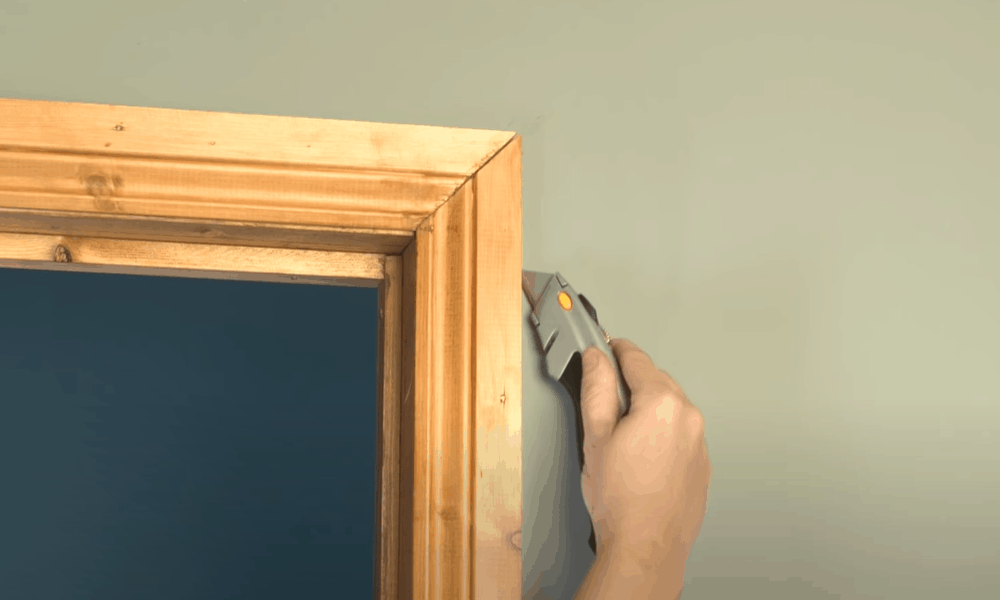
To access the frame and take correct measurements for buying a replacement, you first have to remove the trim. The trim is the outer wooden molding surrounding the entryway.
- Run a utility knife along the edges where the trim meets the jamb and where it meets the wall. This not only makes it easy to remove the trim; it also helps to minimize damage to the wall.
- Use a hammer to carefully tap the tip of a chisel into the space between the trim and jamb. Once there is enough room, use the flat edge of a prying bar to remove the trim all around the entryway.
- Set the trim aside for later use if the pieces are still in good condition. The nails on the pieces of trim can be a safety hazard—be sure to flatten these nails to avoid stepping on them and injuring your foot.
Pro tip: To protect the wall from damage, place a small flat piece of wood in the space between the wall and trim to act as a pivot for the prying bar as you take out the trim all around the door opening.
Step 3. Remove shims
When installing a door, small, flat pieces of wood known as shims are usually inserted between the side jambs and rough opening to ensure that the door is plumb and level.
-
Sale!

Swing Stop Bottom Adjustable Roller Flooring Barn Door Hardware
Original price was: $44.99.$33.99Current price is: $33.99. -
Sale!

Low Noise Floor Guide Adjustable Length Barn Door Hardware
Original price was: $15.99.$11.99Current price is: $11.99.Select options This product has multiple variants. The options may be chosen on the product page -
Sale!

Antique Big Rollers Steel Sliding Barn Door Hardware
Original price was: $187.99.$140.99Current price is: $140.99.


- Use a hammer and chisel to knock out the shims. Some may be held in place by nails and can only be removed by cutting the nails.
Step 4. Remove the strike plate
- Use a power drill to pop out the strike plate and other hardware such as the sliding latch hole on the jamb.
- You may not need to remove the strike plate but in cases where the screws holding the hardware in place are long enough to penetrate the rough opening, taking out the hardware is the only way to give way for the removal of the frame.
Step 5. Measure the door frame
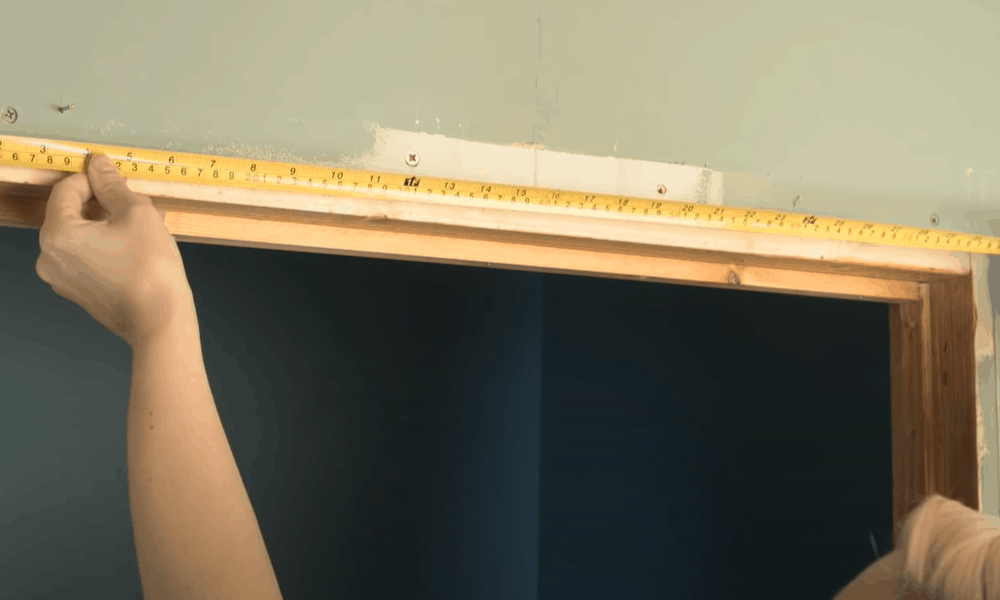
Measure the door frame before detaching it from the rough opening. This will help when purchasing a replacement frame kit that fits your entryway.
- For the width, place the tape measure on one end of the upper door jamb (also known as a header) and measure across to the other end. Take two more measurements in the middle and towards the bottom of the door. Use the smallest dimensions as the width measurement.
- For the length, measure from where the right side jamb meets the floor to where it meets the wall at the top. Again, measure the length in the middle and the left side jamb and use the smallest dimension as the length.
- For the thickness of the frame, measure the distance between the two wall faces.
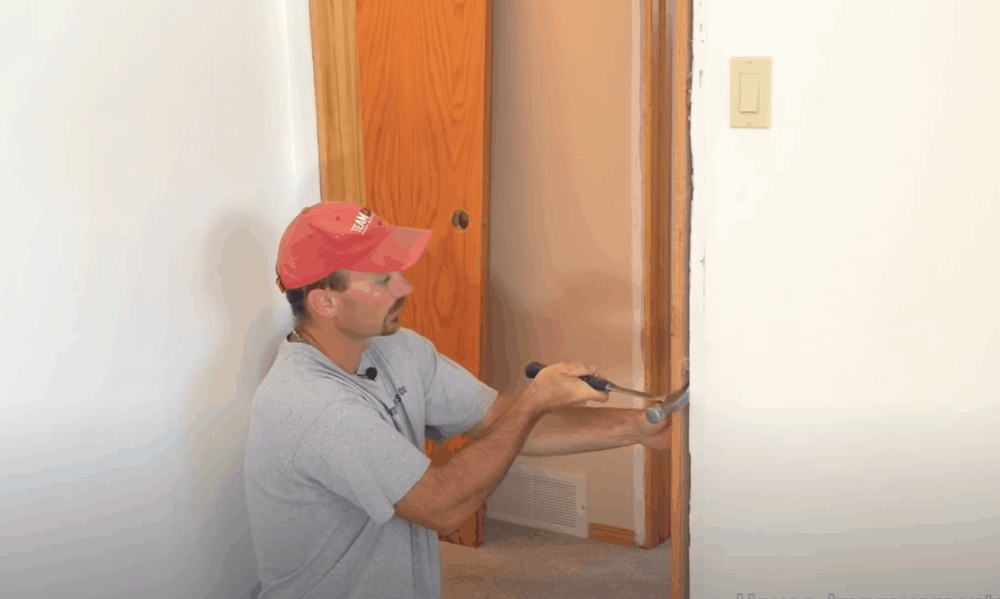
Step 6. Remove the old door frame
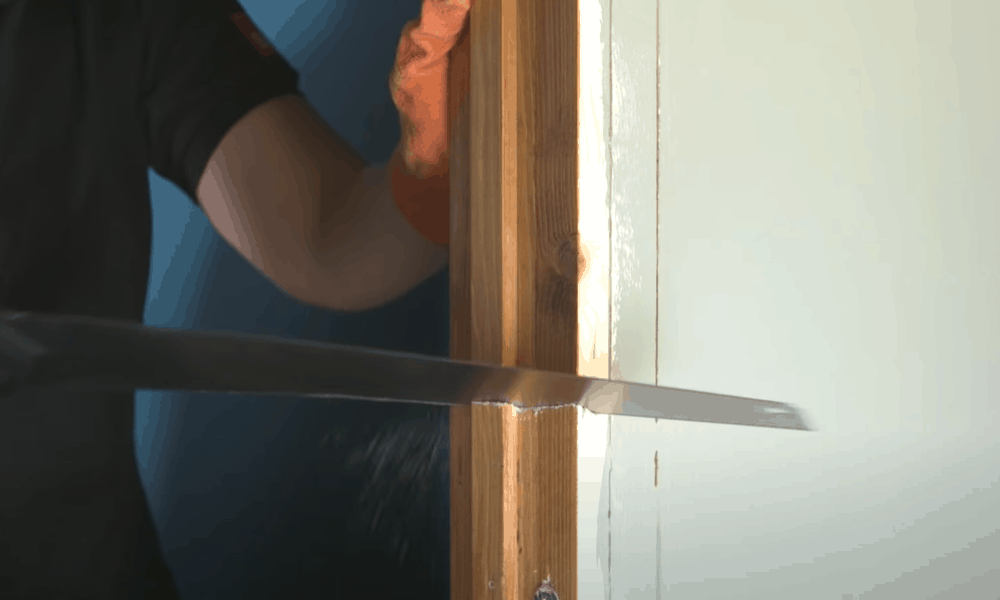
- Using a backsaw (or a reciprocating saw to get the job done faster), cut each door jamb horizontally at about half the height.
- Use the flat side of a prybar to detach the jambs from the walls.
- Once the jambs are out, use a reciprocating saw to cut any protruding nails to make them flash with the rough opening.
Pro tip: Cutting the jambs at a slight downward angle collapses the frame inward making it easy to pry out the wooden pieces.
How to install a new door frame
In the following steps, we’ll show you how to set up a new door frame in the rough opening left after removing the old frame.
If you only need to replace the frame and not the entire door, buying a door frame or jamb kit might be your best option. The alternative is to purchase a prehung door, which comes with its own frame but you should expect to pay significantly more for this.
Here, we’ll show you how to replace the frame using a jamb kit.
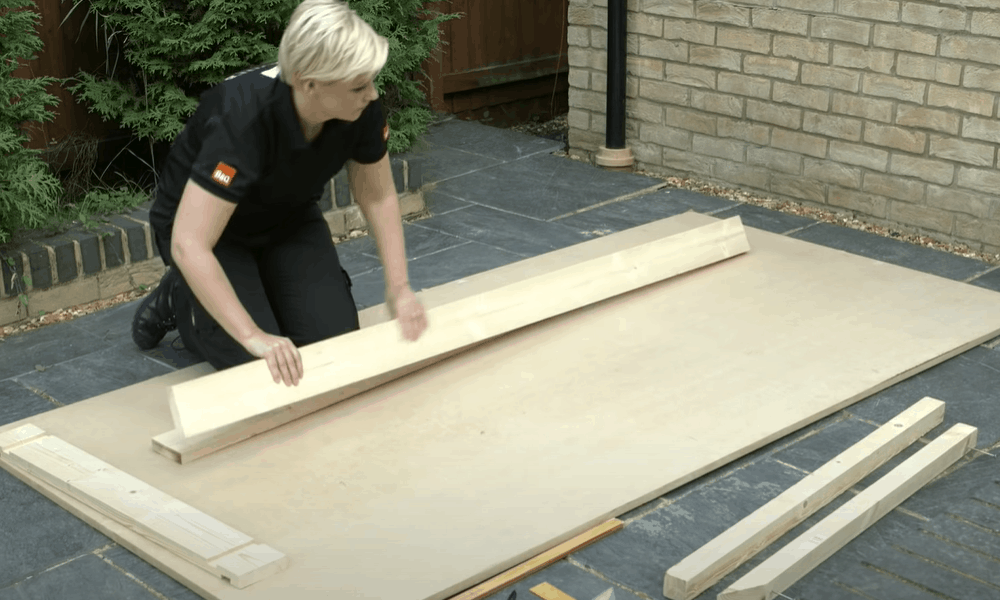
Step 1. Assemble the door frame kit
-
Sale!
Window Cabinet Drawer Handles Self-adhesive Door Knobs
Original price was: $12.99.$9.99Current price is: $9.99.Select options This product has multiple variants. The options may be chosen on the product page -
Sale!
Upscale Sliding Door Knob With Double-sided Tape for Kitchen Door Wardrobe
Original price was: $12.99.$9.99Current price is: $9.99.Select options This product has multiple variants. The options may be chosen on the product page -
Sale!
Round Stainless Steel Door Knobs for Drawer Cabinet Kitchen Cupboard
Original price was: $12.99.$9.99Current price is: $9.99.Select options This product has multiple variants. The options may be chosen on the product page


Generally, these kits come with a header, two side jambs, and weatherstripping.
- Use the measurements you took earlier to purchase the right size frame. You might need to purchase a customized frame for doors with non-standard width or length measurements.
- Lay the header and side jambs on a flat surface ready for assembling.
Step 2. Set up the door frame
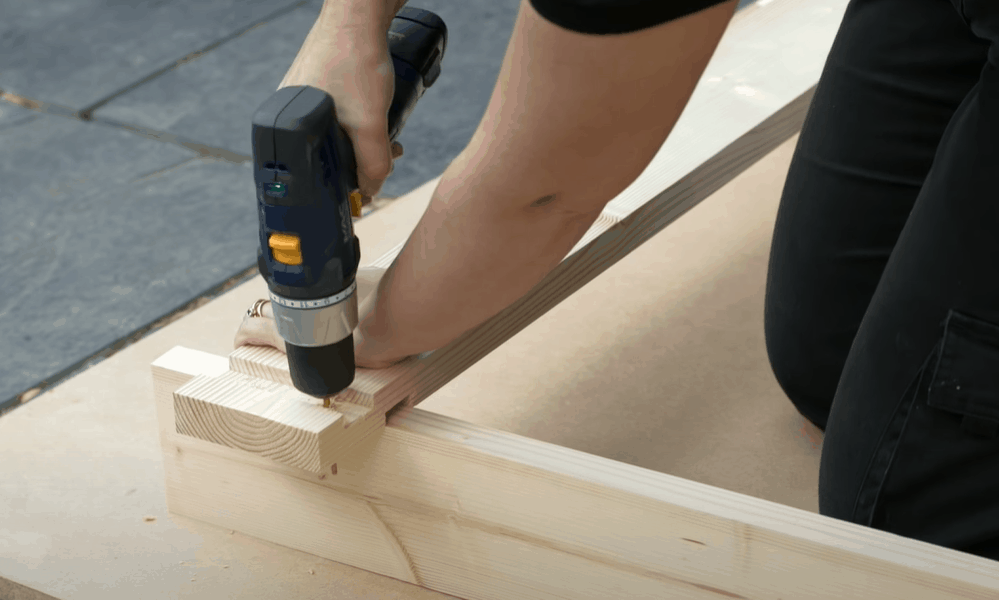
- Pre-drill two holes on each side of the header where you will set the nails. Lay the header and jambs on their edge on a flat surface. The uppermost part of the jambs should intersect with the face of the header.
- To attach the jambs to the header, drill screws into the holes you made earlier. Ensure that the edges of the jambs are flush with the edges of the header.
Step 3. Keep jambs and header plumb and level
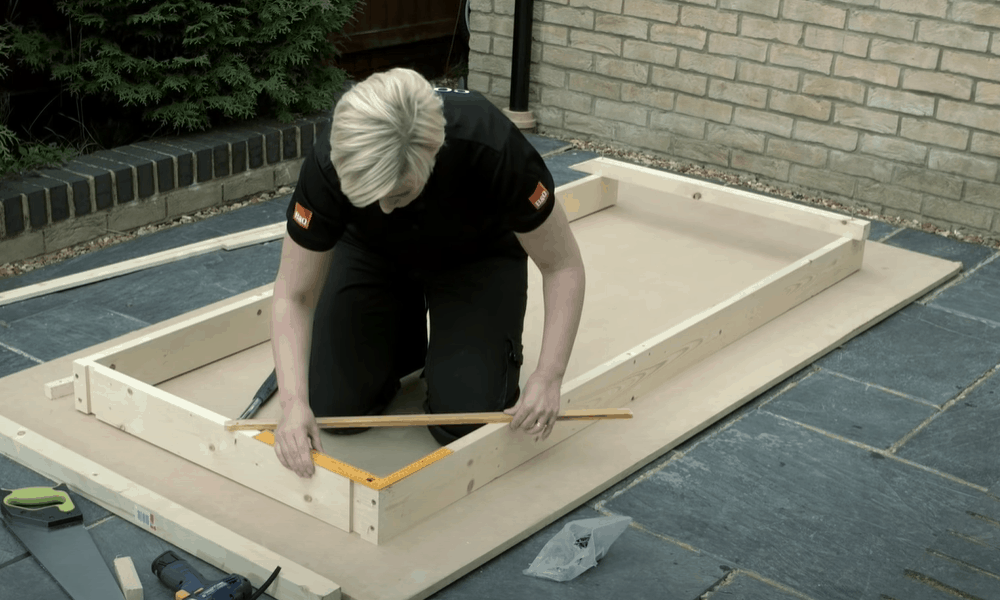
- Now that you have the basic frame outline, you need to brace the structure so that the jambs are parallel and the header is level to the jamb.
- To keep the jambs parallels, fasten a 50x50mm piece of timber about 100mm up from the bottom of the frame. Use a tape measure to check that the measurement between the two jambs is the same at the bottom, middle, and top.
- Place a utility square at one corner of the frame to check that the header and jambs intersect at a perfect 90-degree angle. For safe measure, fasten a diagonal piece of timber in this corner to keep the frame square as you continue working on it.
Step 4. Set the frame into the rough opening

- Pick up the frame from the floor and push it into the rough opening where it should fit snugly.
- Mark the points on the frame where you will drive the nails. Start with the hinge-side jamb. Ideally, the first nail points should be at about 100mm from the bottom of the jamb and the rest of the points should have a 450mm space between them up to the top where the jamb meets the header.
- Next, pre-drill holes into the marked points to accommodate the nails. Using a level, check that the jamb is plumb. If the bubble on the level is at the center, the jamb is indeed plumb.
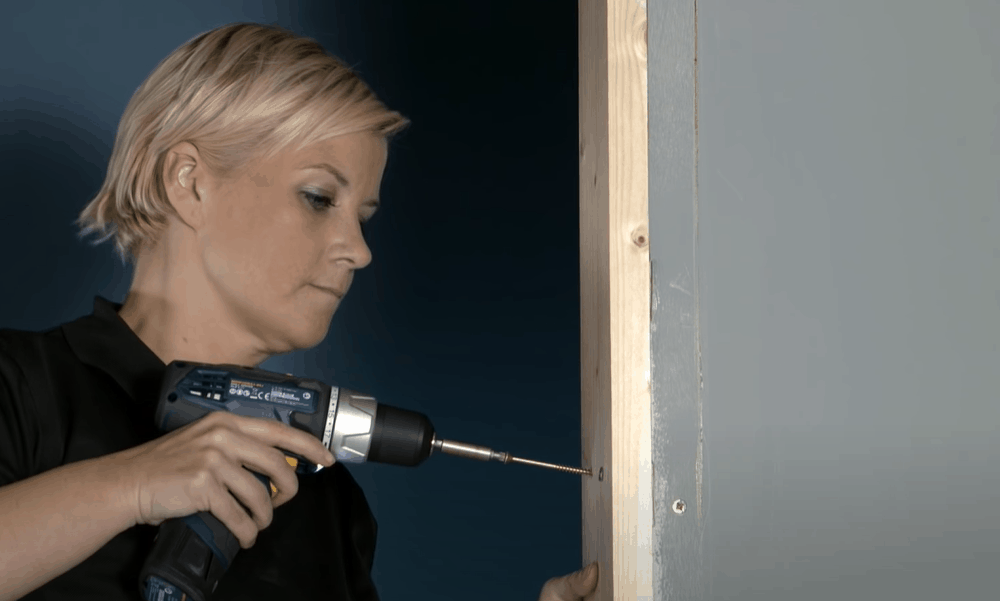
- Use a drill to drive in the nails in the respective points you had marked and pre-drilled all around the entire frame. Again, use the level to check that the jamb is plumb.
- There shouldn’t be a space between the face of the jamb and the level. If the jamb is not plumb, insert shims in between the jamb and wall until the bubble on the level is centered.
- Repeat this process to fix the latch side jamb. Double-check that the jambs are plumb and the header is level then remove the diagonal brace and the one at the bottom of the frame.
Step 5. Mount the door
- Set the door in the frame and insert shims in the space between the door slab and frame to ensure it is plumb and level. Begin with the hinge side and continue placing the shims all around the door, including at the bottom.
- With the shims in place, screw the hinges in their correct position on the door frame. Again, check that the door is level and plumb. Install the necessary hardware such as the strike plate.
- Using a utility knife, trim the shims and make them flush with the wall.
- Apply a small amount of foam insulation around the edges where the frame meets the wall. Allow the foam to dry before installing the trim.
Step 6. Install the trim
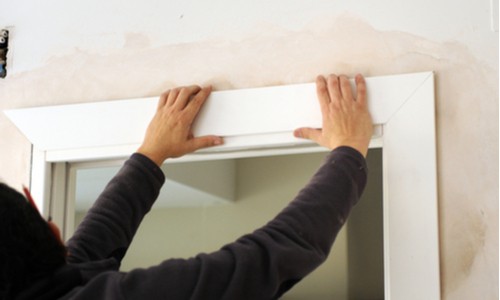
- If your trim was in good condition, nail each piece back into its previous position.
- Apply caulk around the edges where the trim meets the wall. Allow it to dry.
There you have it! A brand new door frame you can be proud of.
Extended Tips
- Consider purchasing a prehung door
If your door has extensive damage, attempting to repair just the frame might not be enough. Replacing the entire door, including the frame with a pre-hung door probably is the best option.
-
Sale!
Semicircular Cartoon Welcome Entrance Door Mat
Original price was: $12.99.$9.99Current price is: $9.99.Select options This product has multiple variants. The options may be chosen on the product page -
Sale!
Anti-skid Water Absorption Bathroom Door Mat
Original price was: $12.99.$9.99Current price is: $9.99.Select options This product has multiple variants. The options may be chosen on the product page -
Sale!
Classic Friends Welcome Rubber Carpet Door Mat
Original price was: $12.99.$9.99Current price is: $9.99.Select options This product has multiple variants. The options may be chosen on the product page


- Inspect door for level and plumb
Before your rush to unhinge the door and remove the old frame, check whether the existing door system is flush plumb and level. This will help you determine whether you need shims and the best location to place them.
Give your door a new lease of life with a new frame
Admittedly, replacing a door frame takes a little bit of time so you want to start this project early in the day. While you can opt to build one from scratch, we recommend purchasing a kit that you can easily put together and have a brand new door frame in no time. By following these instructions, you should be well on your way to installing a new frame that is a perfect fit for your interior or exterior door.
Do you have any questions or comments on replacing door frame? Leave them below—we’d love to hear from you!