Tinted House Windows (Step-By-Step Guide)

Whether you’re installing new windows, or want to spruce up your existing ones, applying a tint to house windows has become one of the most popular DIY projects.
Not only can a tint improve a window’s appearance without replacing the glass, but it can also increase its energy efficiency, reduce harmful glare and UV light, and add another layer of privacy and protection from prying eyes.
But, like all DIY tasks, you need to know the right information to achieve the best results. Otherwise, your window may look worse for wear afterward.
This article will explore everything you need to know about tinting your household windows. We’ll explain the benefits of tints and how you can easily apply them at home. We’ll also highlight some important factors to consider to ensure the best possible outcome for your windows.
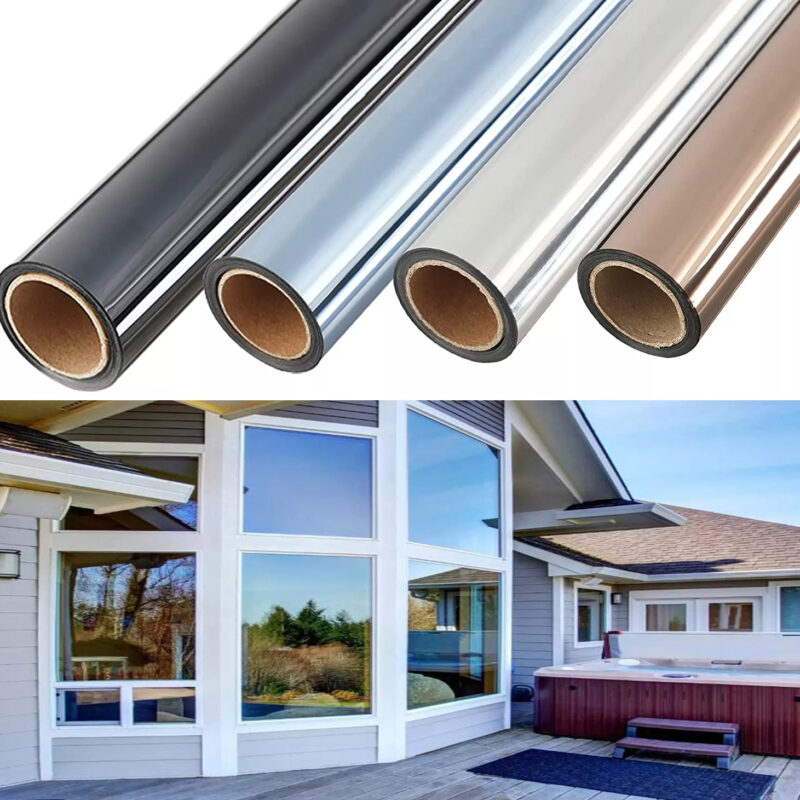
Five reasons why you should get tinted house windows
1. Protect against the sun’s rays
One of the principal reasons for tinting household windows is to filter out harmful UV rays while still allowing natural light to pass through. Specialized solar films can absorb or reflect up to 99% of UV rays, protecting you from harm and helping control your home’s temperature.
For precise information, look for the Solar Heat Gain Coefficient rating on your tint’s brand. These tints can also reduce glare from windows and protect soft furnishings, curtains, blinds, and rugs from fading or bleaching in the sunlight.
2. Energy Efficiency
Next up, tinting your windows can help you save a small fortune in energy costs. That’s because tints can play the role of an air conditioner and an insulator.
If your room receives lots of direct sunlight, a window tint helps prevent additional heat from entering your room, helping you keep cooler in the warmer months. On the flip side, during winter, the tint can act as a thermal insulator, trapping warmth that’s inside and minimizing heat loss.
3. Privacy
Another core benefit of window tinting is the daytime privacy they can offer. Certain shades can help shield your home from onlookers outside, giving off a nice, frosted look. These tints can be used on smaller, vulnerable windows such as ground-level garage windows or cover large panes in patio areas.
What’s more, frosted tints can act as a deterrent against intruders, as they will be unable to see what is behind the glass.
4. Security
An often overlooked benefit of tinting windows is that they offer another layer of protection for your windows. They contain a thin layer of plastic that reinforces the glass.
This can be particularly useful if your home is susceptible to many storms, hail, or other weather conditions that can cause physical damage.
-
Sale!

Universal Hook Up Nailfree Window Blinds
Original price was: $53.99.$40.99Current price is: $40.99.Select options This product has multiple variants. The options may be chosen on the product page -
Sale!
Cellular Honeycomb Fabric Window Blinds
Original price was: $166.99.$124.99Current price is: $124.99.Select options This product has multiple variants. The options may be chosen on the product page -
Sale!
Creative Drape Modern Tulle Window Blinds
Original price was: $12.99.$9.99Current price is: $9.99.Select options This product has multiple variants. The options may be chosen on the product page

Tinted security film is simple to apply and can even help close off cracks or prevent larger cracks from forming until you source a permanent fix. One weakness of this type of film is that it generally provides little insulation.
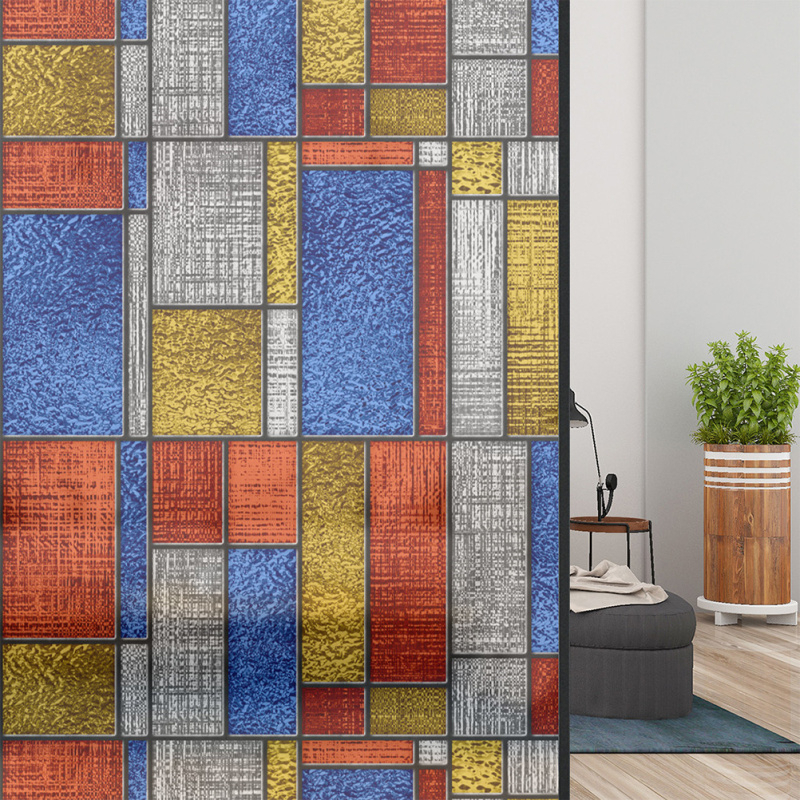
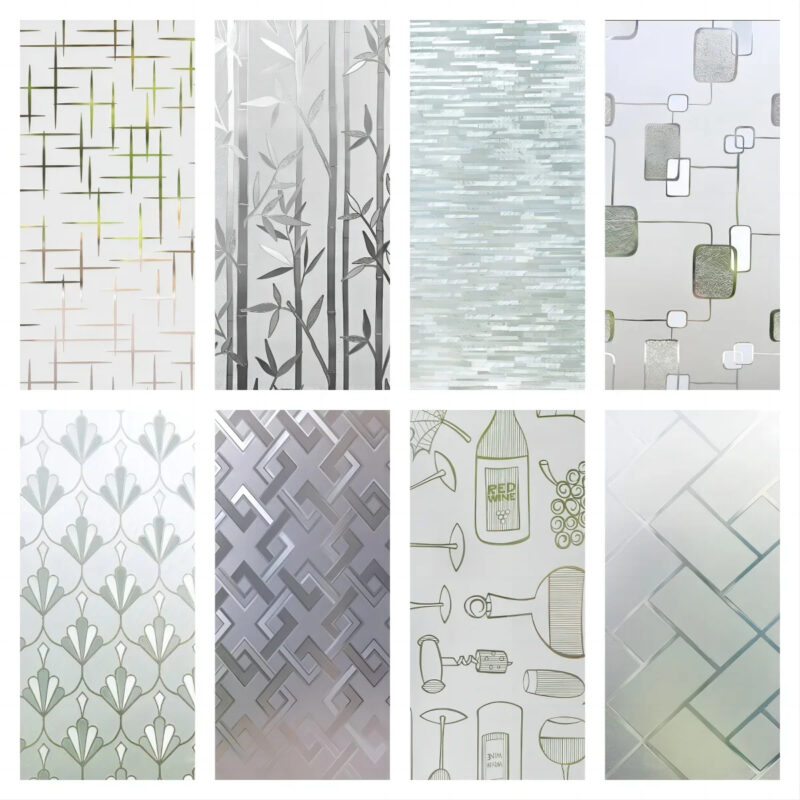
5. Decoration
The final benefit of tinted windows is simple – they look great. Decorative films are so common nowadays that there will no doubt be a variety of tints for you to choose from at your local supplier.
Tints can vary by shade as well as patterns, motifs, etchings, as well as vary by transparency. Some tints are incredibly opaque, giving off a frosty aesthetic that can attract the eye.
That said, tints vary between suppliers, so shopping around to find one to your liking is important. Mix and match the shades around your house to best suit each room.
How to install a home window tint by yourself
You can dramatically reduce the cost and hassle of organizing a professional window tinter by completing the job yourself.
Below is a step-by-step approach to applying a tint and ensuring it lasts the maximum length of time.
1. Cleaning
Ensure the window pane is free from glue, grit, dirt, or grime. A simple cleaning mix consists of some baby shampoo and water. Apply generously to the glass, and use a scraper to shift off debris. Use a squeegee to wipe off excess liquid around the sides of the window.
With a lint-free cloth, gently buffer the glass in a circular motion. Avoid using cleaning products or materials with ammonia, as this can reduce the effectiveness of adhesives.
2. Measure
Now that the window is clean, it’s time to measure your tint accurately. Roll out your tint on a clean, flat surface, and use masking tape to mark the cutting lines of your window. Remember to allow 2 inches on either side just in case; don’t worry, extra tint can be trimmed off later if needed.
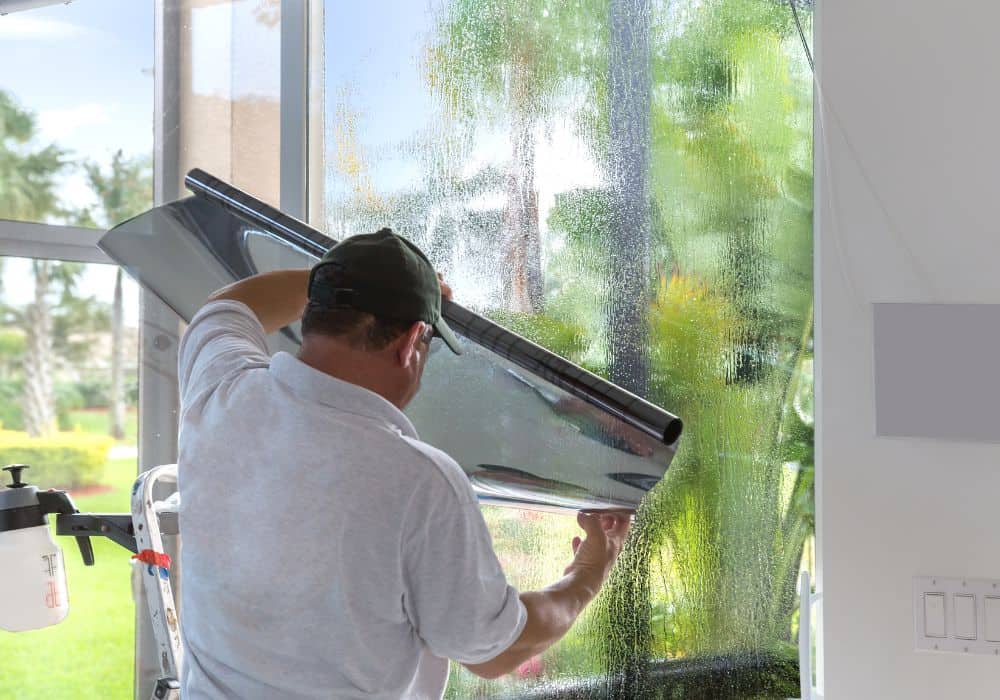
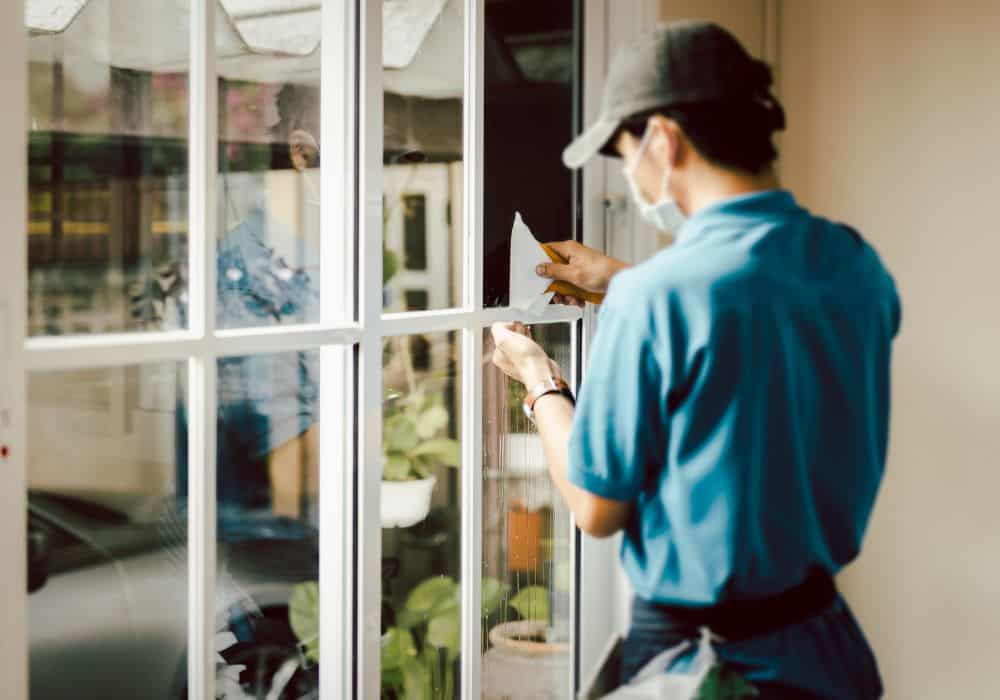
3. Applying the tint
Spray your baby shampoo/water mix back on the window, as this helps lubricate the tint and allows you to reposition it easily. Align the tint accordingly to your window, starting at a corner, and gently peel the backing off the tint.
If the tint is sticking quickly to the window, apply more liquid to keep it fluid and moveable until you’re confident it is lined up correctly.
4. Remove bubbles and creases
Again, apply a generous coating of baby shampoo to your tint. Then, gently roll your squeegee over the tint, ensuring that any creases or gathered-up pieces of tint are smooth. Start from the top of the window, repeating the same direction, gradually working your way down the glass.
-
Sale!
Party Wedding Sequence Backdrop Sequin Window Curtains
Original price was: $30.99.$23.99Current price is: $23.99.Select options This product has multiple variants. The options may be chosen on the product page -
Sale!
Jacquard Leaf Designer Window Curtains
Original price was: $77.99.$58.99Current price is: $58.99.Select options This product has multiple variants. The options may be chosen on the product page -
Sale!
Star Blackout Partition Window Curtains With Gauze
Original price was: $41.99.$30.99Current price is: $30.99.Select options This product has multiple variants. The options may be chosen on the product page

Avoid pressing tint too quickly into the glass sides, as this can accidentally push dirt and dust from the window sill and frame onto the adhesive. Instead, use a blade to cut off excess trimming and gently press the edges into place.
5. Trim
Once the tinting film has been secured, use a sharp blade to remove excess material. Use a credit card or rigid piece of cardboard to create a defined line around your trimming, making the actual cutting process much easier and more accurate.
FAQ:
Is tinting house windows worth it?
We believe tinting windows is an incredibly cost-effective DIY project that you should strongly consider. Regardless of where you live or the type of window in question, tints can offer something to that area of your home – without question.
Installation is simple, and you don’t need many specialized tools or a high skill level to complete it; once you follow the correct method and take your time, you can pull it off.
How much does window tinting cost professionally?
The cost of your window tint will largely depend on the window size and type of film you go for. But generally speaking, estimates for tints range around $5-$8 per square foot. If hiring a contractor, you must factor in equipment costs, labor, and a flat-rate fee.
Are there any downsides to window tinting?
One of the most significant and often forgotten considerations for tinting your windows is how it may affect the lifetime warranty and guarantees on your windows and window frames.
A window manufacturer or insurer can refuse to cover any or all damages to a modified window, especially if it was installed by yourself. If in doubt, check the manufacturer’s guidelines on modification conditions.
How long will a tinted house window last?
Like any big DIY project, you want to complete the task and have it last the test of time. Thankfully, with the proper care and consideration, window tints and films can easily last upwards of 20 years or more on your window.
This all depends on a few environmental factors, such as the type and quality of tint used, whether the window is facing prolonged, direct sunlight over time, and your local weather and climate. Finally, if your window film hasn’t been installed correctly, this can affect its lifespan.
Conclusion
For several reasons, tinting windows has become one of the most popular home improvement projects in recent years. It can make windows look better and improve everything from sun protection to glare reduction, add security to exposed windows, and help reduce energy bills over a prolonged period.
-
Sale!
Stained Static Cling Window Film Privacy Appliedsative Bathroom Shower Door
Original price was: $20.99.$15.99Current price is: $15.99.Select options This product has multiple variants. The options may be chosen on the product page -
Sale!
One Way Mirror Anti UV Window Film Privacy for Home Office Living Room
Original price was: $21.99.$16.99Current price is: $16.99.Select options This product has multiple variants. The options may be chosen on the product page -
Sale!
Opaque Frosted Glass Window Privacy Film Stickers for Home
Original price was: $10.99.$8.99Current price is: $8.99.Select options This product has multiple variants. The options may be chosen on the product page
Tinting older windows can instantly give them (and your entire residence!) a brand new lease on life and add real monetary value to your house. And as our article has shown, doing the job yourself is a relatively easy job to complete!
That said, there are certain things you must be aware of. Applying too dark a shade may rob your room of heat and light, so varying the tint depending on where your room is located is essential. Additionally, homeowners must be careful that applying a tint to the glass doesn’t void your window or window frame’s warranty.
But ultimately, we feel applying a tint to your house windows is well worth the effort. If you still have any questions on how to go about this process, please leave a comment below.
As always, remember:
- Applying a window film is the easiest way to tint your windows.
- If installed and maintained correctly, a window tint can last up to 20 years or more.
- Tinting can help heat reduction in the summer, heat retention in the winter, and protect you and your furniture from harmful UV rays.