How to Remove Door Handle? (Step-By-Step Tutorial)
Are you looking to replace or upgrade your door latch? Removing the old one is quite simple but if yours doesn’t have visible mounting screws, be prepared to do a little prying.
Easy as this DIY task might be, you want to be very careful not to damage the door or frame. Go ahead—gather the right tools and follow these simple instructions on how to remove a door handle.
Tools for removing door handles
These are the tools you will need to take out your door handle:
- Philips-head screw
- Allen wrench
- Paper clip or stiff wire
- Flat-head screwdriver
- Flashlight
Step-by-Step Guide on How to Remove Door Handle
How you go about removing the handle system will depend on how it is mounted on the door. Not to worry though—follow these steps and you should be able to complete this task in fifteen minutes or less.
Step 1. Locate the screws
Many door handle systems come with visible screws, making it easy to remove the doorknob and latch.
To locate the mounting screws, check the collar, also known as the ‘rose’ that surrounds the knob on the interior side of the door. You should see screws at the top, sides, and/or bottom of the rose.
Don’t worry if you can’t see the screws—in the next steps will show you how to remove a door handle with no visible screws.
Step 2. Unfasten the screws
If your knob has visible screws, all you have to do is unfasten them to take out the lock system.
- Grab the knob itself, then, using a Philips-head screwdriver, turn the screws anti-clockwise to free the knob assembly from the door.
- A spindle connects the interior and exterior knobs. Once you unfasten the screws, tag the interior knob to slide it off the spindle and disconnect it from the exterior knob.
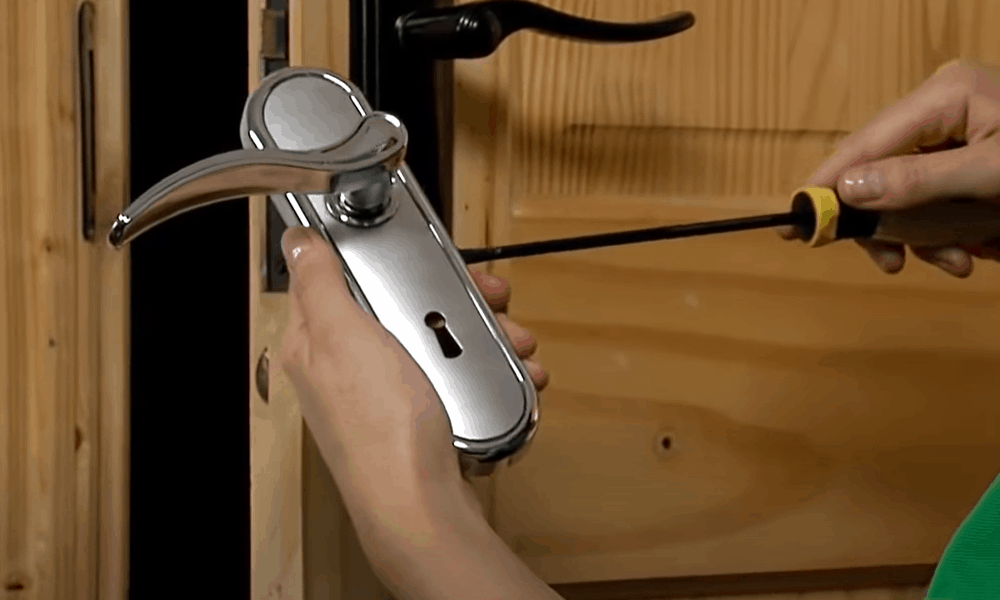
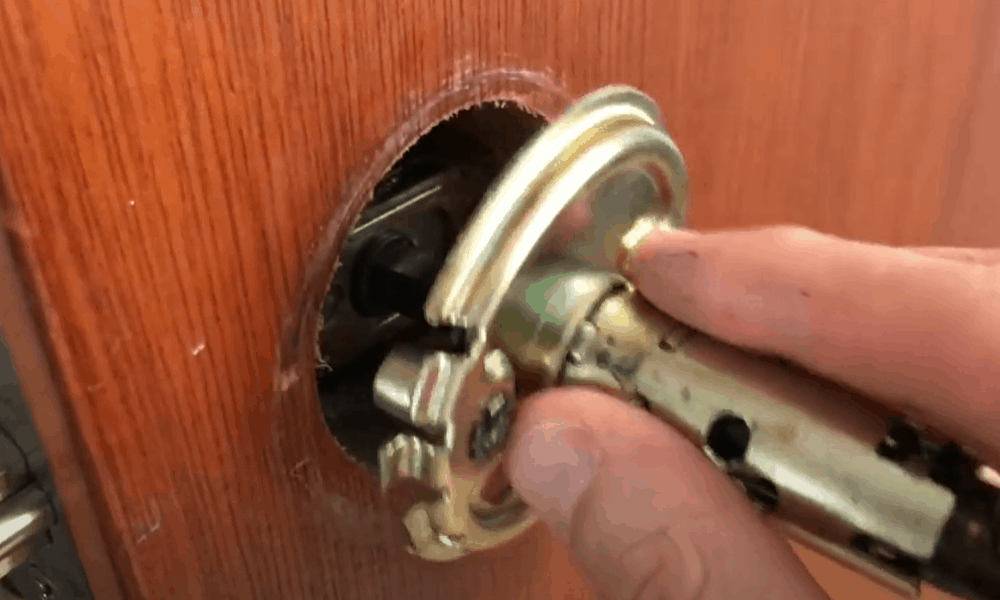
Step 3. Remove the latch plate
To disassemble the entire lock mechanism, you would need to remove the latch plate on the door slab.
-
Sale!

Swing Stop Bottom Adjustable Roller Flooring Barn Door Hardware
Original price was: $44.99.$33.99Current price is: $33.99. -
Sale!

Low Noise Floor Guide Adjustable Length Barn Door Hardware
Original price was: $15.99.$11.99Current price is: $11.99.Select options This product has multiple variants. The options may be chosen on the product page -
Sale!

Antique Big Rollers Steel Sliding Barn Door Hardware
Original price was: $187.99.$140.99Current price is: $140.99.


- Locate the mounting screws attaching the latch plate to the door edge. Then, use a Philips-head screwdriver to unfasten the screws. You might have to pry the latch plate gently to free it from the door.
- With the screws out, you should be able to pull the latch system through the side of the door.
Step 4. Remove the striker plate

The striker plate is located on the doorjamb and receives the latch when locking the door. The striker is usually held in place by two screws. Use a Philips-head screwdriver to take out the screws to free the striker.
Step 5. Locate recessed fasteners
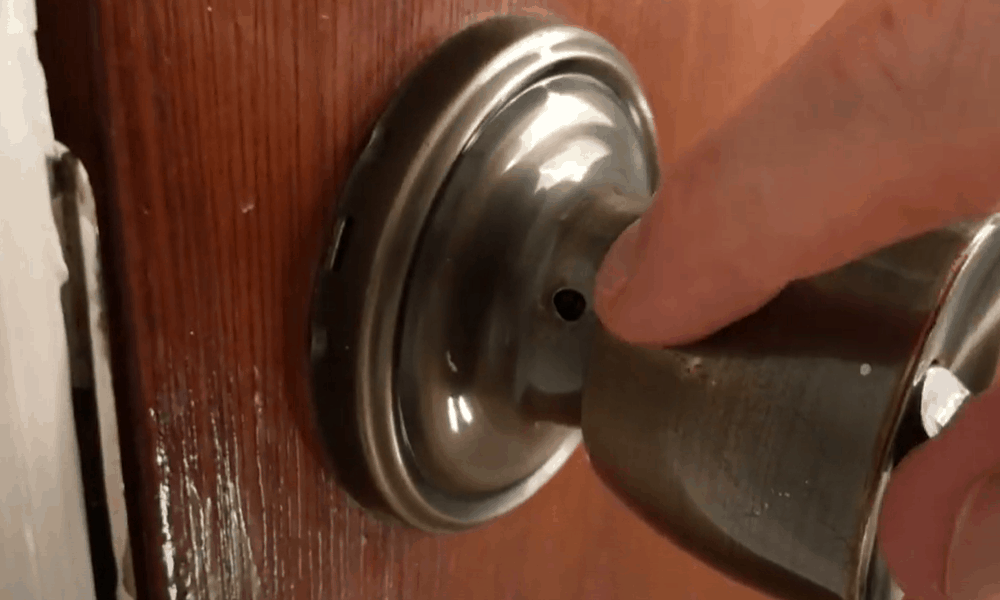
- If your door lock system doesn’t have visible mounting screws, you will have to locate the hidden screws first to remove the handle.
- Look for a thin slot or hole usually located toward the bottom of the doorknob shaft or where the rose meets the knob.
Step 6. Determine if the recessed lock system is held in place by a screw or detent
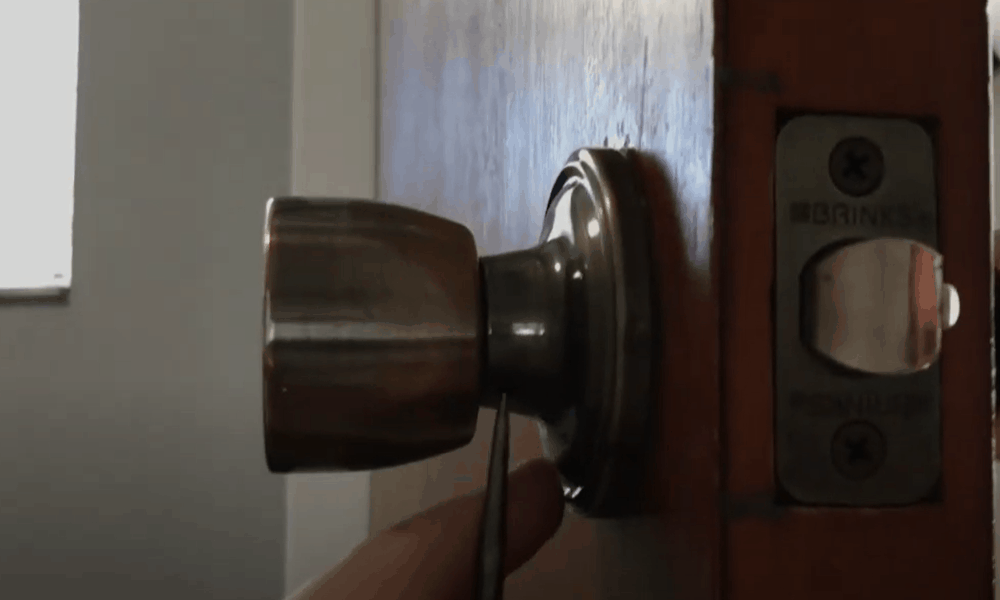
In recessed lock systems, the small hole at the bottom of the doorknob shaft hides a screw or a spring-loaded button known as a detent that holds the lock in place.
- Using a small flashlight, peer through the small hole to find out whether you are dealing with a detent or screw.
Step 7. Remove the screw from a recessed lock system
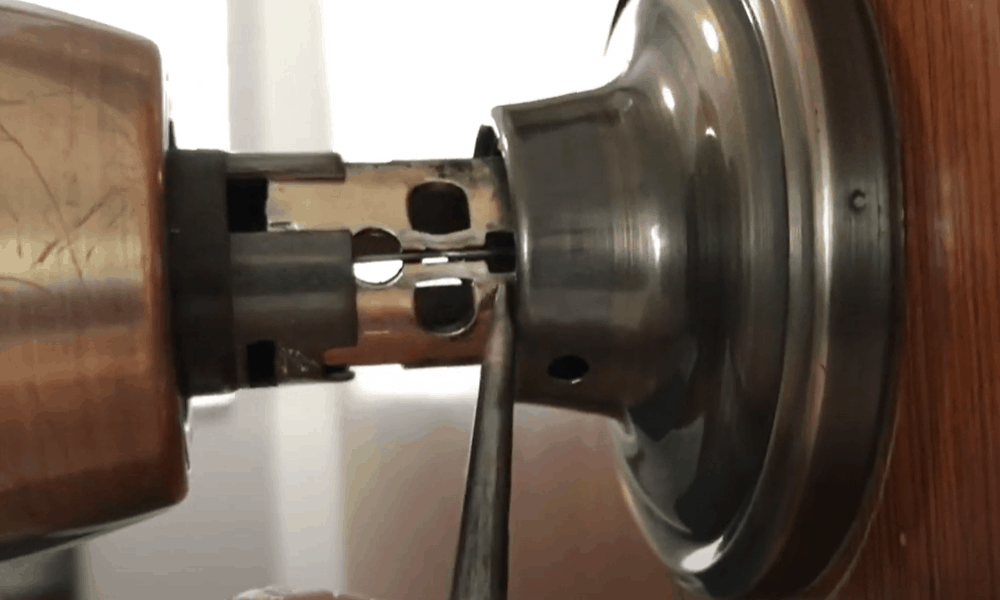
The method you use to take out the recessed lock system will depend on whether there is a screw or a detent inside the small hole you located earlier.
- If it is a hex-head screw in there, you will need an Allen wrench to unfasten it. Other lock systems come with a flat head or Philips-head screw, which can be removed using a compatible screwdriver.
- To unfasten a hex-head screw, insert a small Allen wrench into the small hole. Turn the wrench anticlockwise while sliding the screw up and out of the hole.
- To remove a flat-head or Philips-head screw, insert a compatible screwdriver into the small hole and turn it counterclockwise to unfasten the screw.
Pro tip: If the small hole at the bottom of the knob appears like a slot, the screw inside is usually the flathead type.
Step 8. Remove a lock system held in place by a detent
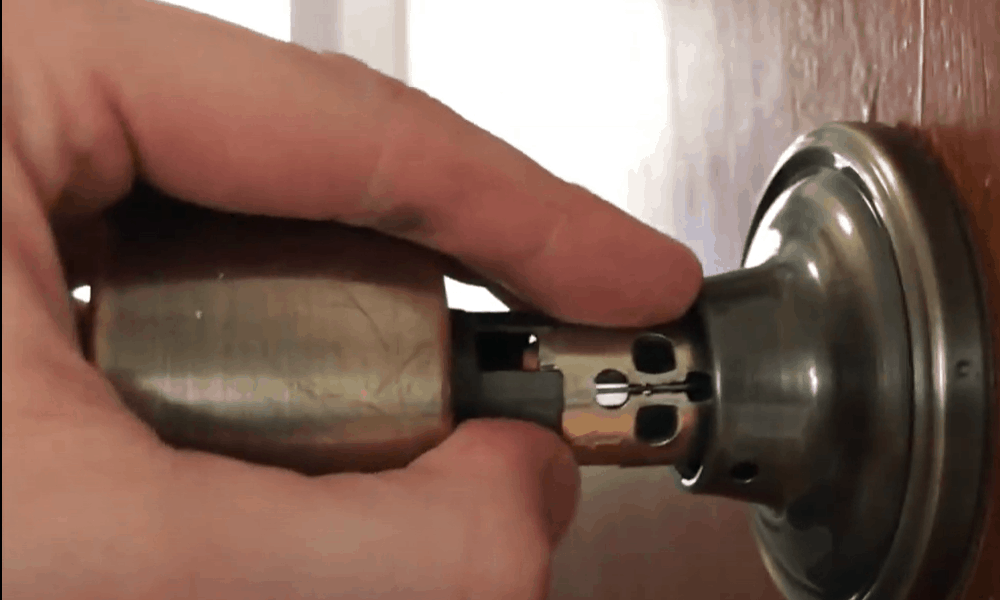
If you cannot locate a screw inside the hole, your door handle system is likely held in place by a spring-loaded detent. This might sound complicated but removing the handle is actually pretty simple.
Insert a thin paper clip or firm wire through the hole. Then, while holding the doorknob, press the paperclip or wire in to spring the detent. This should immediately release the doorknob.
-
Sale!
Free Punch Glass Door Sliding Door Knobs Suction Cup
Original price was: $12.99.$9.99Current price is: $9.99.Select options This product has multiple variants. The options may be chosen on the product page -
Sale!
Window Cabinet Drawer Handles Self-adhesive Door Knobs
Original price was: $12.99.$9.99Current price is: $9.99.Select options This product has multiple variants. The options may be chosen on the product page -
Sale!
Upscale Sliding Door Knob With Double-sided Tape for Kitchen Door Wardrobe
Original price was: $12.99.$9.99Current price is: $9.99.Select options This product has multiple variants. The options may be chosen on the product page


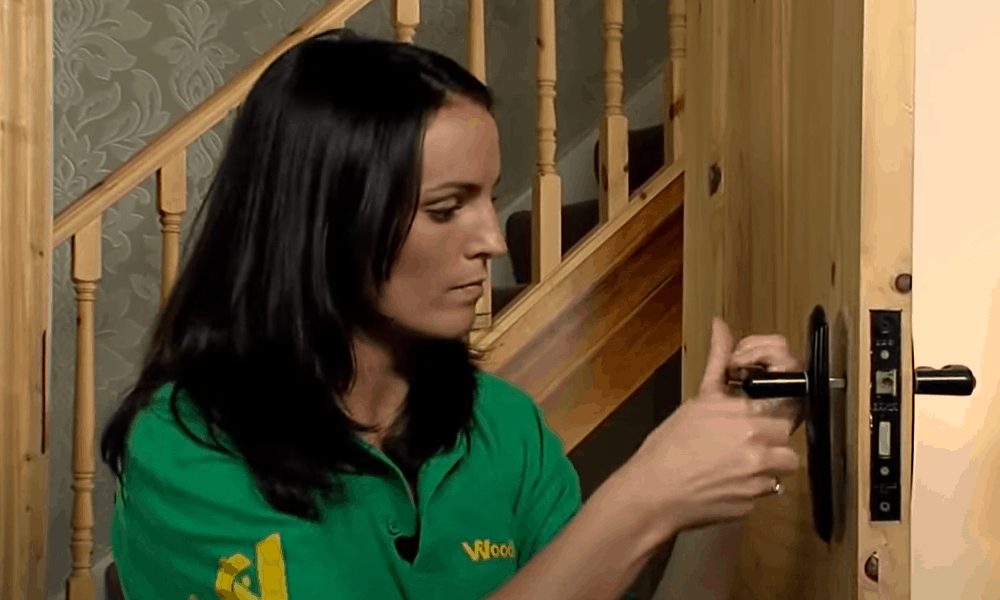
Pull the handle slightly to release it from the slab. To replace the entire lock system, remove the latch and strike plate as we’ve explained earlier (check steps 3 and 4).
Step 9. Remove a lock system with a cover plate
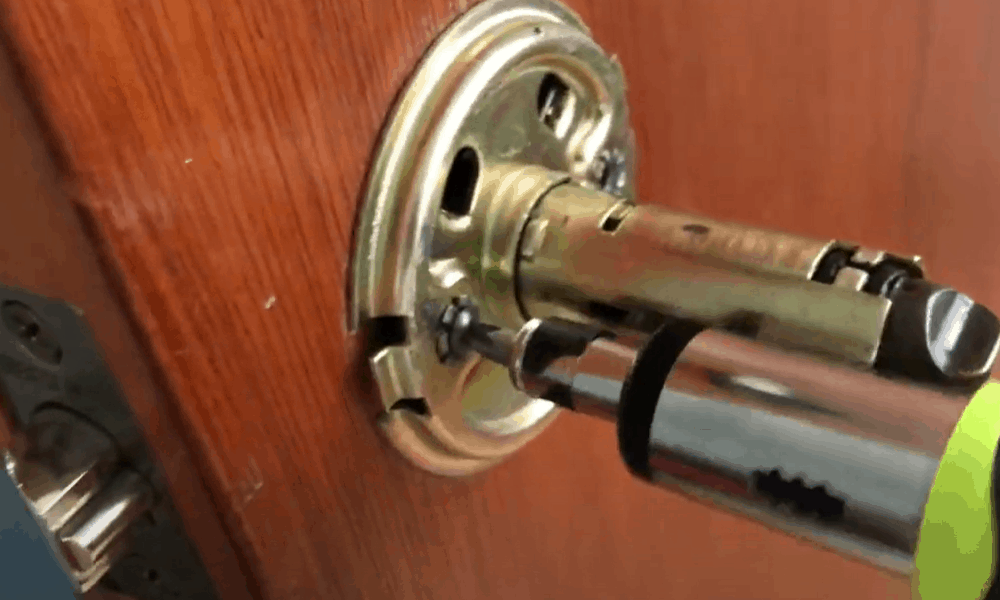
- In yet other lock systems, the fasteners that hold the handle in place are hidden behind the rose. So, you have to take out the rose or cover plate first to release the handle from the door.
- Locate a small slot where the cover plate meets the door slab. Insert a flat head screw and simply push out the plate. You might have to slightly pry to break the seal between the cover plate and door.
- With the rose free, you should be able to remove the doorknob, leaving behind the latch spindle. To expose the screws, slide the rose through the spindle and set it aside.
Pro tip: If your lock system doesn’t have a slot, try turning the rose anticlockwise to see if you can break the seal to release it from the door.
Step 10. Unfasten the screws behind the cover plate
- Using a screwdriver, unfasten the screws by turning them anticlockwise. With the recessed screws out, you should be able to easily take out the knob on the other side of the door.
- To replace the entire lock system, just remove the latch and the striker plate on the doorjamb.
That is all there is to removing a door handle! If you are looking to replace it, check out our tips below on how to install a door handle like a pro.
Extended Tips for removing door handles
Follow these tips to make your door handle installation process a success:
Measure, measure, measure
Do not assume that you know the kind of replacement lock system you will need just by looking at your old one. For a perfect fit, especially in older homes that have settled, be sure to measure the holes on the door slab left after taking out the old lock system.
First, measure the diameter of the hole through which the doorknobs enter. On most doors, the hole is usually 2 1/8 inches. Next, measure the distance from the center of the hole to the door edge. This is known as the setback and usually comes in about 2 ¾ inches.
Adjust the latch distance before installing
With the right measurements in hand, you should be able to buy a fitting lockset. Keep in mind that you might not always find a replacement latch with the exact measurement as your old one. In this case, ask your local hardware store to adjust the measurements of the new latch to fit your door.
When installing the new latch, ensure that the beveled side is facing the direction you will push the door when closing it. Also, for the door to lock properly, ensure that the new latch plate fits snugly in its place and that it is aligned with the doorjamb.
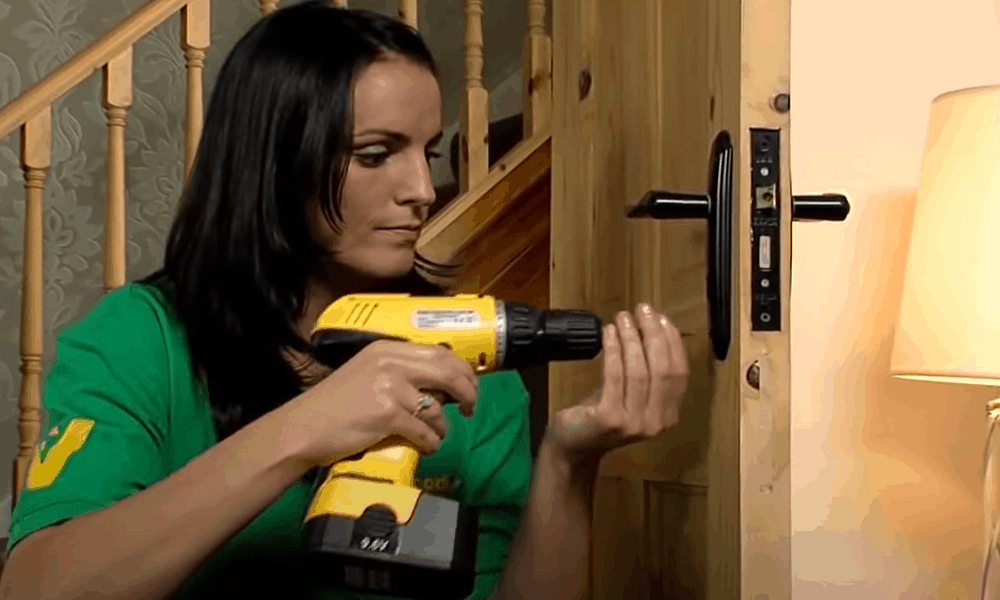
Opt for simple hand tools
When taking out the lock system and installing a new one, there is a good chance of damaging the door slab and jamb, resulting in costly repairs or replacements. While a drill might get the work done fast, for example, when unfastening and installing the screws, it can easily destroy the door. To minimize damage, we recommend using simple hand tools such as a screwdriver that is compatible with the screw head.
Troubleshoot as you go along
Nothing is more frustrating than installing an entire door lock system only to find that the various parts do not align. To avoid such a scenario, regularly test the lock system as you go along.
-
Sale!
Home Entrance Anti-Slip Coral Fleece Door Mat
Original price was: $12.99.$9.99Current price is: $9.99.Select options This product has multiple variants. The options may be chosen on the product page -
Sale!
Semicircular Cartoon Welcome Entrance Door Mat
Original price was: $12.99.$9.99Current price is: $9.99.Select options This product has multiple variants. The options may be chosen on the product page -
Sale!
Anti-skid Water Absorption Bathroom Door Mat
Original price was: $12.99.$9.99Current price is: $9.99.Select options This product has multiple variants. The options may be chosen on the product page


After installing the latch and strike plate, open and close the door several times to check that the latch easily fits into the strike plate. The knob should also turn smoothly when locking and unlocking the door.
If the latch doesn’t slide deep enough into the strike plate hole, the door will not close properly. To resolve this problem, remove the striker plate and chip out more wood. This will deepen the recess enough to accommodate the latch or deadbolt.
A simple DIY chore you can complete in a matter of minutes
Want to install new door accessories for aesthetics or to replace broken ones? You first need to disassemble the existing lock system. Fortunately, you do not have to hire someone to do this simple task for you. With the right tools and the instructions we have given you above, you should be able to remove a door handle in just a few minutes.
Do you have any questions or comments on removing and replacing door handles? Please leave them below—we’d be happy to hear from you!