11 Steps to Build a Wall with a Door

Do you have a room that you want to partition? Installing a frame wall might sound like a complicated job but you only need moderate DIY skills, the right tools, and of course, the right set of instructions.
Besides having a complete home improvement project you can be proud of, you will also save a ton of money by doing it yourself. Below, we show you how to build a wall with a door like a pro.
Tools for wall framing
These are the tools and materials you will need to build a wall with a doorway.
- Tape measure
- Power drill
- Plumb bob
- Carpenter’s level
- Tri-square meter
- Reciprocating saw
- Handsaw
- Stud finder
Materials
- Screws and nails
- Sanding block
- Drywall compound
- 2×4 planks
- Drywall sheets
- Shims
Step-by-Step Guide on How to Build a Wall with a Door
Follow these simple steps to build an interior wall with a door.
Step 1. Determine the location of the new wall
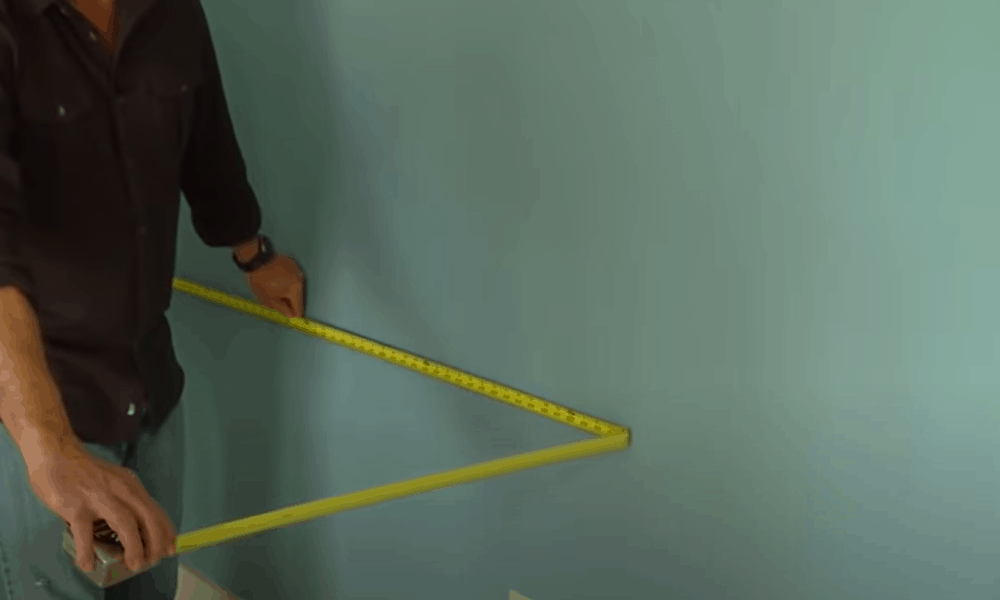
- When deciding the location of the new wall, use the adjacent wall as the reference point.
- Climb up a ladder and make a mark about 3 inches from the opposite wall where the new wall will go.
- Place a plumb bob on this mark and drop it to the floor. Have someone mark this point on the floor. Do this for the other end of the wall.
- Use chalk to draw a line between the two marks on the ceiling and the other two marks on the floor. Be sure to measure the chalk lines to cut the right size bottom and top plates later on.
Pro tip: Be sure to leave ½ inch on both ends of the new wall to account for drywall.
Step 2. Locate the studs in the intersecting wall
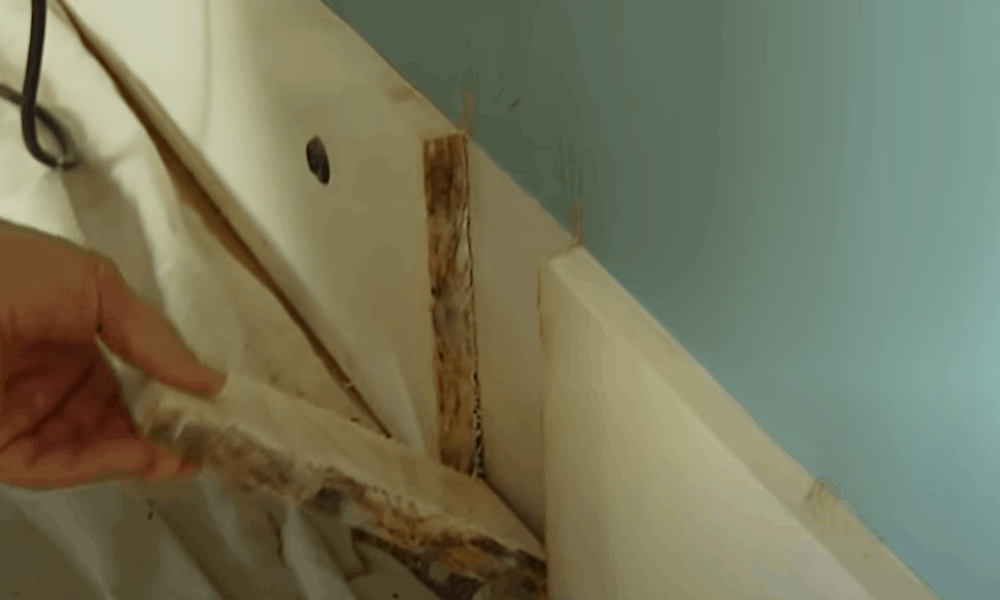
- Once you have figured out where you want the new wall to go, the next step involves preparing this new location for the upcoming installation.
- First, use a stud finder to locate the studs in the adjacent walls that the new wall will intersect with. Aligning the studs of the new wall with those of the existing wall is a great way to improve the strength and stability of the new wall.
- Next, using a reciprocating saw, cut out a notch measuring about 4 ½ inches on the crown molding and baseboard of the existing wall. This will provide the space needed to insert the new wall.
- Use the chalk line you had drawn on the floor as a guide when cutting out the molding. The notch should be 2 ¼ inches wide on either side of the chalk line and should have the same width as the bottom plate that you will insert in the notch.
Pro tip: If you have carpet flooring, you will have to remove it first before installing the new wall.
Step 3. Mark the location of the door
-
Sale!

Swing Stop Bottom Adjustable Roller Flooring Barn Door Hardware
Original price was: $44.99.$33.99Current price is: $33.99. -
Sale!

Low Noise Floor Guide Adjustable Length Barn Door Hardware
Original price was: $15.99.$11.99Current price is: $11.99.Select options This product has multiple variants. The options may be chosen on the product page -
Sale!

Antique Big Rollers Steel Sliding Barn Door Hardware
Original price was: $187.99.$140.99Current price is: $140.99.


- To ensure a good fit, measure the width of the actual door you intend to install.
- Add 3 inches to this measurement and transfer these measurements to the chalk line on the floor. The three additional inches allow you to accommodate the jack studs that frame the door.
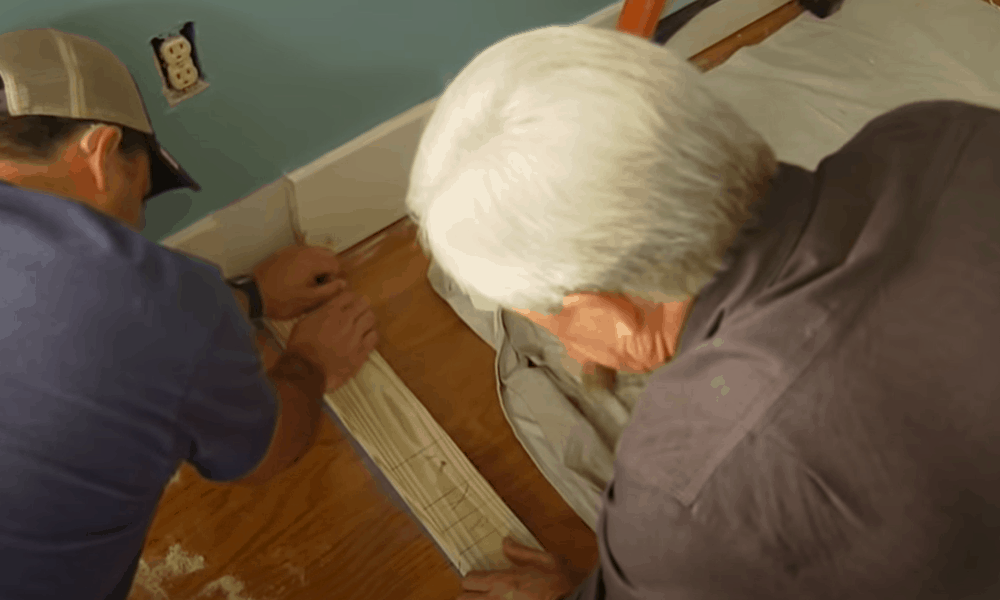
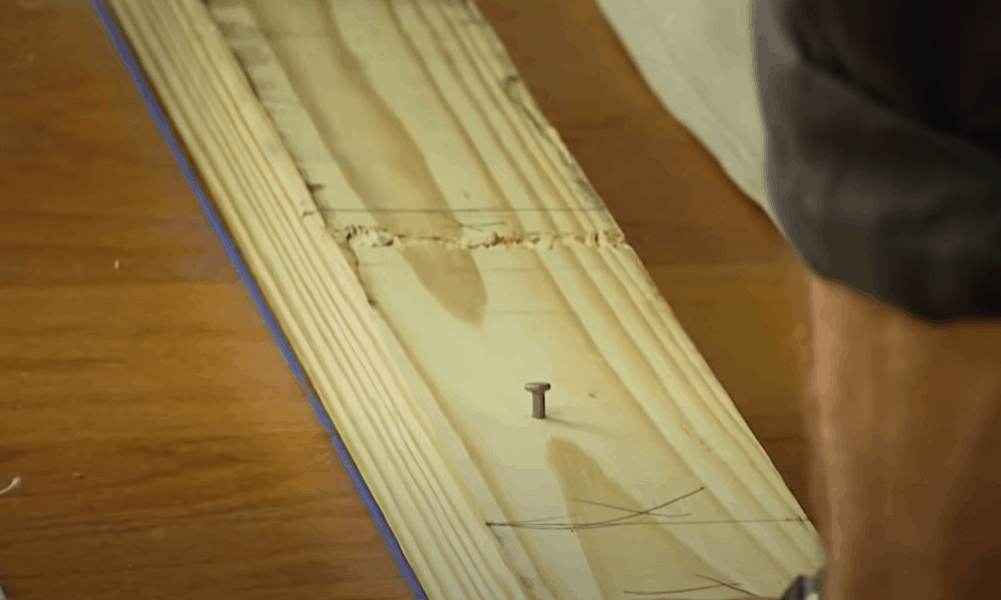
Step 4. Measure and cut the base and top plates, header, and jack stud
- To determine the length of the base and top plate needed to install the wall, simply measure the chalk line you had drawn on the floor. Cut two 2×4 planks to the length of the chalk line.
- Then, cut the jack studs. The jack studs make up the rough opening of the door. These studs should be 1 ½ inches shorter than the height between the top and bottom plate.
- Next, cut two header pieces. The headers usually sit on top of the king studs. The pieces should measure three inches longer than the width of the doorway.
Step 5. Mark the position of the vertical studs on the base and top plates
- The vertical studs, also known as king studs make up the core of the wall. You will attach these studs between the top and bottom plates to build the wall. But first, you have to mark the precise position where you will install the studs.
- Place the base and top plates you had cut earlier on the floor facing each other. Use a tape measure to mark the position of the king studs every 16 inches on both the top and base plates.
- Then, on either side of each of the 16-inch marks you have made, make ¾ inch marks. Place a tri-square on the face of the top plate at a 90-degree angle and draw vertical lines on the ¾ inch marks. The result will be small boxes where you will fit the vertical king studs. Draw an X inside each of these boxes. Repeat this process with the bottom plate.
Step 6. Mark the location of the door on the base and top plates
- After marking the positions of the king studs on the top and base plates, you now want to do the same for the doorway.
- Take the 2×4 header stud you had cut earlier and place it on top of the base plate. Draw a line on each end of the header onto the plate to mark the length of the header.
- Don’t forget to account for the king studs closest to the header. To do this, make another mark about 1 ½ inches outward from the first header mark and draw an X between these two marks to indicate where the king stud will go.
- To account for the jack stud, make another about 1 ½ inches inward on each side from the initial header marks you had made. Draw an O between the inward line and the initial header mark to indicate where the jack stud will go. Repeat this process with the top plate.
- To mark the location of the cripple studs, place the header on the top plate between the king studs closest to the doorway. Cripple studs are the small vertical studs that stand between the top plate and header.
Step 7. Measure and cut vertical king studs
- The length of the king studs is essentially just the height of the wall. To determine the appropriate length, measure from the ceiling down to the floor. Then, subtract 3 inches from the ceiling to floor measurement you get, to account for the thickness of the bottom plate and to get the right size studs.
- Next, find out how many king studs you will need to cut to build the wall. Count the number of Xs you had marked in the small boxes on the top or bottom plates. Then, use a reciprocating saw to cut the studs to length.
- You can also cut the cripple studs at this time. To determine the appropriate length of the cripples, subtract the length of the jack stud from the length of king stud then subtract that measurement from the thickness of the header.
Pro tip: When measuring for the length of the king studs, take measurements on both ends of the wall and on two or three locations in the middle. Use the smallest measurement as the length of the king studs.
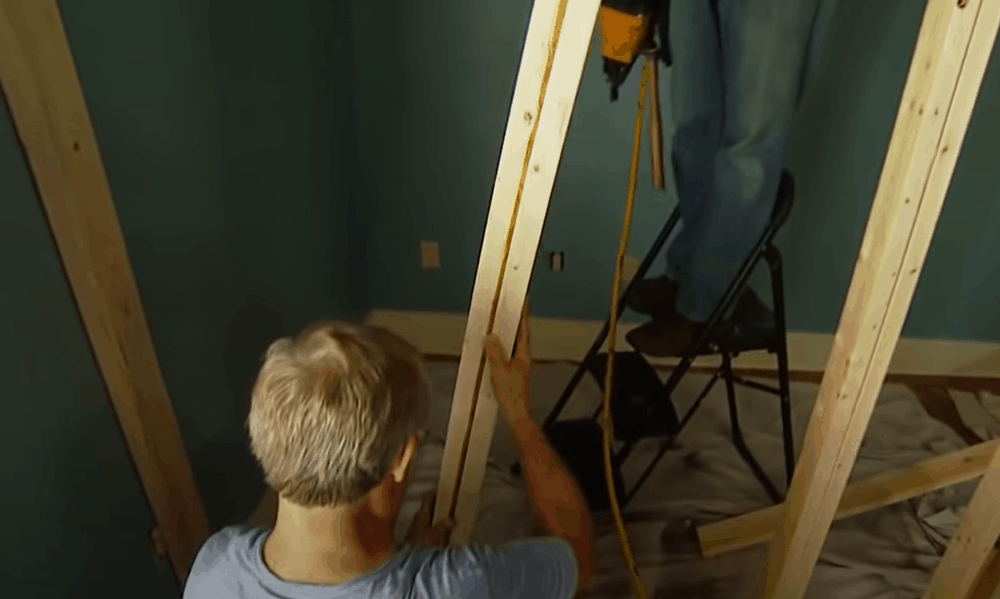
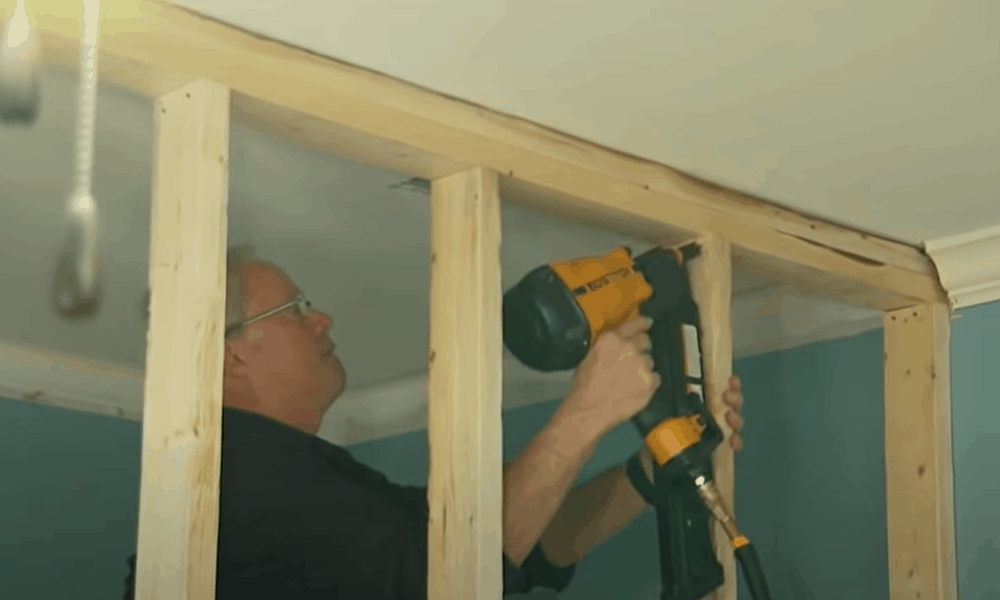
Step 8. Assemble the wall frame
- Next, it is time to put all the pieces together for the new wall. First, place the top and base plate parallel to each other on the floor in a way that will allow you to fit the vertical studs in between them.
- Start by assembling the parts of the doorway, these include the two king studs, followed by the two jack studs, and then finally, install the header.
- Position the individual vertical studs on the X marks you had made earlier. Start by attaching the studs to the bottom plate, ensuring that the pieces are aligned at a right angle.
- Drive nails, one on each side, through the face of the bottom plate into the 2×4 king studs. Repeat this to attach all the vertical studs to the base plate then move on to the top plate.
- With all the vertical studs attached to the top and bottom plates, the header mounted onto the king studs, and the jack studs attached to the king studs, install the cripples between the header and top plate.
Step 9. Position and secure the wall frame
-
Sale!
Free Punch Glass Door Sliding Door Knobs Suction Cup
Original price was: $12.99.$9.99Current price is: $9.99.Select options This product has multiple variants. The options may be chosen on the product page -
Sale!
Window Cabinet Drawer Handles Self-adhesive Door Knobs
Original price was: $12.99.$9.99Current price is: $9.99.Select options This product has multiple variants. The options may be chosen on the product page -
Sale!
Upscale Sliding Door Knob With Double-sided Tape for Kitchen Door Wardrobe
Original price was: $12.99.$9.99Current price is: $9.99.Select options This product has multiple variants. The options may be chosen on the product page


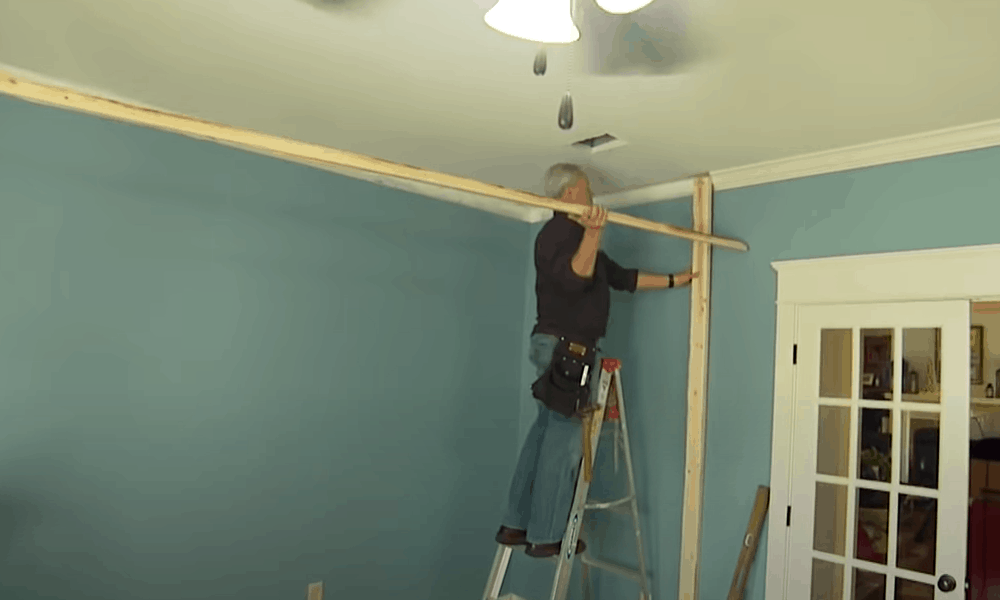
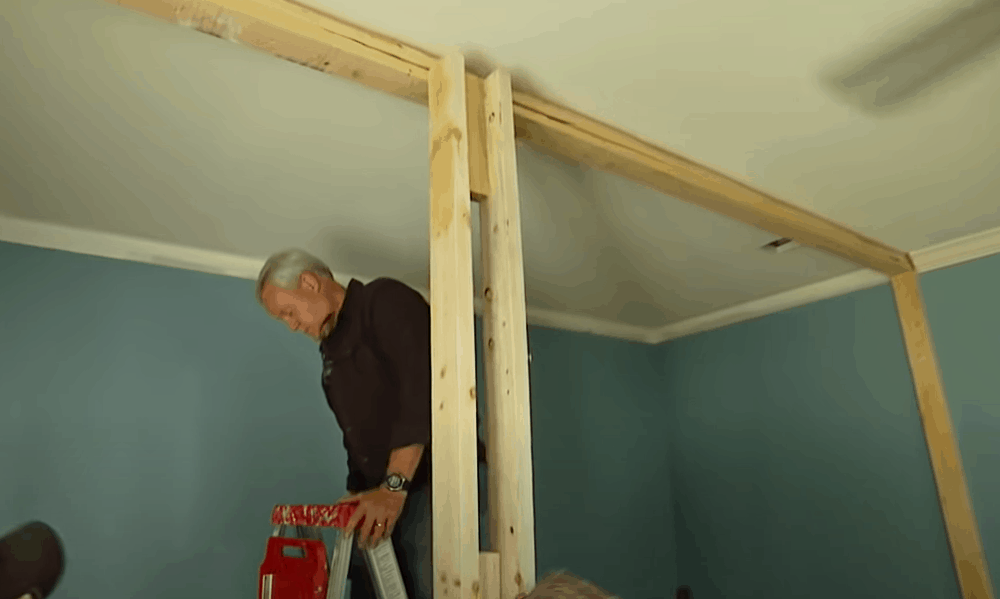
- You now have a complete wall frame. Have someone help you lift and position the frame so that the bottom plate stands right on top of the chalk line you had drawn earlier.
- Check that the vertical studs are plumb and the frame is perfectly positioned. Tap the edges of the wall frame to push it into position until it is completely plumb.
- With the wall frame in position, secure the bottom plate by driving nails into the floor about 12 inches apart.
- Secure the studs at each end of the new wall to a stud in the intersecting wall.
- Next, cut out a piece of the bottom plate at the doorway. Be careful not to cut down to the floor. Take out this piece to create a true entryway ready for the prehung door.
Pro tip: Insert shims in between the bottom plate and floor if you find gaps between the top plate and ceiling.
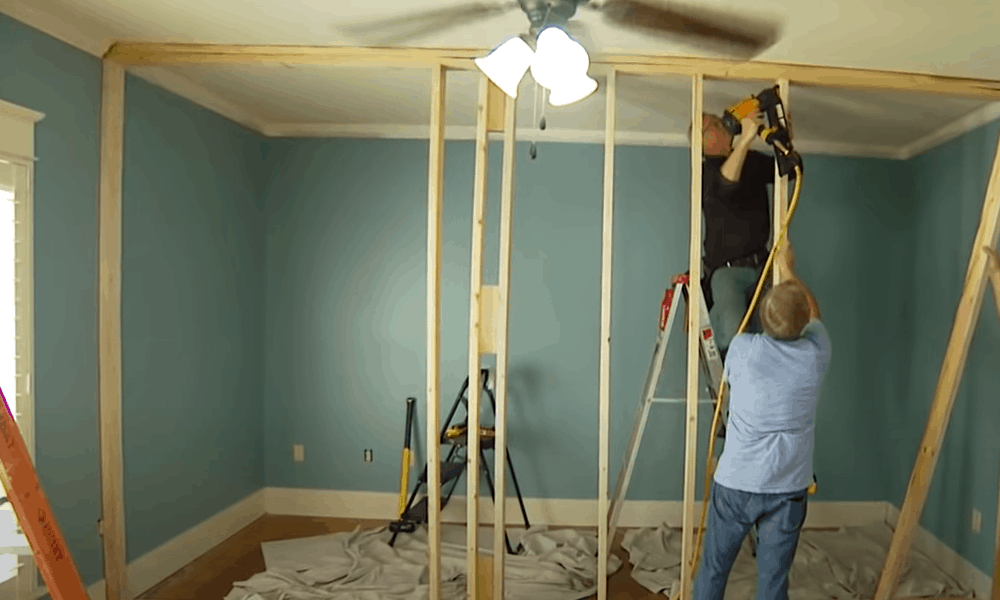
Step 10. Install drywall
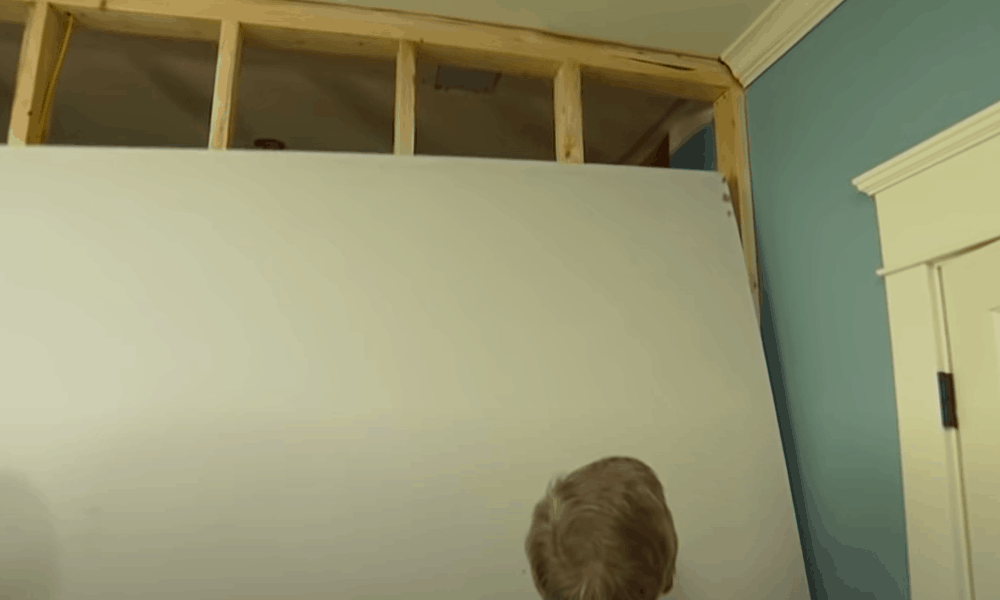
- With your wall frame all set, the next step is to attach drywall to the frame to build a solid wall. To secure the sheets of drywall to the frame, drive nails into the studs as well as the top and bottom plates.
- Use joint compound to seal the space between the drywall sheets. Allow to dry then sand down for a seamless look.
Step 11. Install the prehung door
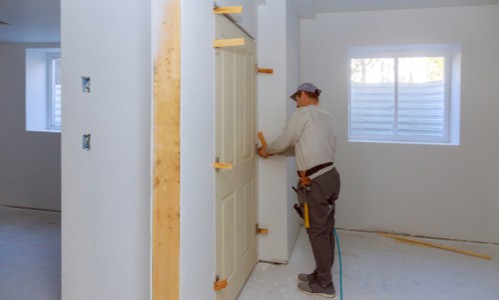
- Position the door in the opening. Before driving nails to attach it to the wall frame, check that the door is level and plumb. Insert shims between the doorframe and jack studs as necessary until the door is completely square.
- To secure the door, drive nails into the doorframe through the shims to the jack studs on both sides of the door. Secure the door header to the wall frame header as well.
Congratulations on building a wall with a door! Now you can paint the wall your preferred color and enjoy your newly portioned room.
Extended Tips for framing a wall with a door
Here are additional tips to help make this project a success:
- Secure studs with zigzag blocks
If you have installed the wall correctly, it should be pretty strong. However, consider installing small blocks of wood between the vertical studs in a zigzag pattern. Although this would be extra work, it can go a long way in making the wall even stronger.
- Use the right nails for your floor type
To secure the bottom plate to the floor, use the right type of nails. For concrete floors, drill the bottom plate first then drill the floor. Using a power tool, punch 3-inch nails through the pre-drilled holes. If you are installing the door on wooden floors, the usual framing nails should be good enough.
-
Sale!
Home Entrance Anti-Slip Coral Fleece Door Mat
Original price was: $12.99.$9.99Current price is: $9.99.Select options This product has multiple variants. The options may be chosen on the product page -
Sale!
Semicircular Cartoon Welcome Entrance Door Mat
Original price was: $12.99.$9.99Current price is: $9.99.Select options This product has multiple variants. The options may be chosen on the product page -
Sale!
Anti-skid Water Absorption Bathroom Door Mat
Original price was: $12.99.$9.99Current price is: $9.99.Select options This product has multiple variants. The options may be chosen on the product page


A moderately challenging job with massive rewards
Partitioning a room can be a great way to maximize or reconfigure the space you have in your home. The most efficient way to go about this is to install a non-load-bearing wall, a task you can complete in a day or less.
Do you have any questions or comments about building a wall portioning with an entryway? Please leave them below—we‘d love to hear from you!