How to Paint a Metal Door? (Step-By-Step Tutorial)
Metal doors are tough and solid, providing you with an extra level of security and ensuring you and your family are safe inside your home. However, with metal doors, you also need to take proper care of them – otherwise, they are prone to damage from exposure to the elements.
The most important part of looking after your metal door is ensuring it has a layer of paint that can help protect it. You will need to redo it every few years, but it’s not a particularly challenging job. And if you need a guide, here’s how to paint a metal door.
If you want a preview of some of the stuff we’re going to be talking about – as well as a few extra hints and tips – you can check out this video before reading on.
What you’ll need for painting a metal door
Here’s a list of the tools and equipment you’ll need.
- Hammer
- Nail
- Sawhorses
- Degreasing cleaner
- Rag
- Towel
- Screwdriver
- Painter’s tape
- Old newspaper
- Fine grit sandpaper or sanding block
- Patching compound or auto body filler
- Primer
- Paint
- Paint roller
- Small paintbrush
Step-by-step guide on how to paint a metal door
Here are the steps you need to follow to paint your metal door.
Step 1. Remove the door
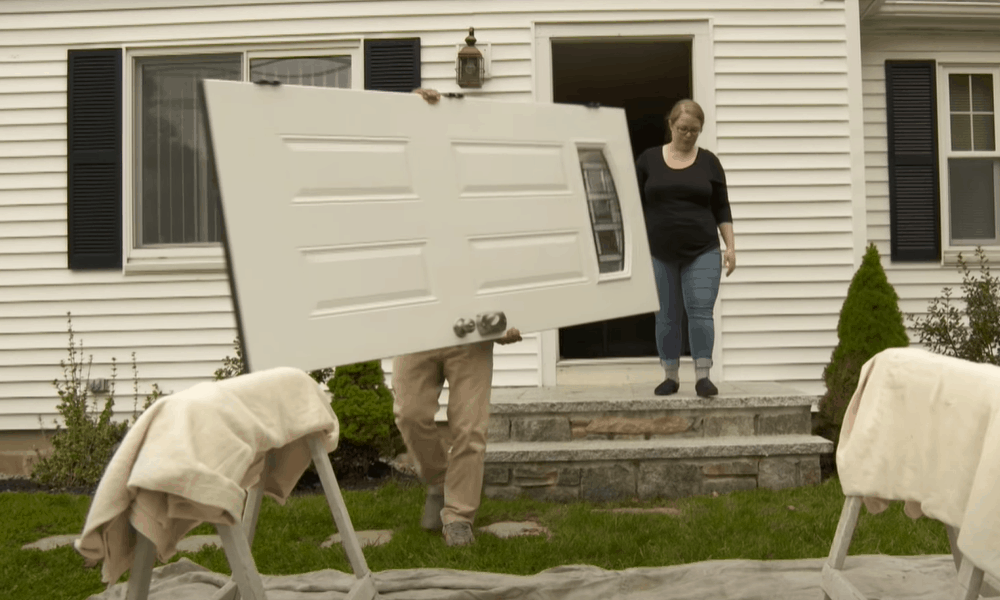
If possible, it is better to remove a door from its hinges for repainting. This will make the whole process much easier, you won’t have trouble with any sections being hard to reach and it will be simpler to avoid getting paint on parts you don’t want to work on.
To do this, you need to start by removing the hinge pins. The simplest way to do this is to use a nail and a hammer. You need to open the door wide to give you good access to the hinges, place a nail on the bottom of the hinge pin and hit it with the hammer.
This will cause the pin to pop up out of the top of the hinge, and you can then pull it out the rest of the way with your fingers. Finally, take the door off its hinges and place it on the sawhorses.
Pro tip: If it isn’t practical or convenient to remove your door before painting it, it is possible to do the job with the door still in place.
If you choose to do this, be aware that painting a door can take several days due to the several coats required and the drying time between each application. For this reason, make sure you check the weather forecast to choose a time when you will have a few days without rain.
Step 2. Clean the door
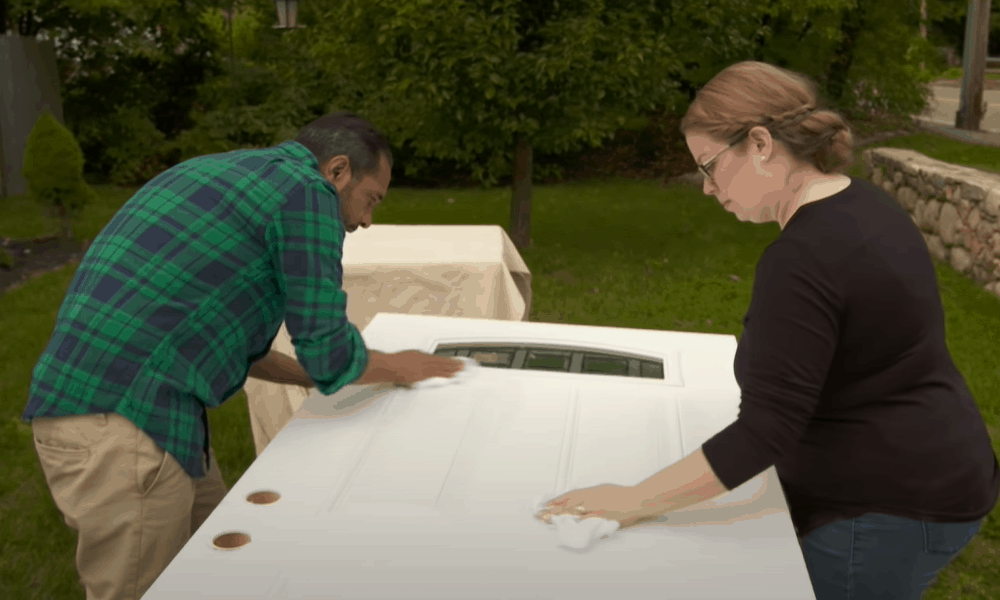
The next step is to start preparing the door for the paint. First, you need to clean the door. If you paint onto a dirty door, the paint will not adhere to the door properly and will not last as long. This will mean you need to repaint much sooner.
-
Sale!

Swing Stop Bottom Adjustable Roller Flooring Barn Door Hardware
Original price was: $44.99.$33.99Current price is: $33.99. -
Sale!

Low Noise Floor Guide Adjustable Length Barn Door Hardware
Original price was: $15.99.$11.99Current price is: $11.99.Select options This product has multiple variants. The options may be chosen on the product page -
Sale!

Antique Big Rollers Steel Sliding Barn Door Hardware
Original price was: $187.99.$140.99Current price is: $140.99.


To clean it, use some degreasing cleaner and a rag. Clean the whole surface of the door that is going to be painted and make sure you remove all dirt, dust, grime and anything else that is stuck to the door.
When the job is finished, wipe the door down with a towel and leave it to dry. Don’t move on to the next step until it is completely free of moisture.
Pro tip: Since all cleaning products are different, make sure you read the instructions on the bottle before using it. Also, consider using safety equipment like gloves and goggles – some cleaning products can be quite potent.
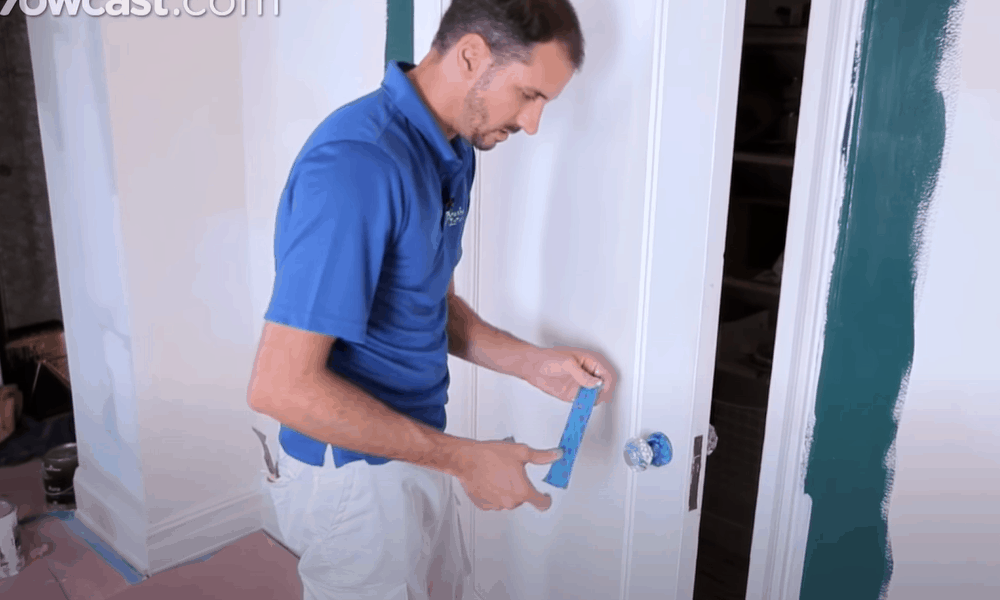
Step 3. Remove any fittings from the door
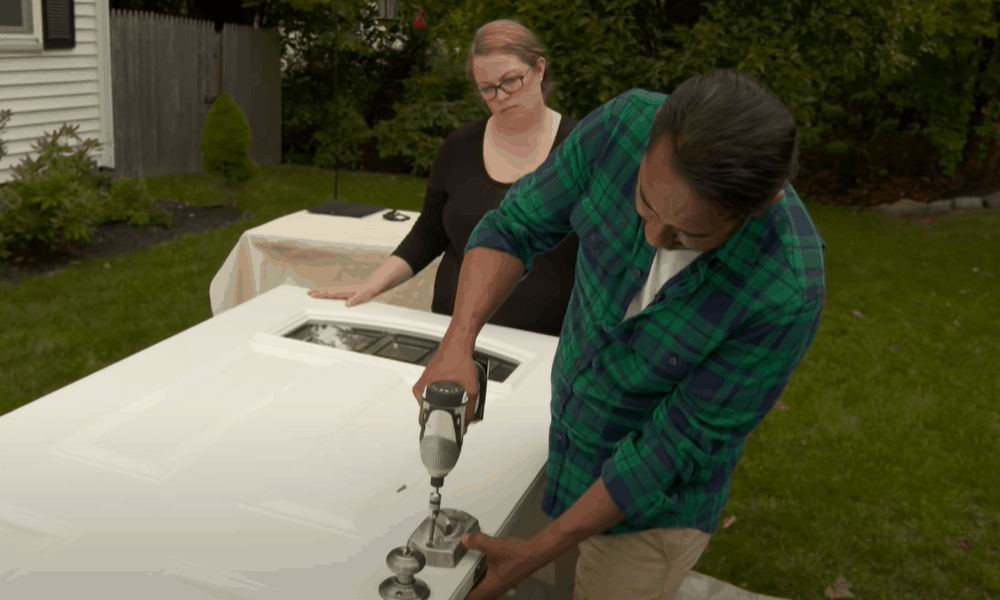
Take your screwdriver and remove any fittings like the handle or doorknob, the knocker or anything else.
Step 4. Cover any areas you don’t want to paint
If there are any sections of the door you don’t want to paint, cover them over using painter’s tape and old newspaper. You can also do this to cover any fittings you were unable to remove.
Step 5. Sand the door
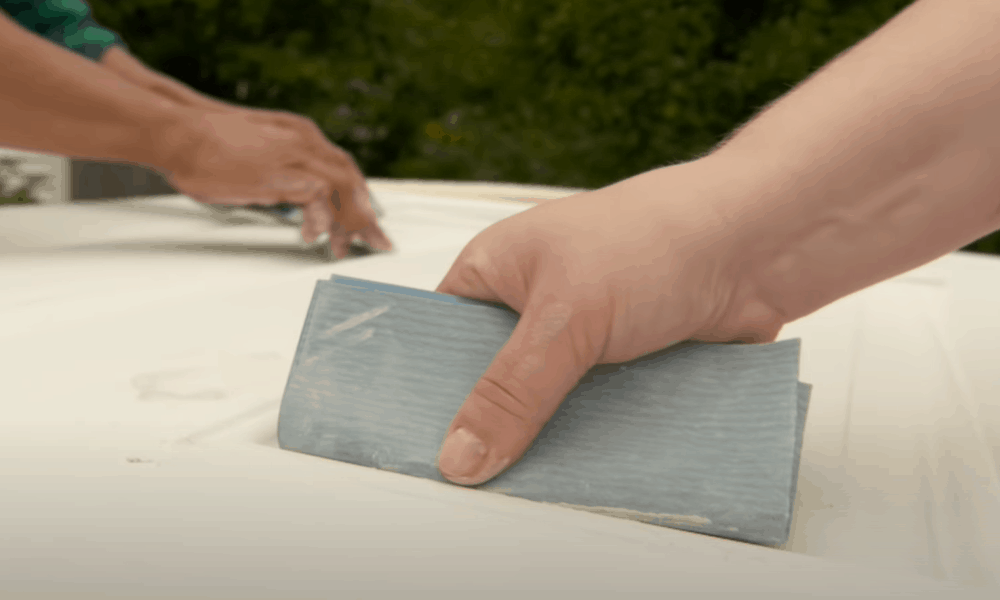
When the door is dry, you should then give the whole surface a light sanding. This will help the new paint adhere more effectively and will also remove any old paint that is still stuck to it.
When you have finished, make sure the door is completely clear of all dust – you may even prefer to wipe it down with a damp towel, in which case, you will need to leave it to dry again before continuing.
Pro tip: Again, consider wearing safety equipment like gloves, goggles and a face mask. When you sand the door, the dust may blow up in your eyes or you may inhale it.
Pro tip: If there are any dents in the door, you can also take this opportunity to fix them. Sand the dent and then fill it with patching compound or auto body filler. Leave it to dry and then sand lightly over the top until the filler is less noticeable.
Step 6. Apply primer
If you want the paint job to last, you should apply primer before putting on the main coat of paint. Use the roller and apply an even coat of primer over the whole surface of the door. When you have finished, leave the primer to dry before adding a second coat.
All primers are different, so you should read the instructions carefully to see how long it will need to dry. It should take from around an hour up to three hours to dry. You can test it by touching it gently with your finger.
-
Sale!
Window Cabinet Drawer Handles Self-adhesive Door Knobs
Original price was: $12.99.$9.99Current price is: $9.99.Select options This product has multiple variants. The options may be chosen on the product page -
Sale!
Upscale Sliding Door Knob With Double-sided Tape for Kitchen Door Wardrobe
Original price was: $12.99.$9.99Current price is: $9.99.Select options This product has multiple variants. The options may be chosen on the product page -
Sale!
Round Stainless Steel Door Knobs for Drawer Cabinet Kitchen Cupboard
Original price was: $12.99.$9.99Current price is: $9.99.Select options This product has multiple variants. The options may be chosen on the product page


When the first coat is dry, repeat the same process to apply the second coat.
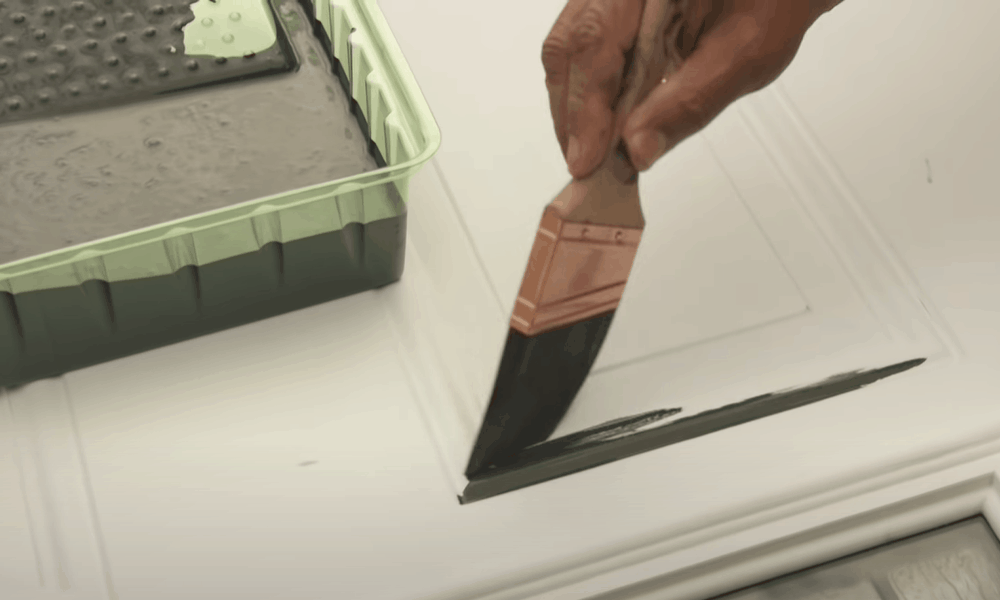
Pro tip: If your door has recessed panels or other parts that are difficult to reach with the roller, you should apply the primer to these sections first using a small brush. When this is finished, apply the primer to the rest of the door with the roller.
Step 7. Paint the door
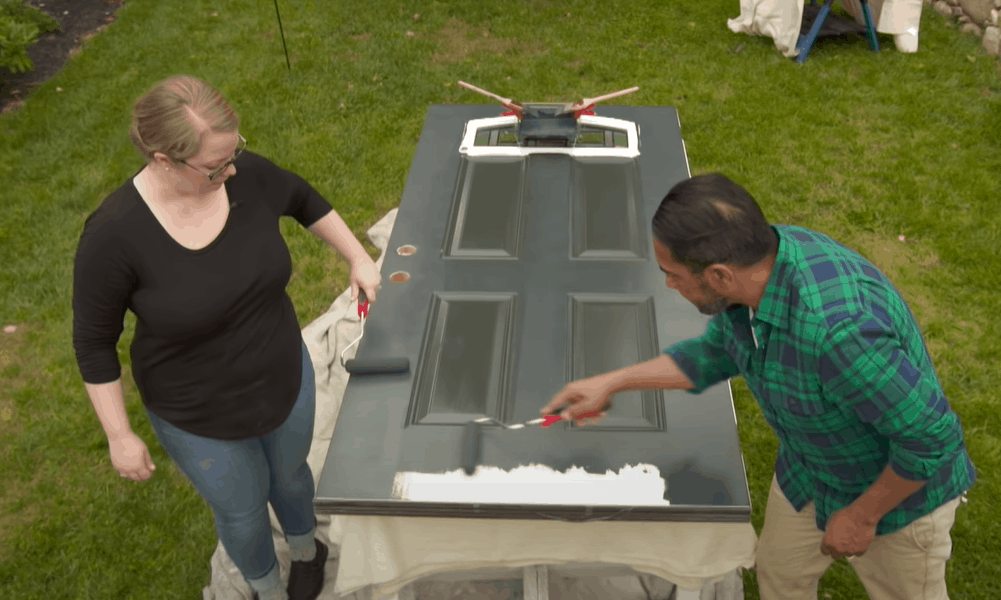
When the second coat of primer is dry, you can move on to painting the door with the main coat. You have two choices, you can either use a roller to paint the door or a spray can.
If you are using a roller, you should start by using a brush to paint any spots that will be difficult to reach with the roller. When these are done, you can then do the main part of the work with the roller.
Leave the paint to dry completely before applying the second coat.
Pro tip: Make sure you choose a type of paint that is suitable for an exterior door. The best choices are satin or semi-gloss – these are options that will stand up to the elements the best and last longest.
Step 8. Leave the door to dry completely
You need to make sure the door is completely dry before putting it back up. Otherwise, even slightly wet paint can easily be marked with fingerprints or anything else if you touch it. Consider leaving it for up to 12 hours before refitting the door.
Pro tip: If you are planning to paint both sides, give it a good 12 hours to dry before turning it over and working on the other side. Again, if you place a wet door on the sawhorses, it will easily pick up marks and blemishes.
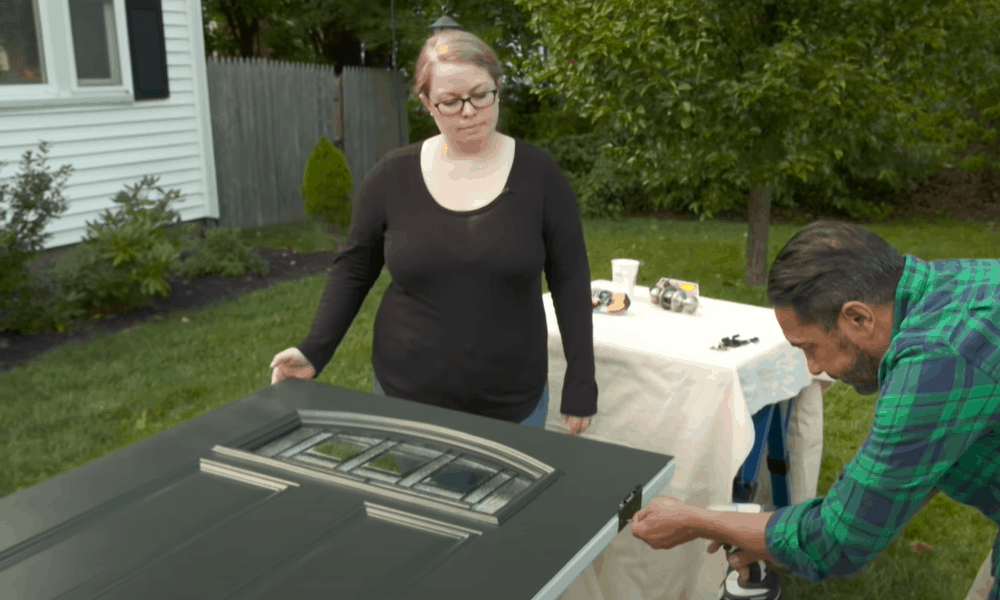
Step 9. Put the door back in place
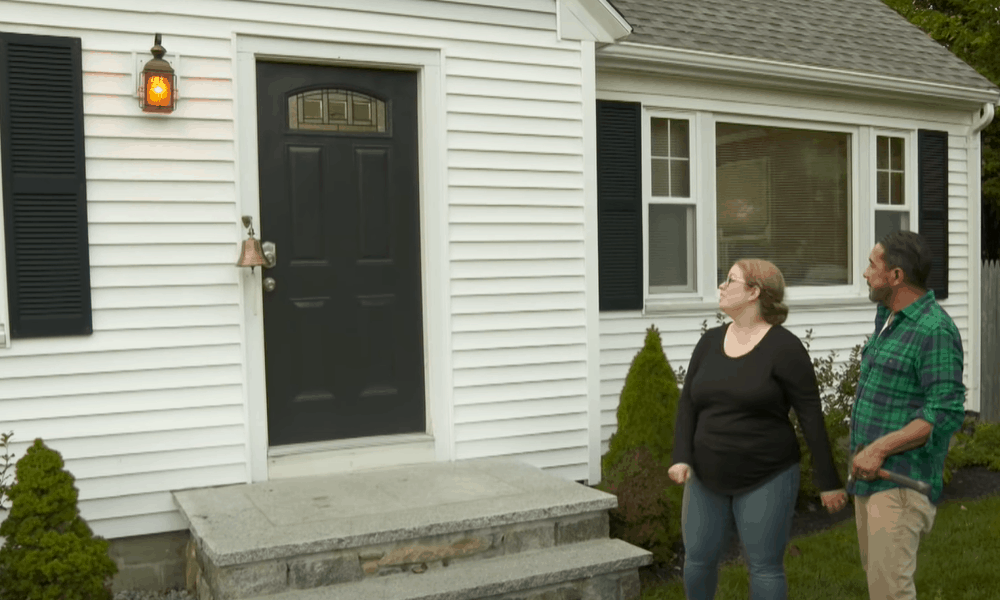
When the door is painted on both sides as required and you have left it to dry, you can now start to remove the painter’s tape and newspaper. When this is done, reattach any fittings like the doorknob or the knocker.
Next, all you need to do is hang it back up on the hinges, slip the hinge pins back into place, hammering them back in if necessary – and you have successfully repainted your metal door.
Extra pro tips
Here are a few extra pro tips that will help you complete this project successfully.
- Use cloth to protect the door on the sawhorses
If you use sawhorses, don’t place the door directly on them as this can damage the surface. Instead, place a cloth on the sawhorse to protect the door.
-
Sale!
Semicircular Cartoon Welcome Entrance Door Mat
Original price was: $12.99.$9.99Current price is: $9.99.Select options This product has multiple variants. The options may be chosen on the product page -
Sale!
Anti-skid Water Absorption Bathroom Door Mat
Original price was: $12.99.$9.99Current price is: $9.99.Select options This product has multiple variants. The options may be chosen on the product page -
Sale!
Classic Friends Welcome Rubber Carpet Door Mat
Original price was: $12.99.$9.99Current price is: $9.99.Select options This product has multiple variants. The options may be chosen on the product page


- Set aside a couple of days for the project
If you want to paint your door, you need to realize that, with the different coats that need to be applied plus the time it takes for them to dry, this is a job that may take more than one day.
Since it might not be practical to leave a door off its hinges for two or three days, you need to think about the logistics of this before you start.
- Consider special paint for doors facing the sun
If you have a metal door that faces the sun, it may become very hot during the summer months. In this case, you should take this into account when choosing the paint and consider opting for white appliance paint to minimize this effect.
A Simple job – with the right planning and preparation
As you can see, painting a metal door is not difficult. You just need to make sure you prepare the required materials in advance and then take your time to make sure you do it right. And by following our step-by-step guide, we’re sure you will complete the project successfully!