How to Clean a Window Fan? (Step-By-Step Tutorial)
Is your window fan starting to look nasty due to accumulated dirt and debris? Regular and proper cleaning of fans can extend their longevity and efficiency. As a regular user of box fans, I recommend giving them a quick weekly dust-off and a deep cleanse every other month. Read on—I will show you two easy ways to clean a window fan.
How to clean a window fan: Weekly routine
To keep your fan working seamlessly and efficiently, consider giving it a quick clean down once every week.
For this weekly routine, you will not need to take the fan apart. You will also only require basic, everyday tools to get your cooler looking spick and span.
Things you will need
- Vacuum hose with a brush attachment
- Can of compressed air
- Microfiber cloth
With all the necessary tools gathered, let’s get straight into cleaning the fan.
Step 1. Unplug the fan from the power source
Wait for the blades to come to a complete standstill. Place the fan on a flat surface such as a tabletop.
Never clean a fan while it is plugged to the power source or even immediately after unplugging it. Doing so can increase the risk of damage to the fan or cause an electric accident.
Step 2. Attach a dusting brush to one end of the vacuum hose
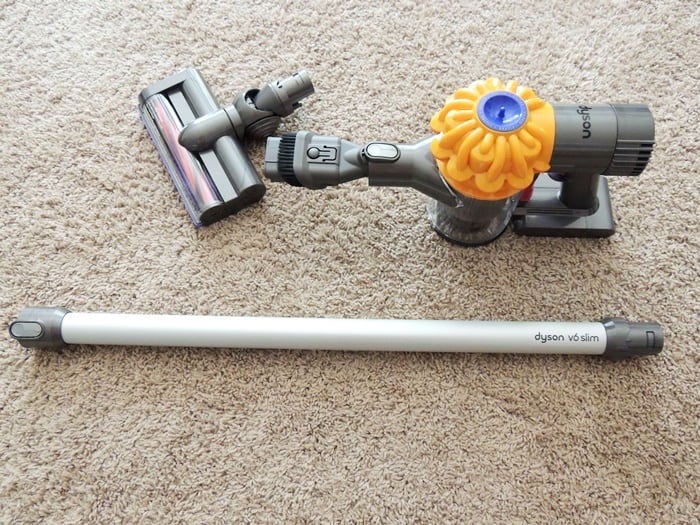
Both a canister and an upright vacuum can get the job done. But, a handheld vacuum is easier to maneuver as you clean the fan’s grills and blades.
The type of brush you use is also important. Opt for the round-shaped brush attachment with long, soft bristles. Not only is it great at whisking dust off surfaces; it also comes in handy for cleaning nooks and crannies.
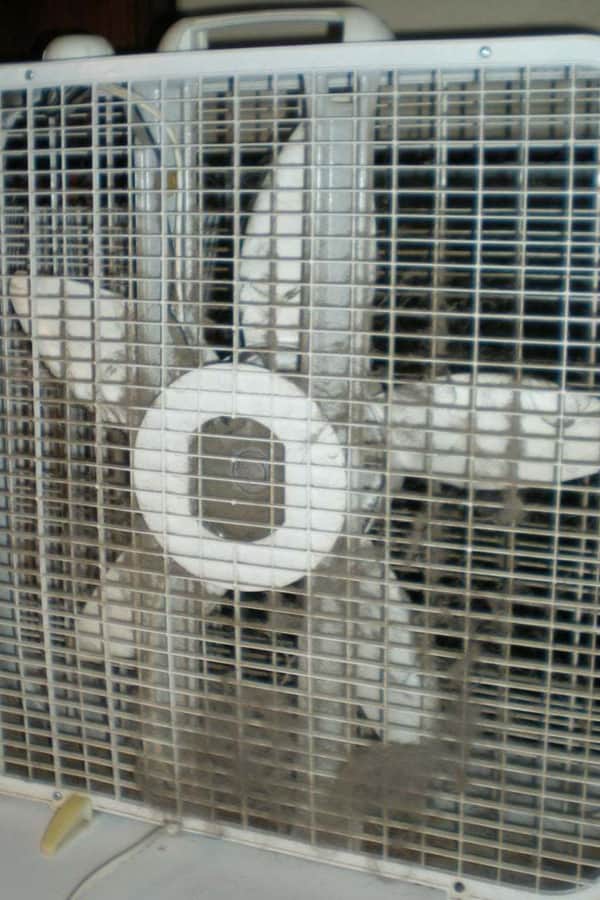
Step 3. Clean the grill
-
Sale!

Fire Retardant Sunscreen Window Blinds
Original price was: $45.99.$34.99Current price is: $34.99.Select options This product has multiple variants. The options may be chosen on the product page -
Sale!
Light Filtering Zebra Window Blinds
Original price was: $37.99.$28.99Current price is: $28.99.Select options This product has multiple variants. The options may be chosen on the product page -
Sale!
Portable Blackout Stick On Window Blinds
Original price was: $21.99.$15.99Current price is: $15.99.
After a week of use, specks of dust and debris would have settled on the surface of the grill. Gently, glide the vacuum hose with the brush attached across the grill to pick up any lingering dust. Do this severally, spending more time on the grill slots where dust tends to hide.
Step 4. Clean the fan blades

Hold the can of compressed air in an upright position and poke the straw through the grill slots. You can purchase compressed air cans from an office supply shop or hardware.
With the straw directed towards the blades, spray compressed air to blast away dust particles and lint off the blades. Repeat this severally until the blades look clean through the grill slots.
Step 5. Give it a final wipe down
Using a dry microfiber rag, wipe the appliance starting from the top, working your way through the grill and down to the base. Flip the fan so that the backside faces up. Clean the back thoroughly from one side to the other.
Step 6. Put Back
Put the fan back in its original position, plug it in, and switch it on at your convenience.
That’s it! The whole process should take you less than half an hour so you can go back to enjoying the fan’s cool and comforting breeze.
Tips for deep cleaning a window fan
Over time, a lot of grease, dust, and debris can accumulate in the interior parts of the fan. I use my fan regularly so I make sure to give it a nice deep clean once a month. If you live in cooler, less dusty areas, you might only need to clean it every six months or so.
To clean the insides of the fan, you will need to take it apart. Don’t worry—we’ll show you how.
-
Sale!
Line Heart Decor Tassel Window Curtains
Original price was: $12.99.$9.99Current price is: $9.99.Select options This product has multiple variants. The options may be chosen on the product page -
Sale!
European Simple Partition Screen Window Curtains
Original price was: $15.99.$11.99Current price is: $11.99.Select options This product has multiple variants. The options may be chosen on the product page -
Sale!
Blackout Simple Solid Thicker Window Curtains
Original price was: $48.99.$36.99Current price is: $36.99.Select options This product has multiple variants. The options may be chosen on the product page


Things you will need
- Screwdriver
- Brush or sponge plus mild soap
- Dry microfiber rag
- Vacuum cleaner
Step 1. Unplug the fan from the power source
Before cleaning, ensure that the blades are at a standstill. Place the fan on a flat and stable tabletop.
Step 2. Unscrew the grill from the rest of the appliance
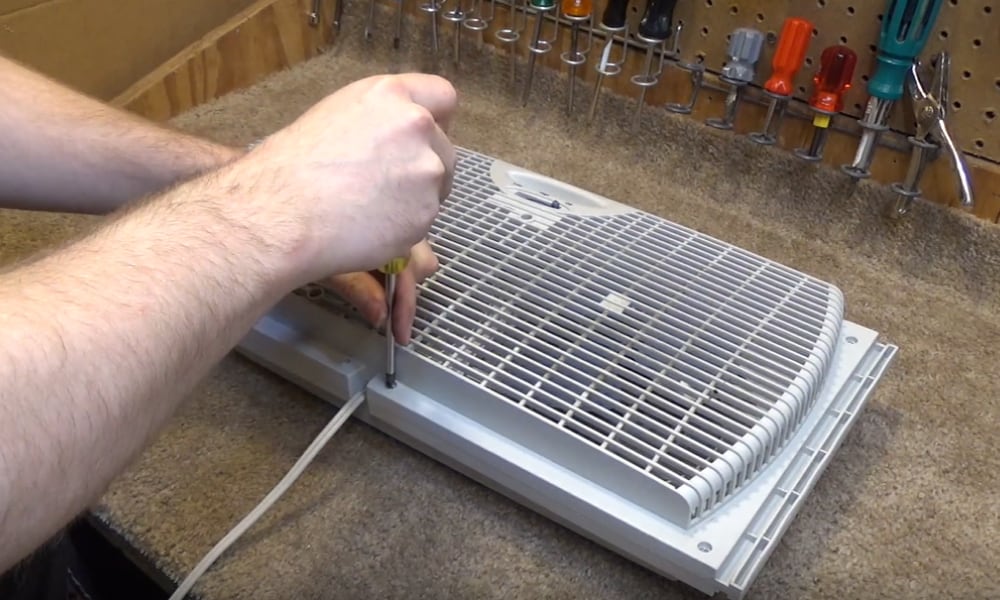
Some fans have a back grill too—unscrew that one as well. Be sure to check the manufacturer’s instructions on how to best unscrew the grill.
Step 3. Take out the detachable blades
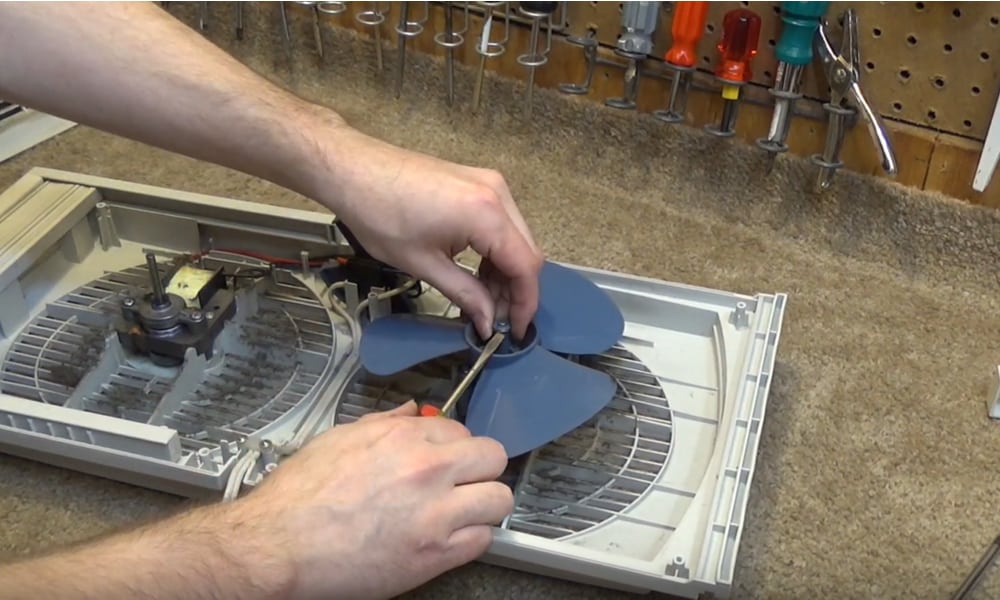
Generally, this requires you to remove the screw at the top center of each blade. Be careful not to break the fins. Set all the screws away in a safe place for easy access later.
Step 4. Soak the grill and blades in a sink of warm soapy water to loosen the dirt and debris
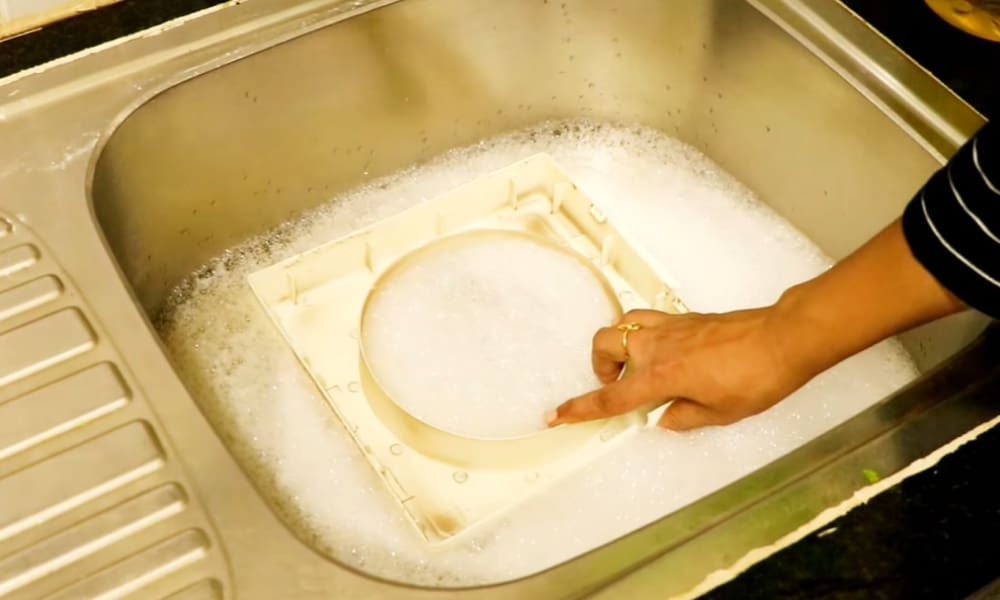
As these parts soak, use a handheld vacuum or other type of vacuum to blast out the dust, lint, and other dirt in the interior parts of the fan.
Consider using a crevice tool to clean hard-to-reach nooks inside the appliance. For a thorough job, use a damp microfiber cloth to wipe out any lingering dust. Be careful not to touch the motor or to spill drops of water on it.
Step 5. Scrub the blades and grill using a sponge or soft-bristled glass
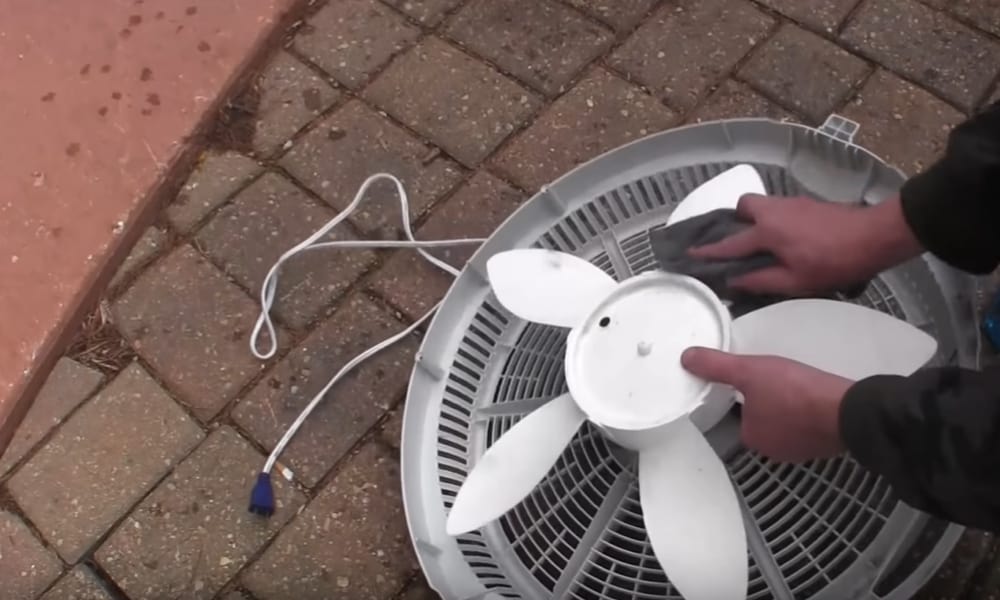
Put them out to air dry or, if you are pressed for time, use a dry microfiber rag to dry the fan components.
-
Sale!
Self-adhesive Mesh Window Film Privacy for Home Office Decorat
Original price was: $5.99.$4.99Current price is: $4.99.Select options This product has multiple variants. The options may be chosen on the product page -
Sale!
Removable Electrostatic Retro Flower Window Film Privacy For Home
Original price was: $9.99.$7.99Current price is: $7.99.Select options This product has multiple variants. The options may be chosen on the product page -
Sale!
Pure Matte UV Blocking Window Film Privacy for Home
Original price was: $37.99.$28.99Current price is: $28.99.


Step 6. Screw Back
Screw the blade and the grills securely into place and use the fan as usual.
Conclusion
Want to clean a window fan? Depending on use and the amount of dirt on it, you could either dust it off lightly or take it apart for a thorough cleanse. With a few basic tools such as a vacuum, air compressor, and microfiber rag, you should be able to get the job done in a jiffy.
Have you tried other ways to clean your window cooler? Share your thoughts with us and if you have any questions, don’t hesitate to ask in the comment section below.