How to Refinish Front Door? (Step-By-Step Tutorial)
Most homeowners aren’t excited by the idea of refinishing their front door. They think that the job is too messy and takes too much time. This assumption convinces them to hire a painter the moment their entry door starts looking a little worse for wear.
However, as anyone who has ever repainted their entry door may tell you, the refurbishing job isn’t as difficult as it is made to be. Have doubts about this claim? Think that we’re bluffing? Then check out this guide on how to refinish front door.
Before you refinish your front door
You must carefully inspect the signs of wear and tear you are trying to reverse. A door that might have suffered warping due to extremes of temperature cannot be saved by sanding – the first method discussed below. You might have to stain it for the signs of damage to disappear.
At the same time, you can’t ignore your door’s material of construction. While a solid wooden door might be damaged beyond repair with a few coats of paint, a metal door will become unrecognizable if you subject it to sandpaper treatment. You must know which method of refinishing is best for your door.
Refinishing Wood Front Door
You can use any of the following methods to refinish your front door:
Method One: Refinishing Wooden Door by Sanding
Here’s how you can sand your front door:
What you’ll need?
- Doorstop
- 16-penny nail
- Hammer
- 2 sawhorses
- Towel or padding
- Screwdriver
- 80-grit, 100-grit, and 120-grit sandpapers
- Random-orbital sander
- Teardrop- or trapezoid-shaped blade
- Sanding sponge and clean brush
- Dry vacuum cleaner
Step-by-Step Guide
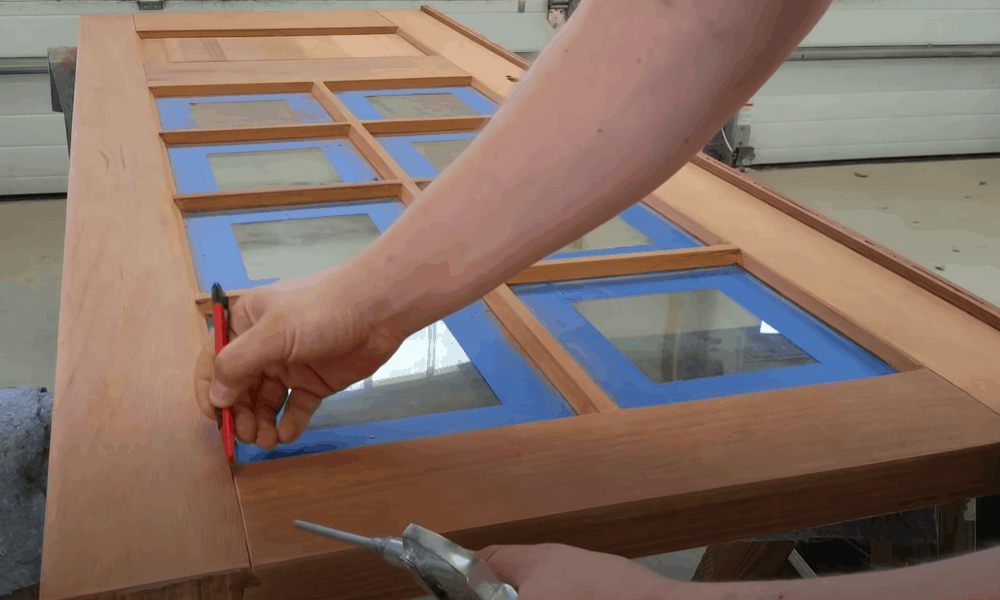
Step 1: Remove and disassemble the door
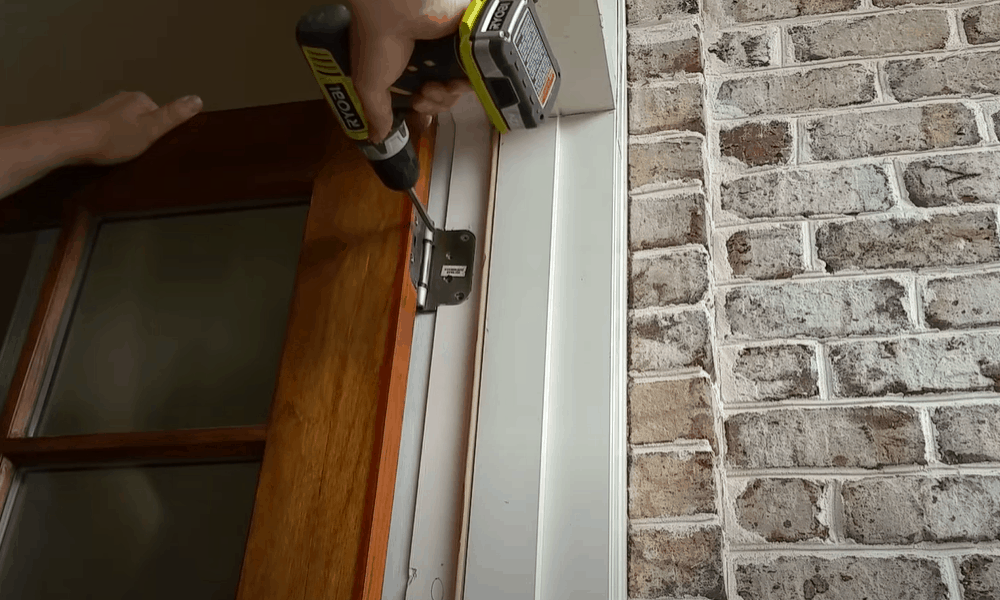
Open your entry door and place a door-stopper underneath it. Place a 16-penny nail on the bottom opening of the door’s hinge and start hammering it. This will loosen the pin attaching the hinge to the door. Do the same with all the other hinges.
Once you have removed the pins of all hinges, carry your door to your workstation. Set up 2 sawhorses and cover them with a towel or padding. The covering will protect your door from getting scratches. Then, place the door on the sawhorses with its knob facing the roof.
Afterward, unscrew all the hardware (front doorknob, handle, kick plate, upper lock) from the door. Either place the hardware aside at a safe place or store it in a shopping bag.
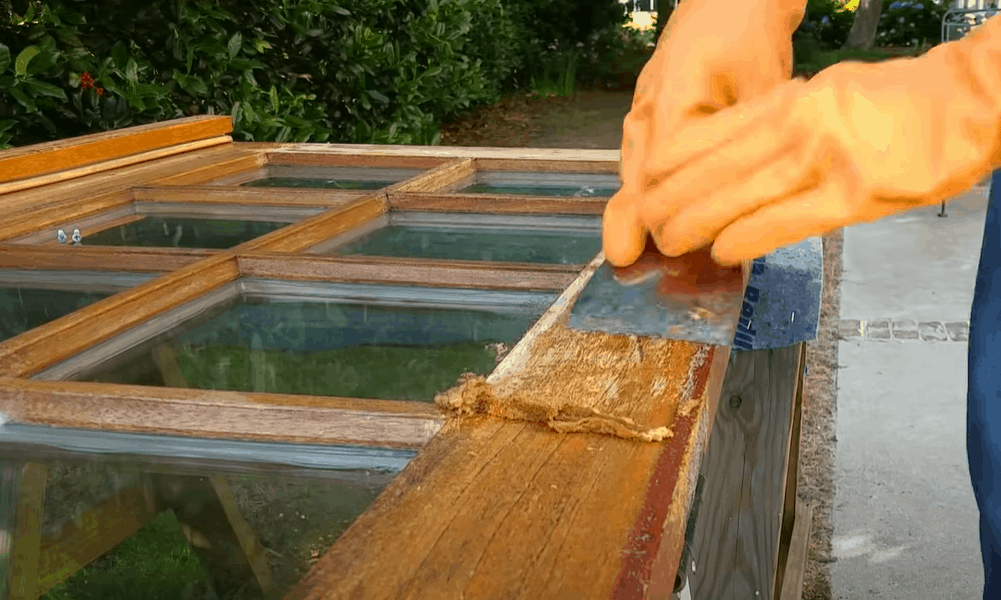
Step 2: Sand away the old wood finish
-
Sale!

Fire Retardant Sunscreen Window Blinds
Original price was: $45.99.$34.99Current price is: $34.99.Select options This product has multiple variants. The options may be chosen on the product page -
Sale!
Light Filtering Zebra Window Blinds
Original price was: $37.99.$28.99Current price is: $28.99.Select options This product has multiple variants. The options may be chosen on the product page -
Sale!
Portable Blackout Stick On Window Blinds
Original price was: $21.99.$15.99Current price is: $15.99.

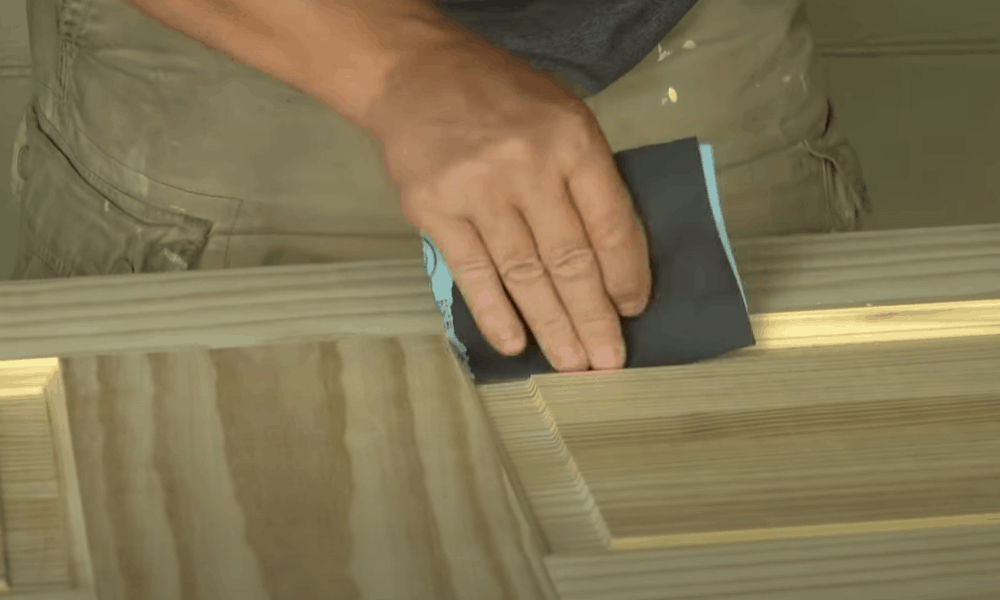
Attach a sheet of 80-grit sandpaper to a random-orbit sander. Turn the sander on and move it over the flat panels of the front of the door in gentle, back-and-forth motions. Peel away wood until the decomposed wood at the top fully gives way to clear wood that lies hidden underneath it.
After the decomposed wood has peeled off, take the sander away and replace the 80-grit sandpaper with 100-grit paper. Now your focus should be on ‘smoothing’ the wood finish. Don’t sand over creases or drips – as your emphasis should be on the door’s smooth portions.
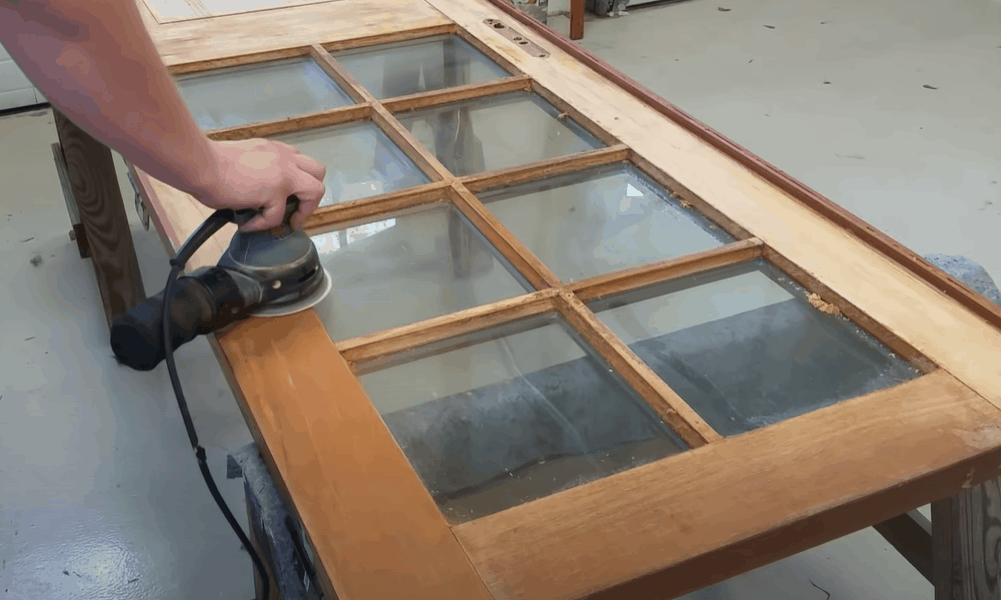
Step 3: Polish the sanded wood
Replace the 100-grit paper with 120-grit paper in the sander. Turn the unit on and sand off the same area that you have smoothened in the previous step. This should make it extra-smooth.
Step 4: Sand-off hard-to-reach areas
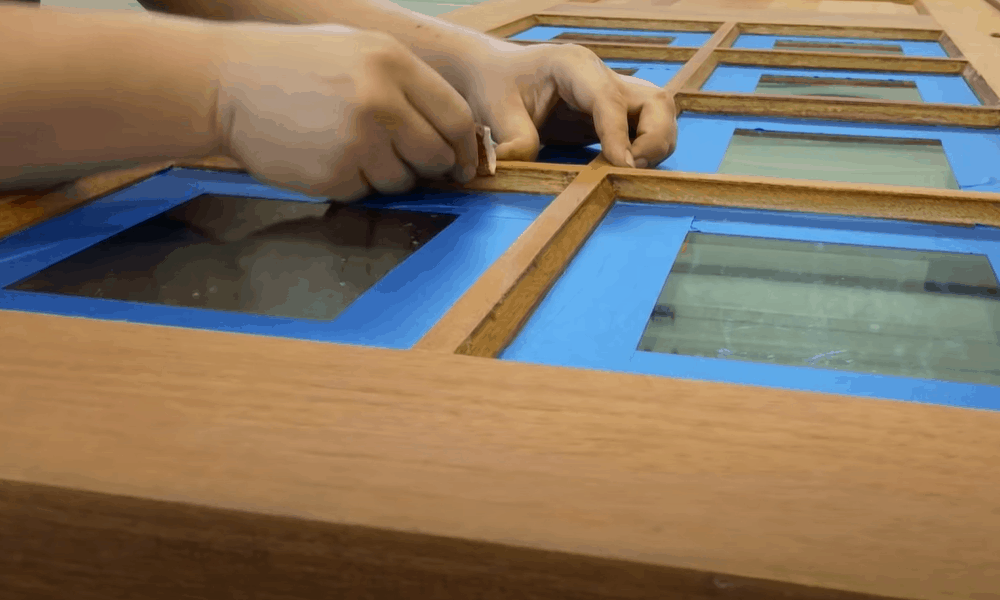
The corners of the door, as well as those areas where the wood is curved for decoration, cannot be sanded off with a machine. You need to smoothen them by hand. Take a trapezoid- or teardrop-shaped blade, apply it against the hard-to-reach areas, and start scraping forward.
You might find it useful to know that both these scrapers work for different portions of the wood. While a teardrop-shaped scraper works best for narrower portions of the wood, a trapezoid-shaped scraper works well with flatter portions that are relatively easier to access.
Step 5: Sand the wooden profiles with a sanding sponge
Take a previously unused 100-grit sandpaper, fold it into thirds, and sand the area you have scraped in the previous step. It may not be possible for you to hand-sand some hard-to-reach areas. If that’s indeed the case, you may use a sanding surface to brush off their surface.
Step 6: Remove leftover sawdust from the door’s surface
-
Sale!
Line Heart Decor Tassel Window Curtains
Original price was: $12.99.$9.99Current price is: $9.99.Select options This product has multiple variants. The options may be chosen on the product page -
Sale!
European Simple Partition Screen Window Curtains
Original price was: $15.99.$11.99Current price is: $11.99.Select options This product has multiple variants. The options may be chosen on the product page -
Sale!
Blackout Simple Solid Thicker Window Curtains
Original price was: $48.99.$36.99Current price is: $36.99.Select options This product has multiple variants. The options may be chosen on the product page


You can remove the obvious sawdust by wiping the door clean with a dry cloth. To get a more thorough cleaning, use a vacuum cleaner. Attach a vacuum tube attachment to the end of the cleaner as otherwise, it might not pick up dirt from the crevices of the door.
Final Step: Reattach the door

Carry your door back from your workstation to the front entryway. Position it against its frame and start inserting the hinge pins one by one. Once you have reattached all the hinge pins, reassemble the hardware just as you removed it.
Method Two: Refinishing Wooden Door by Staining
Here’s how you can stain your front door:
What you’ll need?
- Linseed oil
- Can of stain color
- Painter’s tray
- Natural-bristle brush
- Soft-hair paintbrush
Step-by-Step Guide
Step 1: Apply linseed oil to the door’s surface
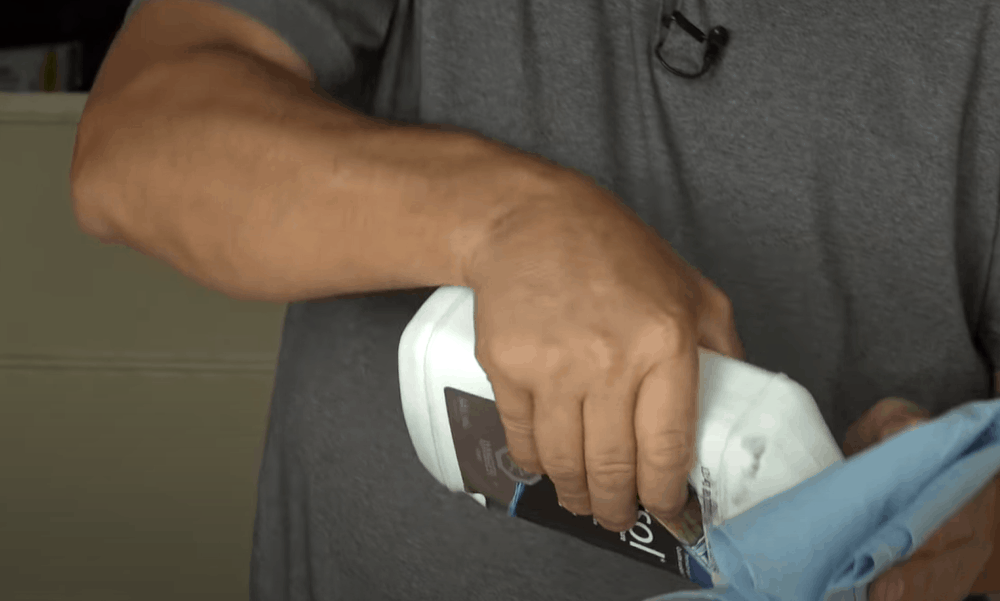
Linseed oil is a natural wood preservative that preserves and protects the wood’s surface. Pour a small amount of it into the painter’s tray, lubricate a natural-bristle brush with it and apply the oil over the curved portions (stiles, horizontal rails, moldings etc.) of the door. Then apply it over the flat portions.
Step 2: Apply stain over linseed oil base
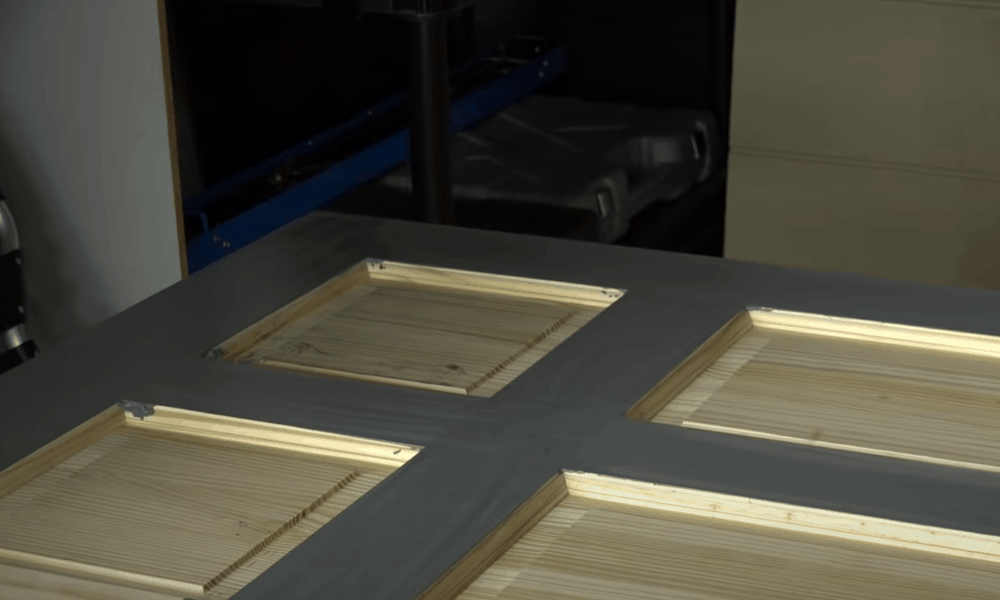
After making sure that the wooden door is dry to the touch, apply stain over both the inner- and outer-facing sides of the door. You can start by applying the stain on the curved portions, with the straight portions of the door coming afterward.
Final Step: Apply 2nd coat of stain
-
Sale!
Self-adhesive Mesh Window Film Privacy for Home Office Decorat
Original price was: $5.99.$4.99Current price is: $4.99.Select options This product has multiple variants. The options may be chosen on the product page -
Sale!
Removable Electrostatic Retro Flower Window Film Privacy For Home
Original price was: $9.99.$7.99Current price is: $7.99.Select options This product has multiple variants. The options may be chosen on the product page -
Sale!
Pure Matte UV Blocking Window Film Privacy for Home
Original price was: $37.99.$28.99Current price is: $28.99.

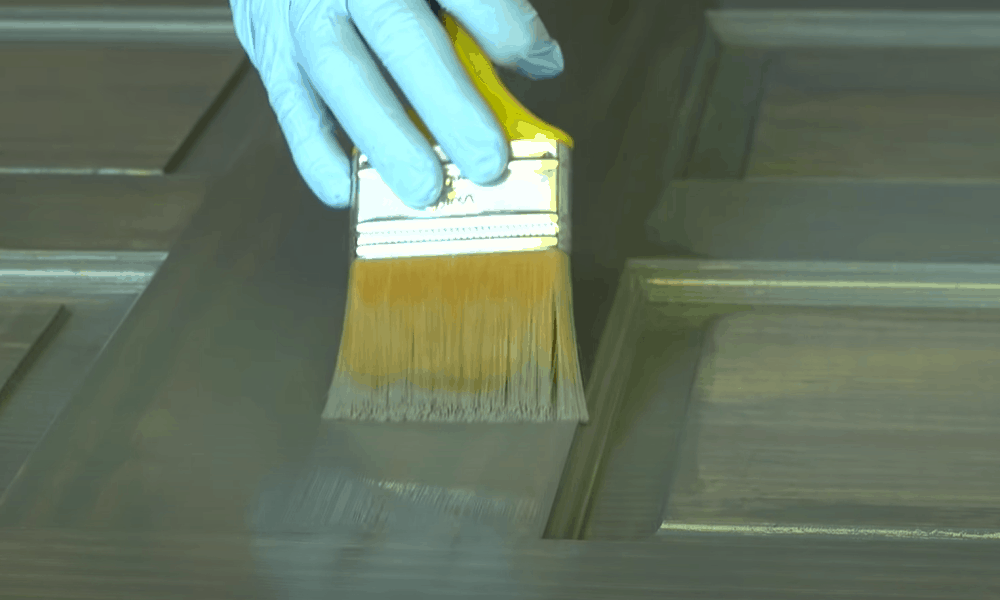
Give the first coat at least one day to dry and follow it up with another coat of stain. Follow up the first two coats with a clear finish on the 3rd day.
Conclusion
It goes without saying that your entry door should make a good first impression on the person visiting your home.
It won’t be able to do that if it’s looking a little worse for wear, in which case you’d have little choice but to subject it to a new coat of finish.
The refinishing process might take up to three days but the results it will deliver will be more than worth the wait.