How to Install Door Sweep? (Step-By-Step Tutorial)
Apart from increasing the energy efficiency of your home, door sweeps ensure pest control without the use of chemicals and eliminate sounds, light, and odors. They are also incredibly durable and can withstand extreme temperatures, moisture and humidity with ease.
The utility of door sweeps isn’t limited to even floors, rugs and carpets. They are flexible enough to adjust to uneven floors as well. You can also count on them to make your air conditioning equipment more efficient as they’d reduce their workload by plugging air leaks.
With these benefits in mind, let’s look at how to install door sweep:
Before you install a door sweep
Here’s what you need to do:
Select the right type
You’d ideally want to select the type that will withstand the weather, temperature changes, wear and tear, and friction associated with its location. Here are the door sweeps that are mostly used by homeowners:
- Standard
Standard door sweeps are the ones where the weatherstripping is attached to an aluminum carrier. They are able to seal gaps ranging between ½ and ¾ inches and tend to be heavy-duty
Installing this sweeps is a cinch. You only have to screw in the holes after using the instructions given below. You can order standard door sweeps between 36’’ and 42’’ sizes.
- Automatic
Does your door sweep against rugs? Is your entire home including the area beneath the door carpeted? Then you might decide to ignore standard sweeps in favor of the automatic ones.
Wondering why that should be the case? Because these sweeps have the ability to automatically rise when you open the door and seal once it is closed. This allows them to come handy on carpets and rugs.
- Self-stick
Self-stick sweeps are the go-to choice for renters because they don’t require you to make permanent changes. Their flexible plastic strip attaches/detaches from the door with minimal fuss.
However, if their ease of installation has impressed you, the poor seal that these sweeps provide might force you to consider other options, as they can’t stand in the way of drafts and extreme weather conditions
-
Sale!

Swing Stop Bottom Adjustable Roller Flooring Barn Door Hardware
Original price was: $44.99.$33.99Current price is: $33.99. -
Sale!

Low Noise Floor Guide Adjustable Length Barn Door Hardware
Original price was: $15.99.$11.99Current price is: $11.99.Select options This product has multiple variants. The options may be chosen on the product page -
Sale!

Antique Big Rollers Steel Sliding Barn Door Hardware
Original price was: $187.99.$140.99Current price is: $140.99.


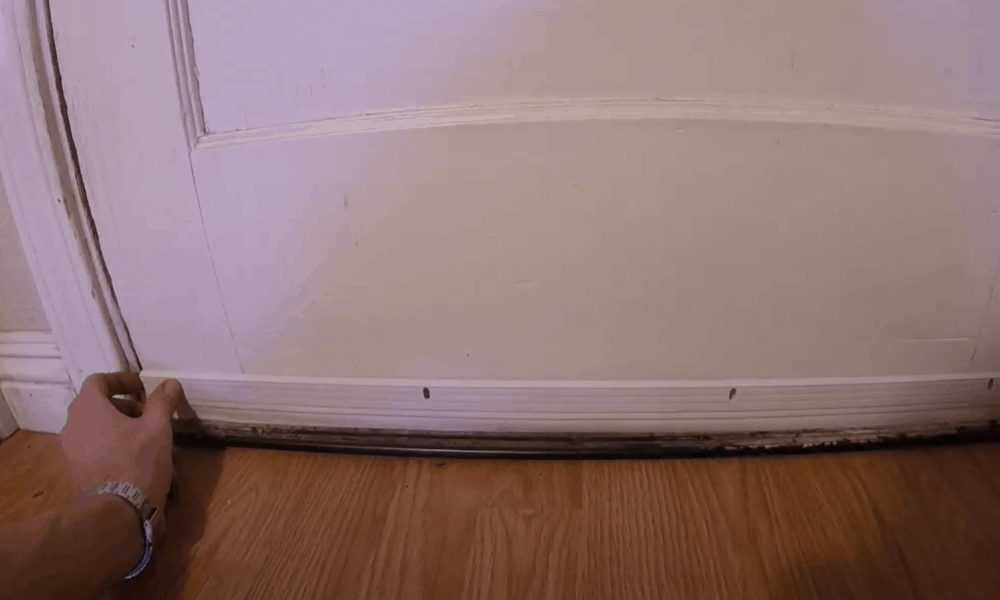
Remove the existing door sweep (if any)
Here’s how you can remove your old door sweep:
Step 1: Remove the sweep

Provided your door already has a sweep, you’d need to take it off before installing a new piece. If the existing sweep is adhesive, simply peel it off using your dominant hand.
If it’s screwed into the door, loosen the screws using a drill and then remove the sweep.
Step 2: Remove the sticky residue

If you feel that the removed sweep has left a sticky residue behind, remove it using an adhesive remover. Then dry the entire area with a clean cloth.
Step 3: Wash the door

Wash the entire door with a mixture of soap and water. This will remove any residue or debris that stayed in place after you removed the sticky residue.
After rinsing the door, dry its frame with a clean cloth. Give the door at least an hour to dry completely.
Installing a metal door sweep
Before following the below-mentioned steps to install a sweep, make sure you go through the video. It shows you how to put into practice everything that we have listed here, thereby making it easy for you to understand this guide.
-
Sale!
Free Punch Glass Door Sliding Door Knobs Suction Cup
Original price was: $12.99.$9.99Current price is: $9.99.Select options This product has multiple variants. The options may be chosen on the product page -
Sale!
Window Cabinet Drawer Handles Self-adhesive Door Knobs
Original price was: $12.99.$9.99Current price is: $9.99.Select options This product has multiple variants. The options may be chosen on the product page -
Sale!
Upscale Sliding Door Knob With Double-sided Tape for Kitchen Door Wardrobe
Original price was: $12.99.$9.99Current price is: $9.99.Select options This product has multiple variants. The options may be chosen on the product page


What you’ll need?
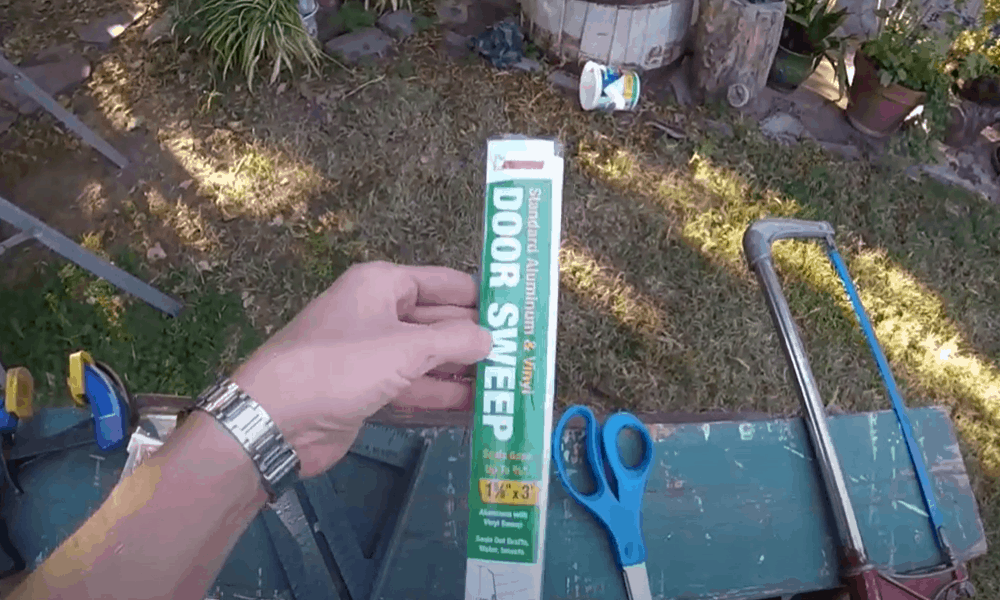
- Metal door sweep
- Measuring tape
- Pencil
- Hacksaw
- Safety glasses
- Screws (3x)
- Drill
- Screwdriver
Step-by-Step Guide
Step 1: Measure the door
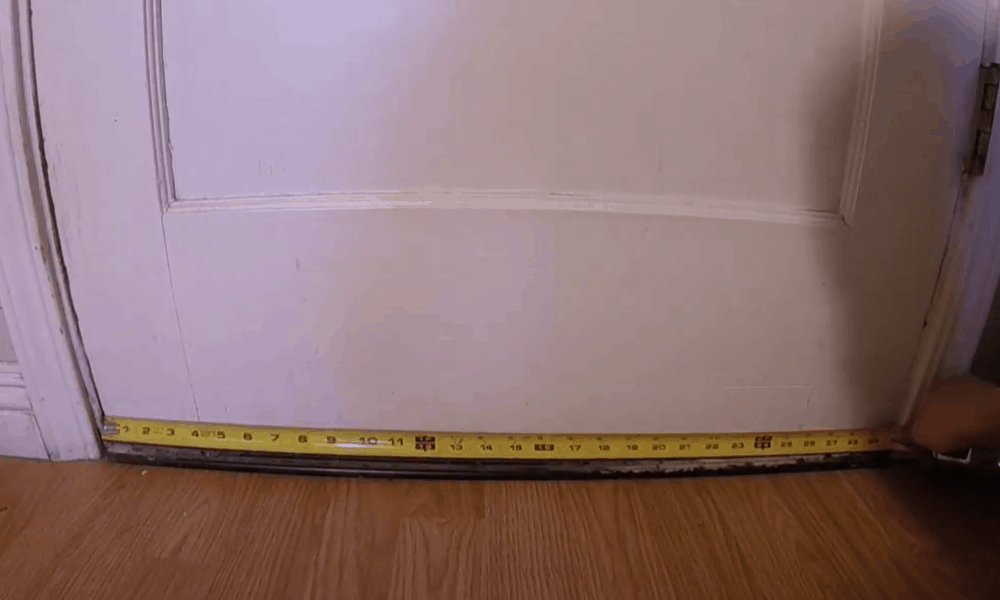
Use a measuring tape to measure the bottom of the door. You should only measure the room facing side of the door. Note down the measurement as they will indicate how long you should cut the sweep.
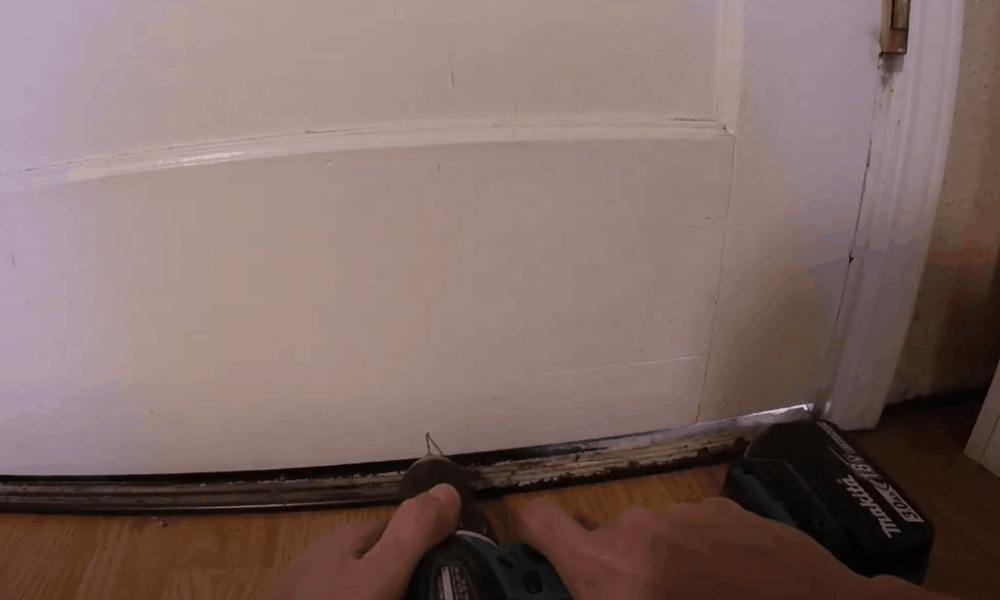
Step 2: Cut the metal sweep
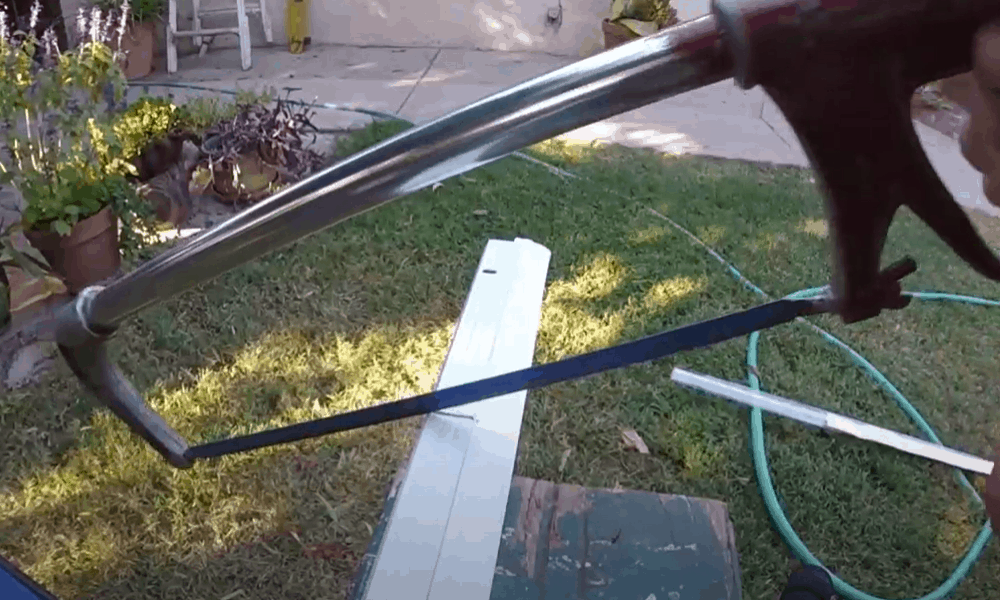
Mark the length of the door’s bottom on the metal sweep with a pencil. Then, place the metal sweep on the work table and extend it. Keep on extending the sweep until you reach a length that is a few inches more than the one you’ve marked.
At that point, use a hacksaw to cut the metal sweep according to the measurement. You might have to repeat the pushing strokes of the hacksaw several times to cut the sweep.
Step 3: Place the sweep against the bottom of the door
The flexible portion of the sweep should only be grazing the floor. This will serve two purposes. The gap underneath the door will be sealed and the sweep won’t drag against the floor. You can ensure that the sweep is correctly aligned by bending down and trying to look underneath it.
If you can see what’s on the other side, adjust the sweep accordingly until all light passing underneath it is blocked.
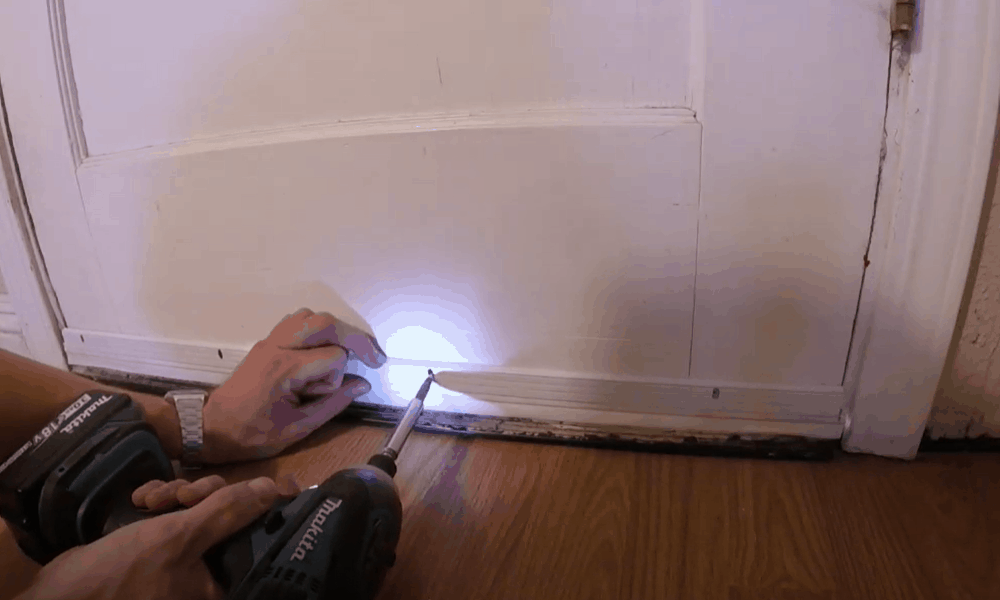
Step 4: Drill in holes
Metal sweeps come with screws that you have to drill in to secure them against the door. Make marks along the length of the sweep where you want the screws to go. The holes should be at equal distance from each other. Once you have made the marks, drill in through them using a drill bit.
-
Sale!
Home Entrance Anti-Slip Coral Fleece Door Mat
Original price was: $12.99.$9.99Current price is: $9.99.Select options This product has multiple variants. The options may be chosen on the product page -
Sale!
Semicircular Cartoon Welcome Entrance Door Mat
Original price was: $12.99.$9.99Current price is: $9.99.Select options This product has multiple variants. The options may be chosen on the product page -
Sale!
Anti-skid Water Absorption Bathroom Door Mat
Original price was: $12.99.$9.99Current price is: $9.99.Select options This product has multiple variants. The options may be chosen on the product page


Step 5: Screw in the holes
Insert one screw each in all the holes and screw it in with a screwdriver. Keep on tightening the screws until they are fully secure.
Conclusion
Installing a door sweep is one of the best decisions you could ever take as far as the energy efficiency of your home is concerned. Your home’s air conditioning equipment will automatically start performing better once they won’t have to deal with air leakages.
What’s more, the door-sweep installation procedure can’t be any easier. It won’t take more than a couple of hours and anyone who knows how to hold a tool can act on the instructions given above. And given the benefits that these seals provide, we think that you can’t ask for anything more.