How to Install a Door Jamb? (Step-By-Step Tutorial)
To secure a door to its opening, you need to install a jamb. But for you to do the installation correctly, ensure to level out the jamb by putting shims at its back.
Afterward, you can add door jamb stops to prevent the door from swinging through it. For detailed steps on how to install a door jamb, follow the guide below.
Step by Step Guide on How to Install a Door Jamb
Step 1: Measure the Width and the Other Sides of the Door Frame
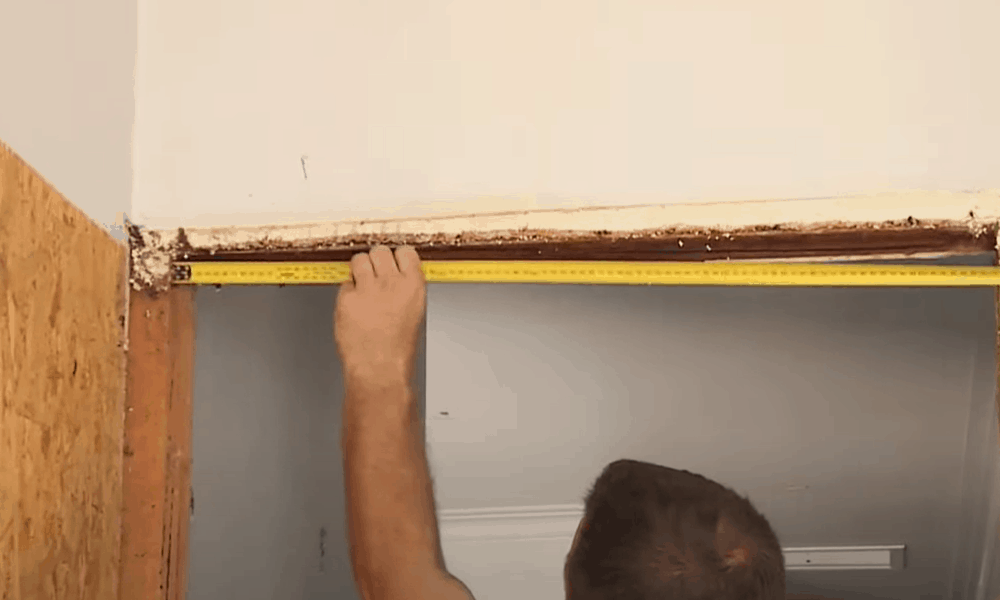
Use a measuring tape to run through the perimeter of the frame to know the width you need for the jamb. Place the tape at the upper structure of the door, take down the measurement in a note.
You should know that if the door walls are 2×4, the frame should be 4½ inches (11.4cm). But, if it’s 2×6, the frame would have to be 6½ inches (16.5cm].
Also, measure the frame sides by placing the tape measure on one of its sides. Record the length. On level ground, this length measurement will be the same on the opposite side.
However, in case they are not the same, measure the other side of the frame’s too, and take down the measurement. Finally, for this step, take the dimensions of the upper side of the frame.
Step 2: Cut the Wood and Fasten Them with a Nail
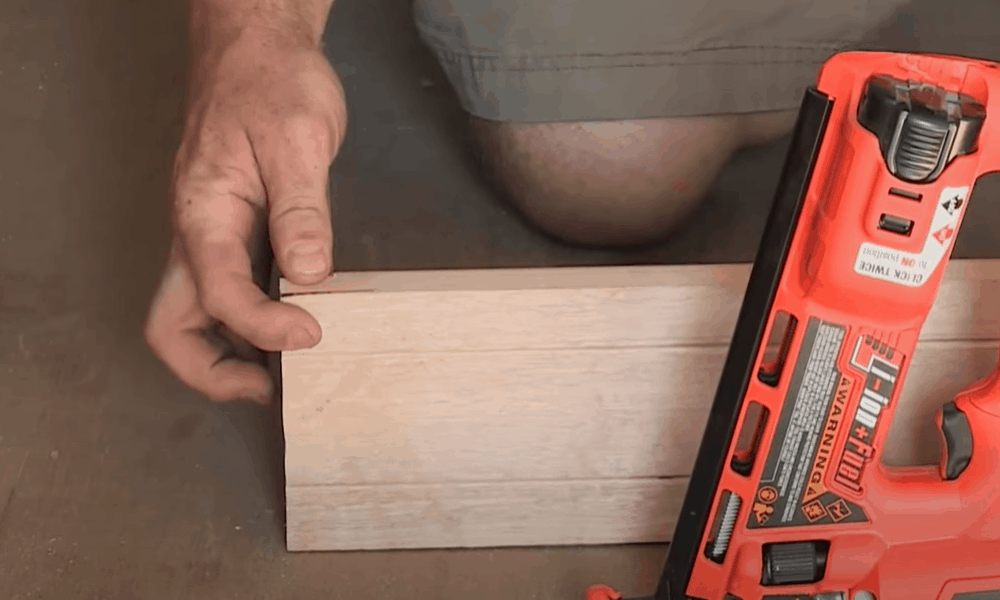
Ensure to wear your complete safety gear to avoid injuries. Wear your gloves, eye guard, and a visor before making use of your circular saw. Gather slim wood pieces, enough to level out the frame, and cut them to match the measurement you took.
Rub glue on one side of the wood that is longest, and then attach the smaller one to it. Nail them together with a nail gun by positioning it outside the point where they join. Ensure that you have aligned the second wood on the other side to nail it like the first one.
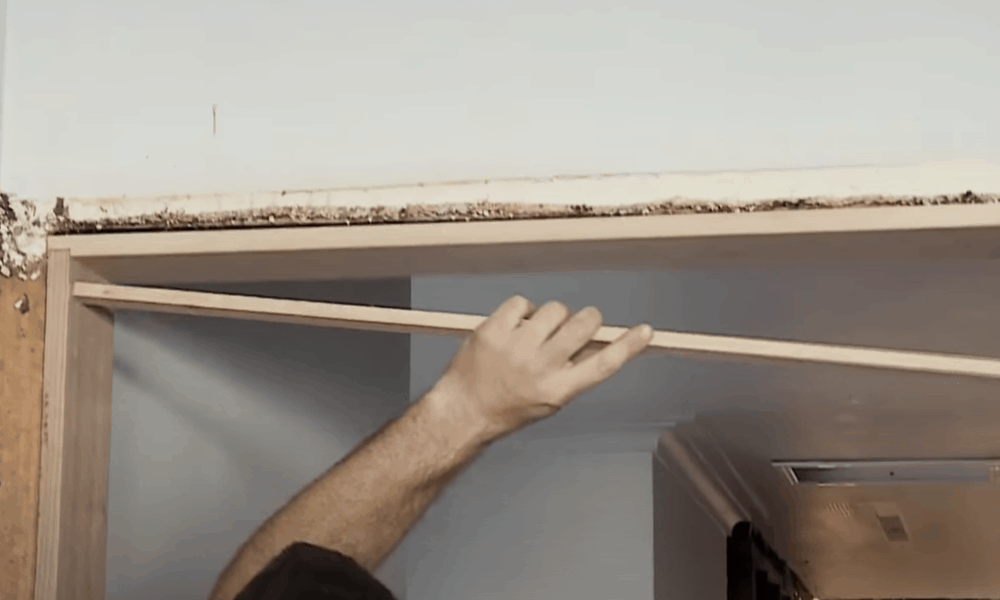
Step 3: Pull the Jamb to the Door Frame
-
Sale!

Top Mounted Hanging Rail Hanger Silent Barn Door Hardware
Original price was: $35.99.$25.99Current price is: $25.99. -
Sale!

Swing Stop Bottom Adjustable Roller Flooring Barn Door Hardware
Original price was: $44.99.$33.99Current price is: $33.99. -
Sale!

Low Noise Floor Guide Adjustable Length Barn Door Hardware
Original price was: $15.99.$11.99Current price is: $11.99.Select options This product has multiple variants. The options may be chosen on the product page


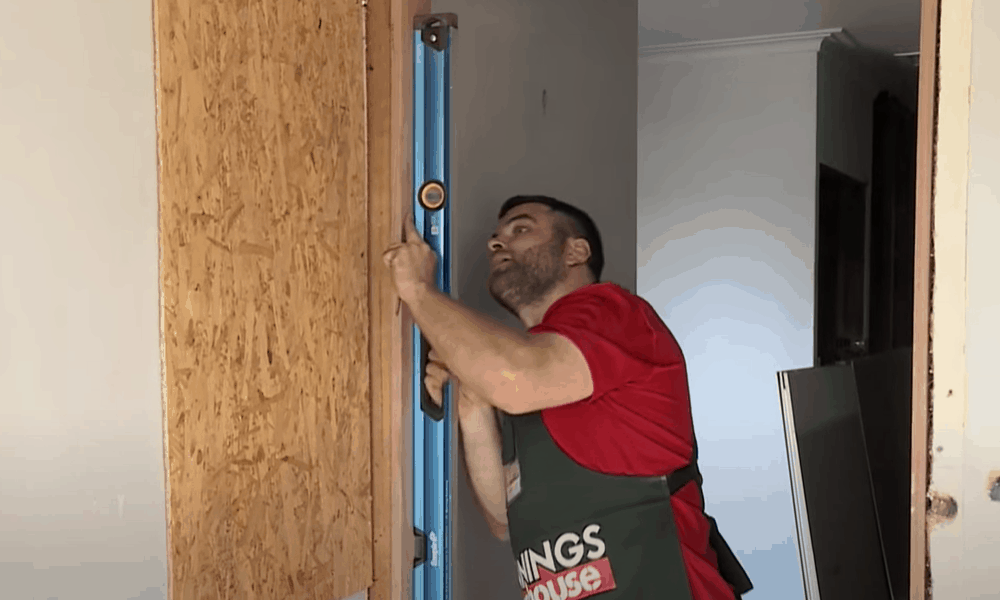
Place the attached wood to the frame, check to see if the other side of the wall is level with it. It should be if you shaped and nailed them together perfectly. Also, check the alignment with a level tool. If they are not, use wood strips to make them the same.
When you finish pulling the jamb up to the frame, put the shims underneath it. Ensure not to lift too much. Find out the spot on which the shims will be perfect so that the hinge will be level from up to down. You can buy the shims or wood strips from a local store and place them behind the jamb.
When you place the attached wood on the frame, it is best to begin with the side of the door that attaches to the hinge.
Step 4: Place the Door Up to the Jamb to Check for Clearance
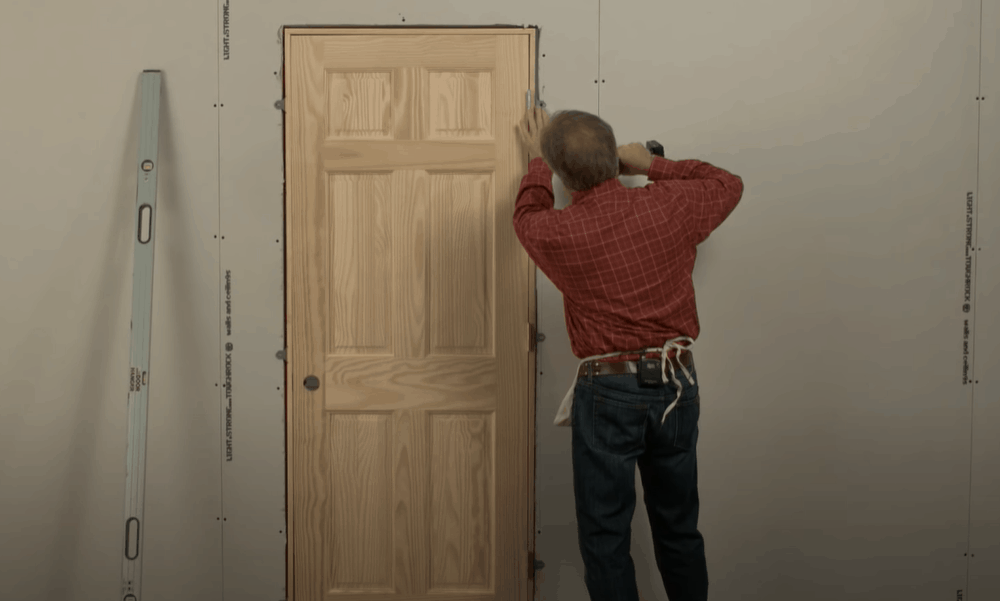
Hold the jamb up by pushing in some nails to make it stand for a while, then pull the door up to it. Ensure that it fits well inside it, then check if the spaces in the middle of the jamb and door are ⅛ inch square. Now, keep adding or removing the strips until it levels out, then take out the door if the measurement is correct.
Step 5: Fasten the Door to the Frame
First, ensure that the jamb stands even on the wall and frame. Then, fasten nails on all its sides to hold it firm, ensuring that each shim has a nail on it to secure it. Attach weather strips to conceal the screw marks. Instead of nails, you can add screws to the door for adjustability and strength.
But you need to drill a hole on the jamb for the screws, then use the weather strips on them after you have attached the screws. Fasten the jamb’s other sides to the frame, but start from the upside before the bottom part.
Ensure the jamb is level with the frame, add shims if it’s not. When they are even, nail the jamb to the frame and then do the same for jamb on the hinge side.
-
Sale!
Universal Security Aluminium Door Knob Thickened Household Hardware
Original price was: $21.99.$15.99Current price is: $15.99. -
Sale!
Free Punch Glass Door Sliding Door Knobs Suction Cup
Original price was: $12.99.$9.99Current price is: $9.99.Select options This product has multiple variants. The options may be chosen on the product page -
Sale!
Window Cabinet Drawer Handles Self-adhesive Door Knobs
Original price was: $12.99.$9.99Current price is: $9.99.Select options This product has multiple variants. The options may be chosen on the product page


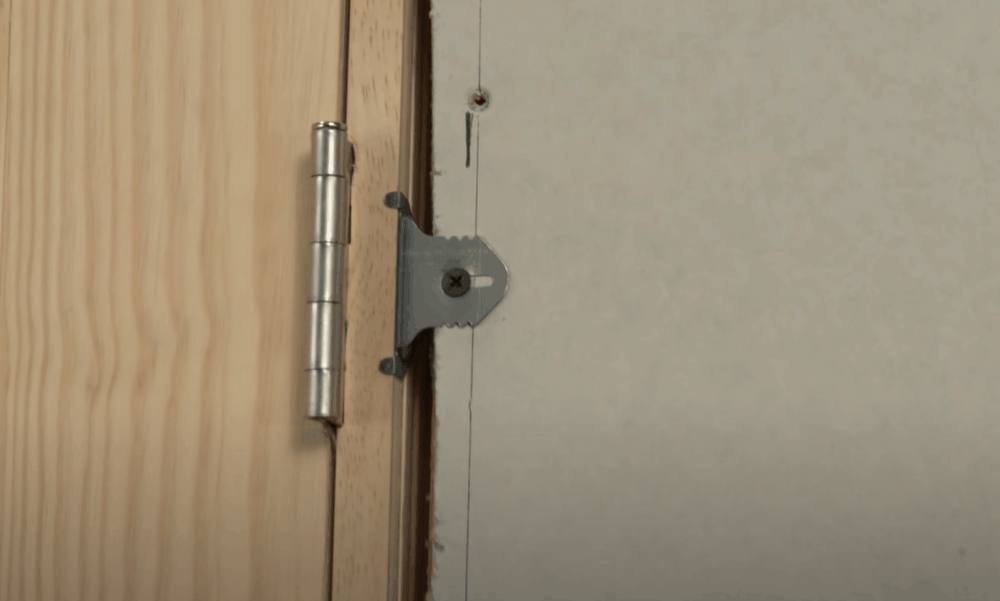
Step 6: Add a Door Stop to the Door Jamb
Get the measurement of the door thickness. Afterward, use the dimension to mark the door position on the top plate when closed. You can use a pencil or marker to make a point. Make it bold so that it doesn’t clean out because that the spot for your doorstop.
Measure for the door stop and cut them according to sizes. Then, fasten them to the top plate with nails. Mark the spot for the door jamb stops on the sides of the jamb the same way you did for the top plate. Measure and cut them out, and then fasten them to the jamb.
Why You Need Door Jamb Construction
The door jamb is an essential component that allows you to install the door in every home. You may need a door jamb replacement if yours is weak and can’t hold firm. Apart from replacement, let’s see some other reasons why you need a door jamb.
To Provide Leveling and Support
The main reason for a door jamb construction is to give the door lasting support. When studying how to build door jambs, you would see that the door rests on the frame when it’s hung. Every other component of the door, including the jamb, is there to ensure that it’s hanging well.
You should be careful with this process as it determines if your door levels out or crooked. It’s not a good thing if the entrance is not level as it may result in various problems. It may have gaps beneath, which spoils the insulation it provides.
Also, the door may not open and close properly. For this reason, you should ensure that the installation of the door jamb is perfect. Hence, it will provide efficient protection it offers to your home.
For Door Hinge Installation
Some components are necessary for a smooth opening and closing of a door. For instance, the hinges are what enable it to swing either way without tipping. So, for your door to close and open freely, you need to install door hinges on a jamb.
If the jamb is not strong enough or has rotten, it won’t stand firm or hold the door well. Also, if you don’t install it well, the door will be hard to close and open.
Protection
When your door jamb construction is solid, you feel protected against theft. Many believe that the important part for their security is the quality of the door’s material, but a strong jamb matter more.
-
Sale!
Memory Foam Non-Slip Soft Bath Door Mat
Original price was: $12.99.$9.99Current price is: $9.99.Select options This product has multiple variants. The options may be chosen on the product page -
Sale!
Home Entrance Anti-Slip Coral Fleece Door Mat
Original price was: $12.99.$9.99Current price is: $9.99.Select options This product has multiple variants. The options may be chosen on the product page -
Sale!
Semicircular Cartoon Welcome Entrance Door Mat
Original price was: $12.99.$9.99Current price is: $9.99.Select options This product has multiple variants. The options may be chosen on the product page


Since the bolt of the door goes into the latch on the frame, the quality of the door does not matter. If you are using a weak door jamb, burglars can easily take down the door.
Wrap Up
Having an interior door jamb kit in your home is essential whether you know how to install a door jamb or not. You won’t want the need for a door jamb replacement to take you unawares so you don’t expose the house to theft. Installing a door jamb is easy with the above-mentioned steps. To summarize the steps a little further for you;
- First, take accurate measurements of the width and the other sides of the door frame
- Make a woodcut with the exact measurement for the door jamb
- Fasten the door jamb to the opening, but ensure it levels out before nailing.
- Measure the thickness of the door for a door jamb stop
- Use the measurement to mark out the spot on the jamb and cut the wood for the doorstop.
- Fasten the newly cut doorstop to the header, the hinge jamb, and lock jamb.
If you have any questions or contributions, let’s know in the comment section.