How to Install a Door? (Step-By-Step Tutorial)
Installing a door can be a tricky job, and you need to make sure you do it right because if you don’t, you may find the door isn’t level or that you can’t open or close it properly. For this reason, you need to know the correct steps to follow to make a success of the project.
Having said that, if you know what you’re doing, you have the correct tools to do it and you are careful to do each step properly, most people with a reasonable amount of DIY skill should be able to manage. And if you’re looking for a step-by-step guide, here’s how to install a door.
If you want a preview of some of the things we’re going to be talking about – as well as a lot of practical extra hints and tips – you can check out this highly informative video before reading on.
What you’ll need for installing a door
Here’s a list of the items you’ll need to complete this project.
- Door
- Frame
- Shims
- Pry bar
- Putty knife
- Nails
- Hammer
- Screws
- Screwdriver
- Drill
Step-by-step guide on how to install a door
Here are the steps you need to follow to install a door.
Step 1. Remove the old door and frame
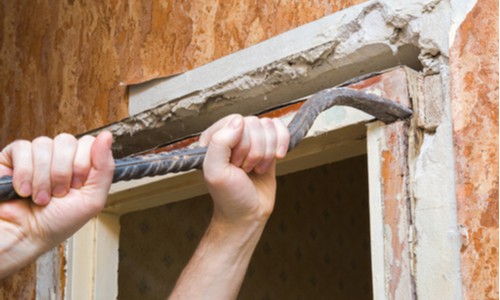
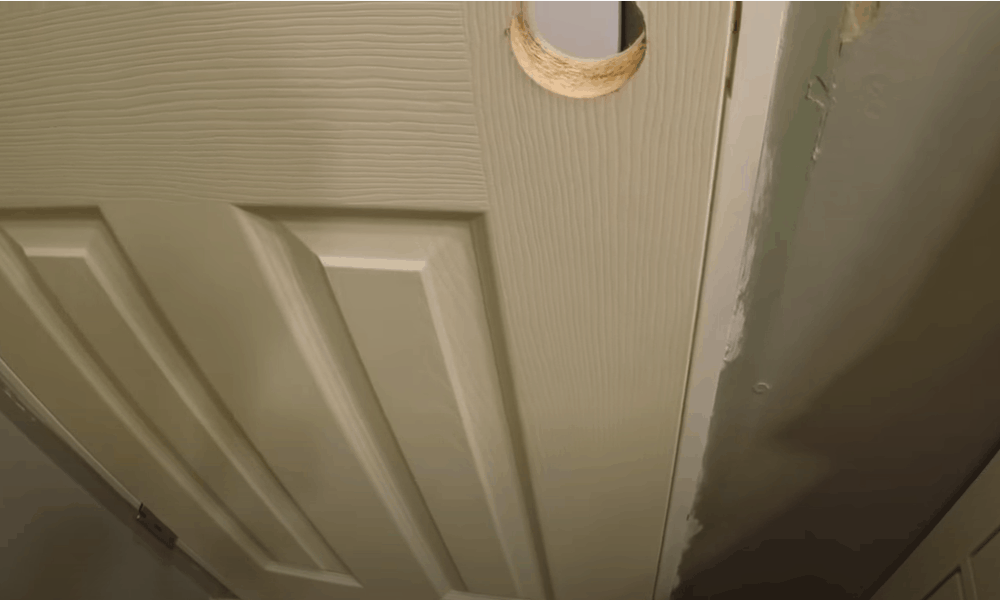
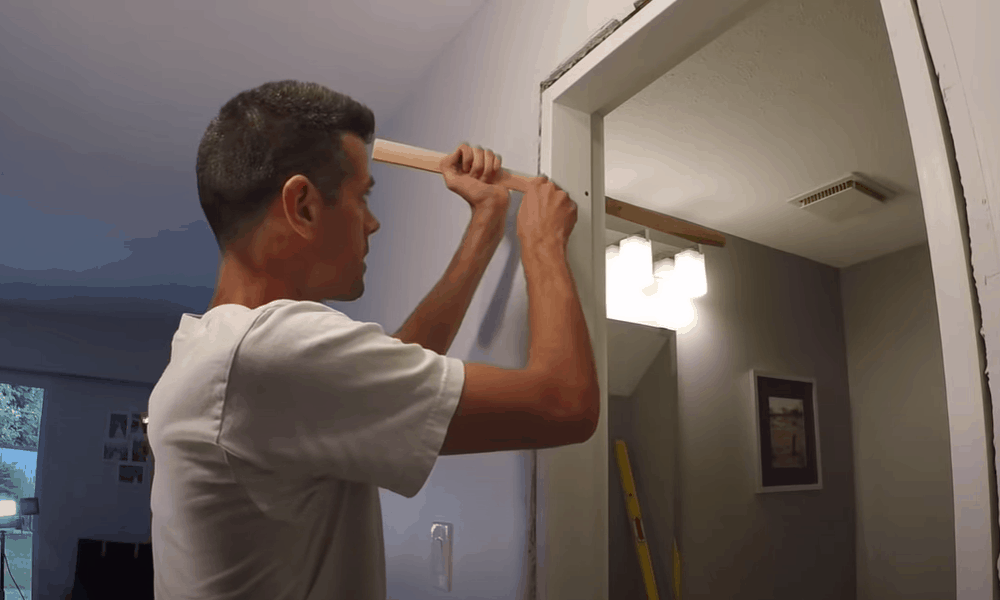
The first step is to remove the old door and frame if it is still there. Start by removing the old lock and hinge pins so you can lift the door out the frame.
Next, pry off the old trim and remove the jambs and header. What you are left with is a gap in the wall known as the rough opening.
Pro tips: The sides of the door are known as the “jambs”, which comes from the French word for leg, jambe. You may sometimes hear people call the top of the door the “top jamb”, but this doesn’t make any sense – we don’t have legs on our heads! The correct name for the top part is the “header”, while the bottom is known as the “sill”.
Pro tip: Place the putty knife between the wall and the pry bar. This will protect the wall from damage, and you won’t need to repair or repaint it after.
Step 2. Measure and level the rough opening
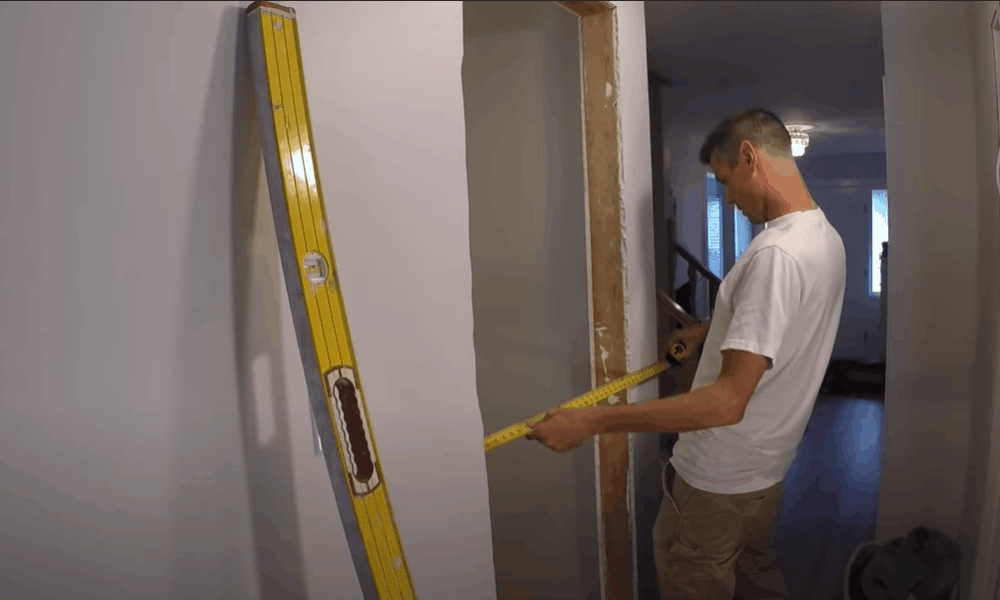
Before you buy a new door, you need to check the dimensions of the rough opening. It may surprise you to know the sides are not always completely straight (“plumb”), the gap between the sides at the top and the bottom might not be the same and the floor might not be level.
For this reason, you need to measure and level everything carefully at this point before you continue.
Measure the height of the rough opening and measure the width at the top and the bottom.
-
Sale!

Swing Stop Bottom Adjustable Roller Flooring Barn Door Hardware
Original price was: $44.99.$33.99Current price is: $33.99. -
Sale!

Low Noise Floor Guide Adjustable Length Barn Door Hardware
Original price was: $15.99.$11.99Current price is: $11.99.Select options This product has multiple variants. The options may be chosen on the product page -
Sale!

Antique Big Rollers Steel Sliding Barn Door Hardware
Original price was: $187.99.$140.99Current price is: $140.99.


Next, you should also check the sides of the rough opening to see if they are level. They probably won’t be perfect, but you need to know how much difference there is since this will allow you to make sure the door you want to install will fit.
Pro tip: If possible, it is better to take these measurements before you buy your door. This way, you can be sure that you buy a door with the correct dimensions.
Step 3. Check the sill
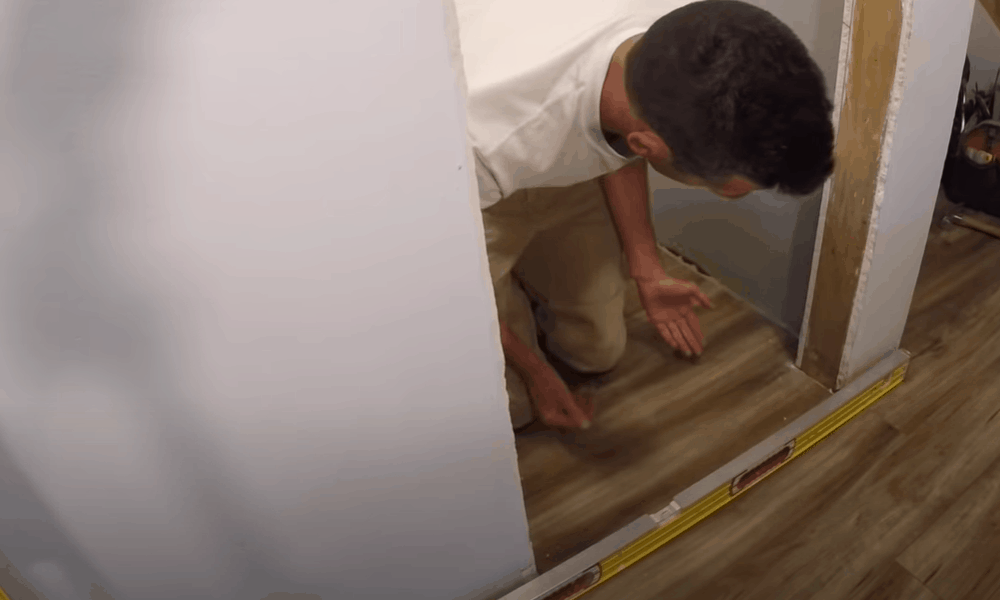
The next step is very important. To ensure the door fits properly, you need to check the sill. If the floor isn’t level, the door won’t open and close smoothly, so you need to check this out before moving on.
If the floor isn’t level, raise the leveling tool by placing wooden shims underneath it at the lower end until it is level. Measure the height of the shims you needed to use (or the height between the level and the floor).
This is the amount you will need to remove from the bottom of one of the door jambs for the door to function properly.
Step 4. Adjust the jamb according to the measurement you took
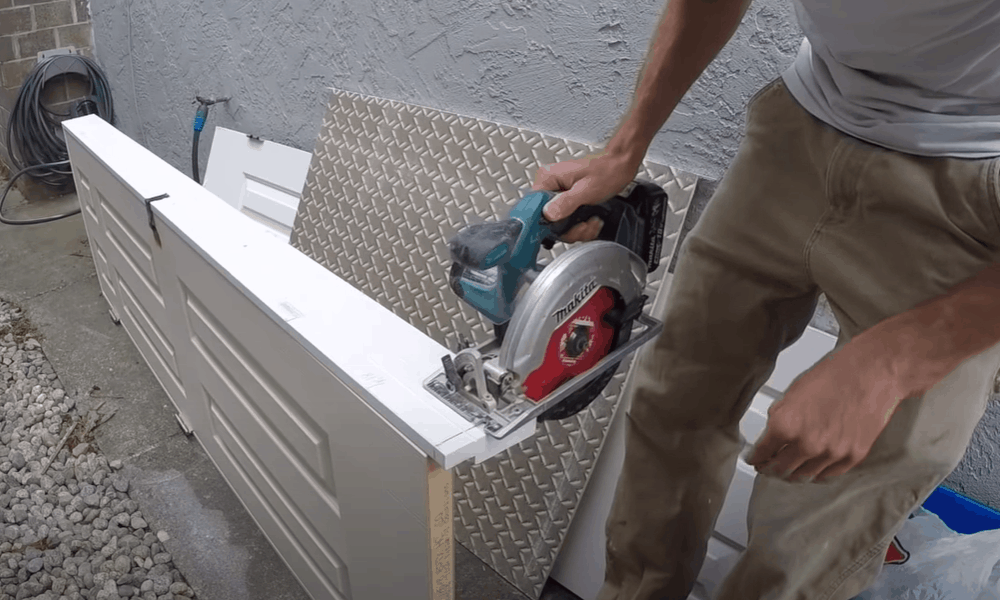
The measurement you just took tells you how much higher the floor is at one side of the door compared to the other. You now need to adjust the door jamb by removing this amount from the bottom.
Be careful that you cut the correct jamb. The one that will be on the side where the sill is higher is the one that needs to be shortened.
If you cut the wrong one, you will then have to take twice as much off the other side to correct it, and if you do this, it will probably mean the jambs no longer fit correctly in your rough opening.
Pro tip: You can use a manual saw or a circular saw to cut the jamb. If you use a circular saw, use a blade with a larger number of teeth to minimize splintering the wood as you work.
Step 5. Secure the frame with shims
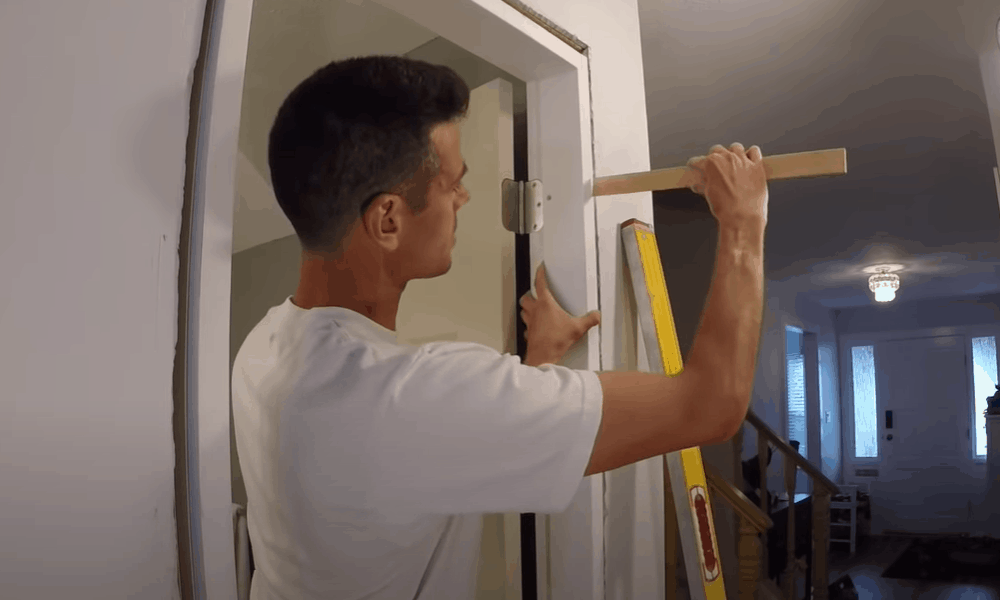
You now need to secure the door frame in place using shims. Place one wooden shim on the hinge side of the door and place another behind the hinge attachment in the door frame.
After this, work around the frame adding more shims at various points to ensure the door is held firmly and securely in place.
-
Sale!
Free Punch Glass Door Sliding Door Knobs Suction Cup
Original price was: $12.99.$9.99Current price is: $9.99.Select options This product has multiple variants. The options may be chosen on the product page -
Sale!
Window Cabinet Drawer Handles Self-adhesive Door Knobs
Original price was: $12.99.$9.99Current price is: $9.99.Select options This product has multiple variants. The options may be chosen on the product page -
Sale!
Upscale Sliding Door Knob With Double-sided Tape for Kitchen Door Wardrobe
Original price was: $12.99.$9.99Current price is: $9.99.Select options This product has multiple variants. The options may be chosen on the product page


As you work, keep measuring with the level and continue adjusting until the frame is plumb.
Pro tip: This part of the work can take a bit of time, but it is important to work carefully and make sure you get it right because the door fitting correctly depends on it.
Step 6. Screw the frame into place
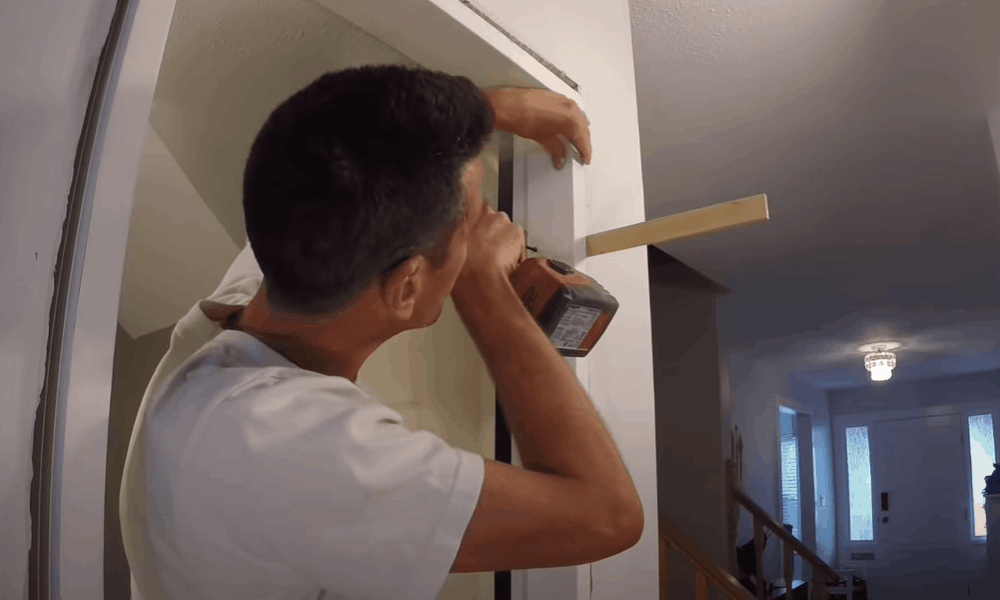
Once you have got the frame into place, you can now use screws to fix it in place. Use screws at each location where you placed the shims to fix the whole thing securely.
You can also put shims where the hinges go. This way, you can then screw them in with longer screws, giving them an extra level of strength and rigidity.
Step 7. Set the door in place and test it
You can now set the door in place. Set the door on the hinges, using shims underneath to support it as necessary. Insert the hinge pins and knock them in with a hammer if you need to.
You can now test the door to see if it opens and closes correctly. Ideally, you want around a 1/8” gap at the top and along the strike side while you are looking for a 1/16” gap on the hinge side.
If the gaps are much different from this, you will need to take the door down and make the necessary adjustments. Keep adjusting it as required until you get it just right.
Pro tip: Sometimes you might have trouble getting the hinges on the door to line up. If this happens, you can loosen the screws slightly to give yourself a bit more play. This will allow you to get the hinges lined up, after which you can tighten the screws again.
Step 8. Fit the trim and finish up
If the door is in place and opens and closes correctly, you can now fit the trim and finish up. Sand the trim lightly and paint as required. You may also need to fit the doorknob, in which case you can do this now.
Extra pro tips for installing a door
Here are some extra pro tips that will help you make a success of the job.
- Choose a pre-hung door if possible
If you choose a pre-hung door, it will make the job slightly easier. With a pre-hung door, you just need to concentrate on making sure everything lines up and taking care of the shimming, making it easier to achieve a successful fit.
- Insulate external doors with expansion foam
It is a good idea to insulate external doors by filling the gap between the rough opening and the doorframe with expansion foam.
-
Sale!
Home Entrance Anti-Slip Coral Fleece Door Mat
Original price was: $12.99.$9.99Current price is: $9.99.Select options This product has multiple variants. The options may be chosen on the product page -
Sale!
Semicircular Cartoon Welcome Entrance Door Mat
Original price was: $12.99.$9.99Current price is: $9.99.Select options This product has multiple variants. The options may be chosen on the product page -
Sale!
Anti-skid Water Absorption Bathroom Door Mat
Original price was: $12.99.$9.99Current price is: $9.99.Select options This product has multiple variants. The options may be chosen on the product page


Apply the foam with a specially-designed expansion foam gun. The trick is to use just enough so that it fills the gap but not too much so that it expands and spills out of the gap.
This is something that will probably take a bit of practice, so start off slowly until you get used to it.
- Caulk the joints
When fitting the trim, you may also consider adding caulking to hold everything more securely in place and also to create a seal between the trim and the wall.
A tricky job – but manageable if you know how
As you can see, hanging a door can be a tricky job, but if you know what you are doing and do each of the steps carefully, there’s no reason why you shouldn’t be able to do it. The key is to measure everything carefully and to pay special attention when inserting the shims.
After this, when the jambs and header are all in place, putting the door up should be easy, and if you’ve done everything correctly, you should find you have no problems with it opening or closing. Furthermore, you will also have saved some money by not having to pay a pro.