7 Easy Steps to Fix a Car Window
Is your car window stuck in an open or closed position? The problem could be as simple as a blown fuse or as serious as a broken regulator. Fortunately, with the right tools and a bit of mechanical know-how, you can get the window to work again. In this guide, I will show you how to fix a car window on your own and save big bucks.
A step-by-step guide to fixing a car window
Automotive power windows consist of several electrical and mechanical parts. All these work together to move the window up and down smoothly.
The cost of fixing a window that will not move typically ranges between $250 and $800 depending on your location and type of vehicle. If you are on a budget, you could assemble the requisite tools and repair the window yourself.
The exact process of repairing a faulty window will depend on the make of your vehicle but most of the steps are pretty much the same.
Things you will need
- Plastic panel popper
- Screwdriver
- An automotive adhesive such as butyl rubber tape
- 3M super adhesive
- Safety gloves
- Voltmeter
- Test light
- Door panel fasteners
Step 1: Check the seals and gaskets

Weather, age, and normal wear and tear can weaken the rubber trimming around the narrow opening where the car window nests. Loose or broken trimming could cause the window to stick open or closed.
Before opening up the door panel to check for interior mechanical or electrical problems, check whether the rubber trims are worn out. Replace broken gaskets. You can buy these online or from your local auto shop.
If the gasket is loose, apply 3M super adhesive around the loose areas and let it dry overnight. Be sure not to glue the glass to the rubber trimming.
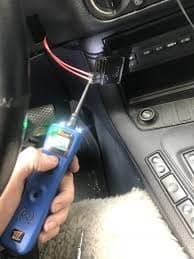
Step 2: Test for a blown fuse
-
Sale!

Magnetic Double-Side Automatic Water Discharge Window Cleaner
Original price was: $67.99.$50.99Current price is: $50.99.Select options This product has multiple variants. The options may be chosen on the product page -
Sale!
Shower Squeegee Long Handle Silicone Window Cleaner
Original price was: $15.99.$11.99Current price is: $11.99.Select options This product has multiple variants. The options may be chosen on the product page -
Sale!
3 In 1 Double-sided Window Cleaner With Spray
Original price was: $10.99.$7.99Current price is: $7.99.


Another common cause of a window that will not work is a blown fuse. If the fuse is faulty, pushing the switch button will move the window neither up nor down. The upside is that this is usually a minor problem and you would only need to replace the fuse.
Refer to your car’s manual to locate the fuse box. Use an automotive test light to find the faulty fuse. Be sure to turn off your vehicle’s ignition when removing a blown fuse.
Carefully pull out the fuse, making sure to avoid tempering with the other fuses. Replace the bad fuse with a new one, which you can buy from any automotive shop.
Step 3: Test the switch panel
If the fuse is good and the window will still not move when you press the switch, check the motor connector in the switch panel. Loosen the fasteners around the switch panel to release it from the door.
Disconnect the motor connector from the rest of the door and connect the voltmeter to the motor on the switch panel. While the car ignition is on, push the switch buttons to see the reaction. If the switch panel is working, the voltmeter reading will change from plus 12 volts to minus 12 volts. If not, you might need to replace the switch.
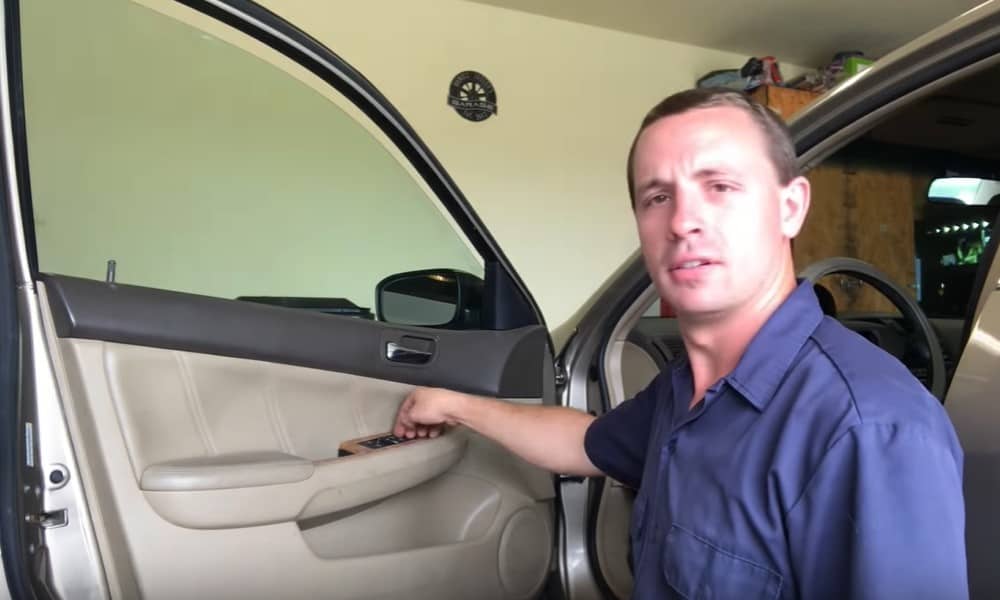
Step 4: Remove the door panel
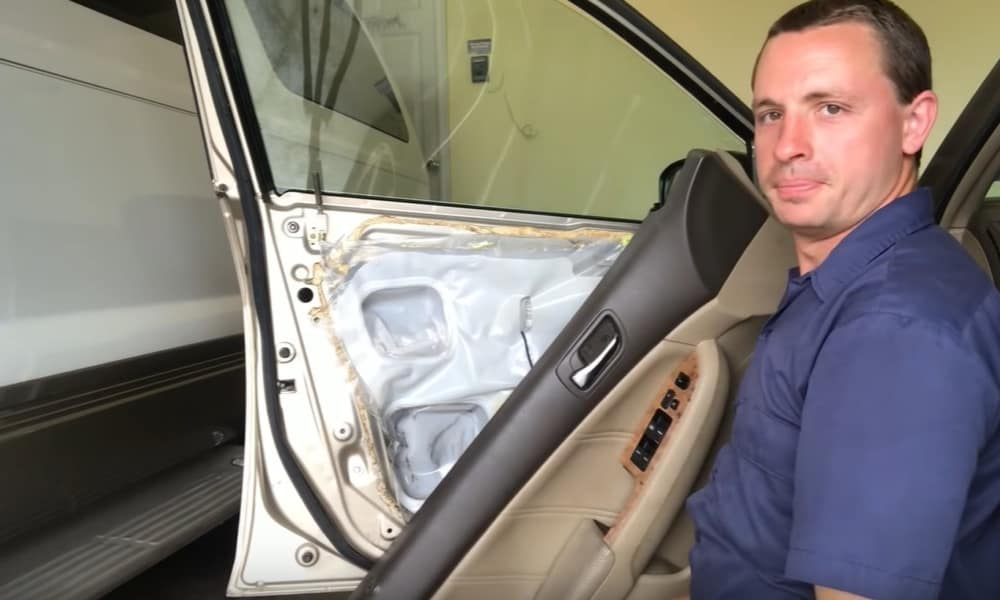
More often than not, when a car window will not work, the motor/regulator mechanism might be faulty and in need of replacement. To inspect the regulator and motor, you will need to pop out the interior door panel.
Locate and remove the fasteners to release the panel. In addition to the metal fasteners, most panels are held in place by plastic clips. Do not pull the panel out forcefully; instead, use a plastic popper to loosen it from the clips holding it in place. Check your local hardware store or auto shop for this handy tool.
Remove the weatherproof lining to expose the casing that protects the regulator. Depending on its condition, you could re-use the lining or replace it with a new one.
Step 5: Remove the glass from the door

Before accessing the regulator, it is best to remove the window from the door. With the door panel off, locate the bolts holding the glass in place. Depending on your type of door, the fasteners might be in different locations but it should be fairly easy to spot them.
Use the switch panel to lower or raise the window. If this is not possible, try lifting the window out by hand.
As you remove the bolts, ask someone to hold the window in place for you, to avoid breaking the glass once all the bolts are loose. If you have artificial window tint, be super careful not to scratch the film as you handle the window.
With the window out, you can now safely inspect the motor/regulator.
Step 6: Check the regulatory assembly
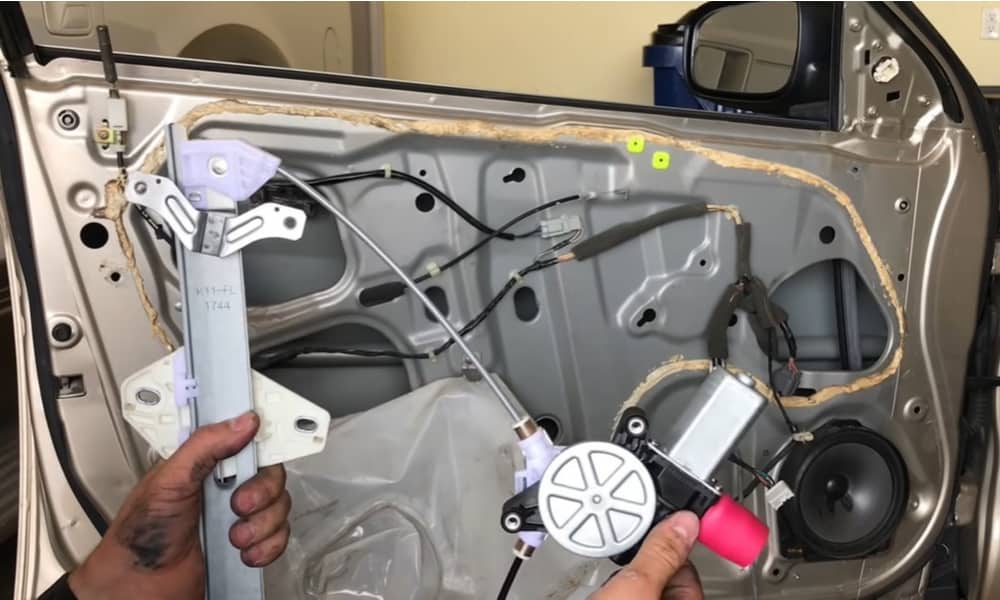
The regulator is largely responsible for the up and down movement of the window. Normal wear and tear can make the regulatory assembly faulty.
Loosen the bolts holding the regulator to the door casing. This will free the regulator hidden behind. Take note of where each bolt was fitted before for easy replacement.
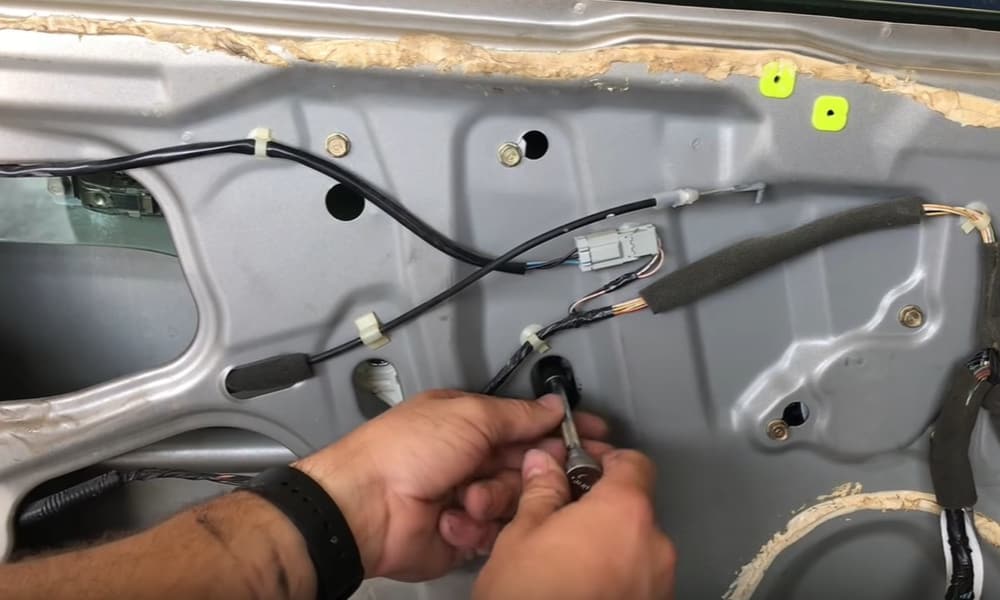
Use one of the openings on the casing to wiggle out the old regulator. Insert the new regulator through the same opening and replace the bolts in their respective positions. Remember to reconnect the motor to the switch panel and the rest the electrical connections on the door.
Step 7: Replace the window
Insert the glass back into place. Use the respective bolts to hold it in its proper position. With the new regulator in place, push the switch button to check that the window is working properly now.
Put the weatherproof lining back in place, securing it with butyl rubber tape or other automotive adhesives. Secure the door panel in its place, making sure to insert the fasteners in their correct position.
Conclusion
A car window that will not work can be a stressful affair. As soon as you notice a problem with yours, it is best to identify and fix the problem immediately to avoid further damage to the window system.
Have you tried other hacks to fix a faulty car window? We’d love to hear from you! Leave your comments and questions below.