How to Install a Prehung Exterior Door? (Step-By-Step Tutorial)

Prehung doors make your life more carefree. You can count on them to increase the energy efficiency of your home, add to its security and safety, and enhance its curb appeal. Add to the equation the fact that they are watertight, and the decision to install them seems a no-brainer.
Furthermore, once you know how to install a prehung exterior door, you’d realize that all your thoughts about the installation procedure being complex were misguided. One doesn’t need to be a master carpenter to do a fine job. All you need is some free time and lots of tools.
Provided you can arrange both, the technique mentioned in this article will help you achieve a perfect, weathertight installation. You can go through this video to see how the end result will look like before scrolling down to replicate it on your front door.
Before you install the new prehung exterior door
Pay attention to the potential weight of the door you’re going to get. You can do that by checking the weight of similar doors online. We recommend that you have at least two people at the installation location all the time, just to be safe.
However, depending on the strength of the people and the weight of the door you’re going to install (and remove), you may need more than four helping hands. Do not attempt to do all the heavy lifting by yourself as it might jeopardize your safety.
What you’ll need for installing prehung exterior door
Here’s a list of all the tools and equipment you’ll need:
- Measuring tape
- Personal protective equipment (glasses, gloves and a face mask)
- Hammer and nail set
- Dropcloth
- Pry bar and wide putty knife
- Handsaw and circular saw
- Pliers or nipper
- Level
- Flashing tape
- Polyurethane caulk (two tubes) and caulk gun
- Galvanized casing nails
- Foam insulation (Two cans)
- Trim board
Step-by-Step Guide on how to install a prehung exterior door
Follow these steps to install a prehung exterior door:
Step 1: Measure the size of the old door

Since the size of the new door will be the same as that of the one it’s going to replace, you must be careful with the measurements.
Otherwise, you might inadvertently end up increasing the size of the job. Here are the measurements you need to make:
- Measure the door size
Measure the height and width of your old door and round the measurements to the nearest inches to find the size of your replacement door.
For instance, if your door measures 85 ¾’’ tall and 36 ½’’ wide, you might want to order a 36’’ by 86’’ door.
- Measure the jamb width
Measure the distance between the rear side of the interior trim and the rear side of the exterior trim. This is the jamb width and using it while ordering a new door will guarantee it fitting flush to the wall. You won’t have to add any jamb extensions.
- Measure the size of the exterior opening
Also known as masonry opening for stone doors, it requires you to make two measurements. First, you’ll have to measure the outside of the exterior casing. Next measure the distance between the top of the trim and the bottom of the sill.
- Measure the size of the rough opening
To measure the size of the rough opening, first, remove the interior trim. Make two measurements – the first between the top of the opening and the bottom of the sill, and the second of the width between framing members.
Step 2: Remove your old door
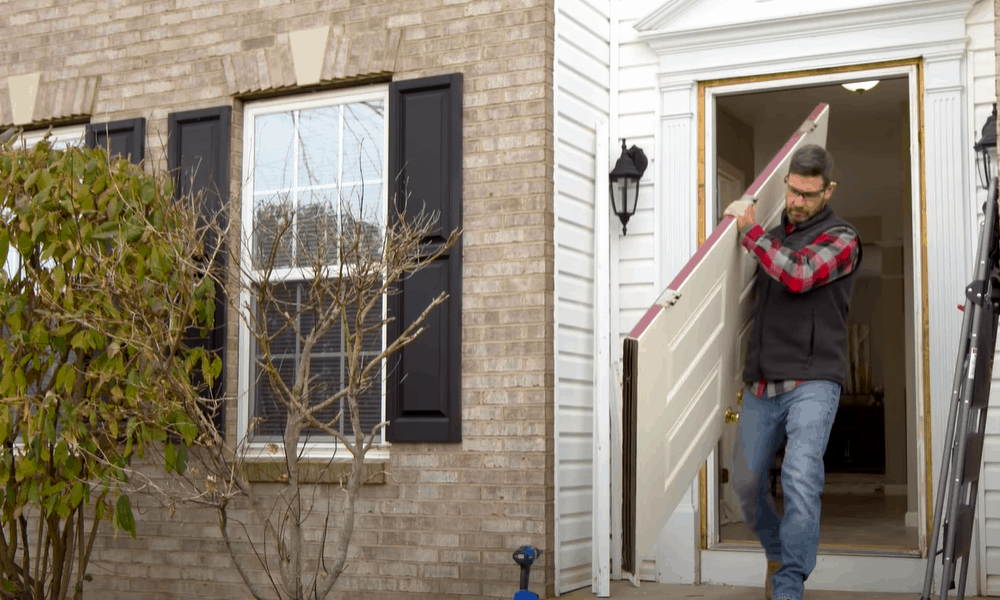
Lay a dropcloth on the floor right beneath the old door.
Use a hammer and nail set to tap the hinge pins. Keep on tapping until you notice the hinge pins have gotten loose.
-
Sale!

Swing Stop Bottom Adjustable Roller Flooring Barn Door Hardware
Original price was: $44.99.$33.99Current price is: $33.99. -
Sale!

Low Noise Floor Guide Adjustable Length Barn Door Hardware
Original price was: $15.99.$11.99Current price is: $11.99.Select options This product has multiple variants. The options may be chosen on the product page -
Sale!

Antique Big Rollers Steel Sliding Barn Door Hardware
Original price was: $187.99.$140.99Current price is: $140.99.


Then push the door open and carry it off. The door will be heavy so you’d need a helping hand to lift it off.
Step 3: Loosen the old trim
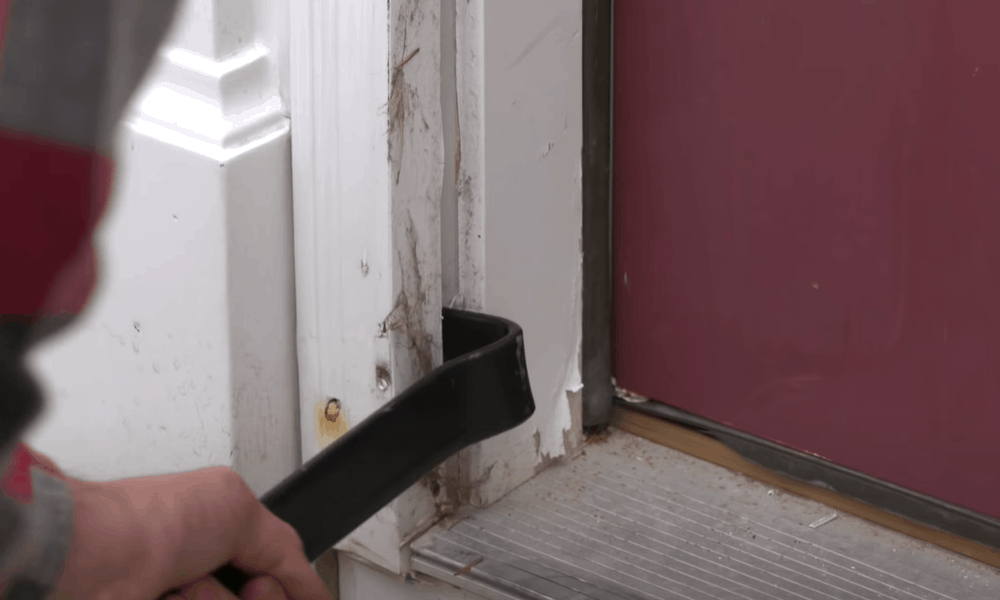
Use a pry bar to loosen the old trim from the door frame.
Place a wide putty knife beneath the pry bar and the wall to protect the paint from getting ripped off.
After the trim has been loosened enough, remove it by slicing the caulk joint with the pry bar. It will be there between the exterior trim and the siding (brick).
Tip: If you’re planning to reuse the trim in the future, use a utility knife to remove the intersection between the jamb and the molding. Afterward, loosen the old trim using the abovementioned technique.
Step 4: Detach the jambs
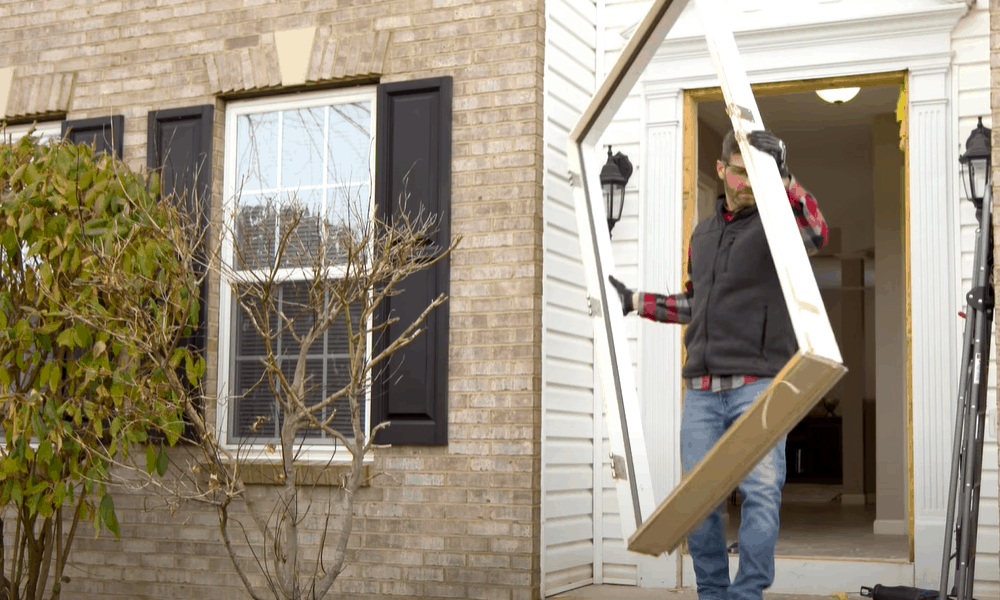
Use a handsaw to cut through the side jamb. This should pry the jambs loose and make it easy for you to pull them out of their opening with your glove-protected hands and tear out the whole frame.
Pro Tip: Hoping to use the interior moldings in the future? Then avoid damaging its face. You can do that by using a nipper or pliers to pull the nails through the rear side.
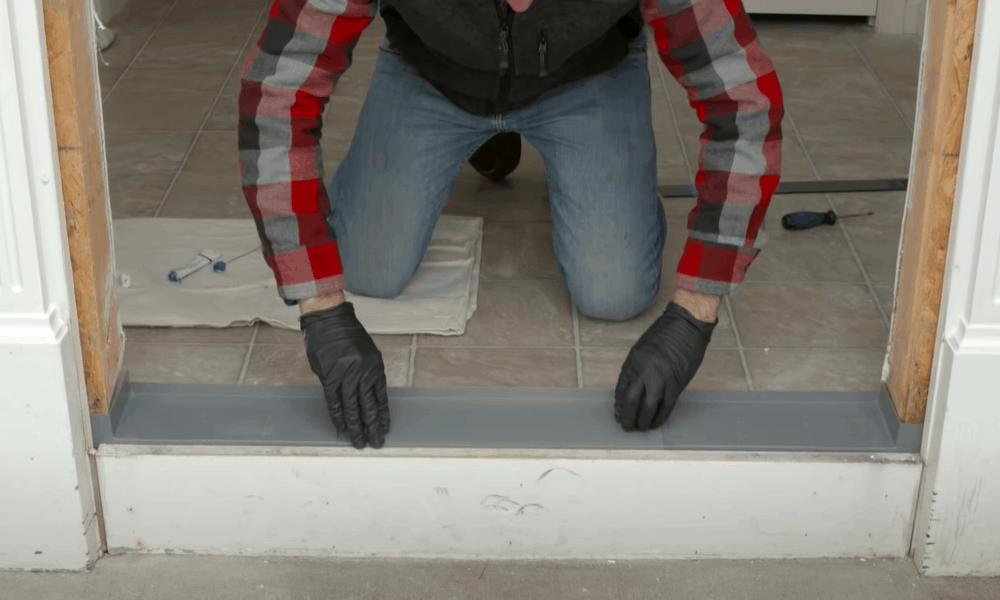
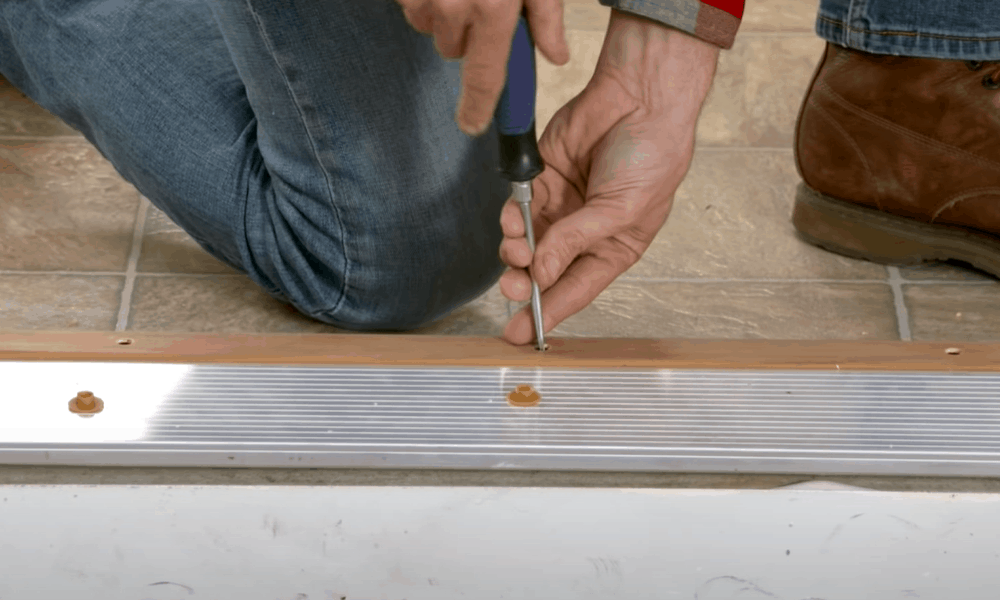
Step 5: Install the sill
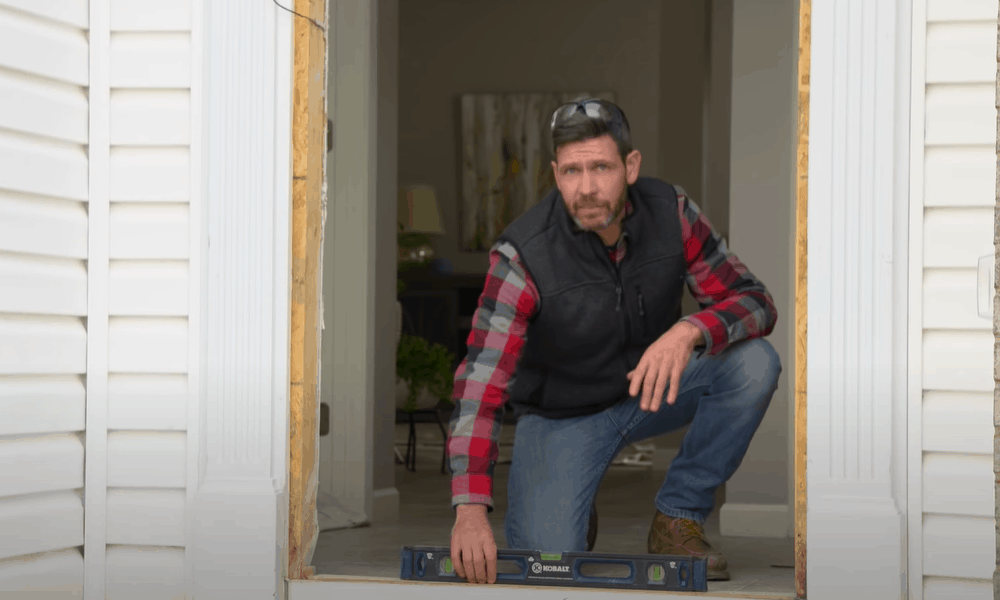
Follow this step-by-step process to prepare and install the sill
- Once you’ve removed the frame, the condition of the subflooring as well as framing in the sill area will be there for you to see. If you see any rotted wood, cut out and replace it.
- Provided the sill on the replacement door is thinner than the one it is going to replace, you might as well have to bulk-up its sill area.
- To check whether or not that is the case, use a two-foot level to check the sill area. If the level indicates that the area isn’t level, you’ll have to make it so with shims.
- To do that, set the height at which the door’s bottom will sit above the floor. The height should be considerable if you have carpeting or rugs underneath the door – as otherwise the door will get stuck into them.
- Use treated lumber to thicken-up the sill area to its proper height. Then level the area by adding shims. Make sure you’re adding shims at a distance of four inches from each other.
- Check to see how the new siding fits against the casing. If the siding is so out of level that the casing and the door frame don’t cut in, trim the casing. You can do that by marking the height up to which the casing needs trimming and then trimming that area with a circular saw.
- Once you notice that everything is level, use coated deck screws to fasten the casing.
Step 6: Install flashing tape
Since contact with water might swallow the sill, it needs to be protected from water at all times.
Cover the sill area with a flashing tap. Wrap the tape over the sill’s front edge and up the sides of its opening.
Close the door and make sure that the addition of flashing tape doesn’t stop it from closing plumb against the opening.
Step 7: Caulk the door
Caulk behind the casing and along the sill.
You can do that by using a caulk gun to apply polyurethane caulk at the sill and along the top and sides of the door’s opening.
Get two tubes of caulk as the door will most likely need as much.
Step 8: Tack in the new door

-
Sale!
Free Punch Glass Door Sliding Door Knobs Suction Cup
Original price was: $12.99.$9.99Current price is: $9.99.Select options This product has multiple variants. The options may be chosen on the product page -
Sale!
Window Cabinet Drawer Handles Self-adhesive Door Knobs
Original price was: $12.99.$9.99Current price is: $9.99.Select options This product has multiple variants. The options may be chosen on the product page -
Sale!
Upscale Sliding Door Knob With Double-sided Tape for Kitchen Door Wardrobe
Original price was: $12.99.$9.99Current price is: $9.99.Select options This product has multiple variants. The options may be chosen on the product page


After you are confident that the doorsill is level, center its top in the opening.
Use galvanized casing nails to tack it into place. Plumb the jamb on the hinge side and then tack its bottom corners.
Step 9: Shim the jambs on the hinge-side
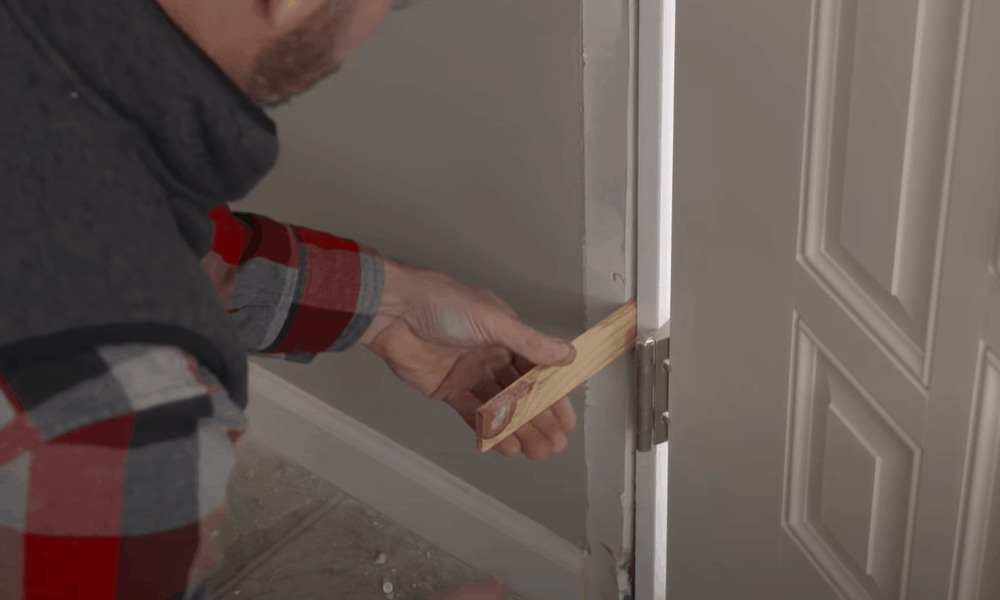
Use small squares of plywood to shim large spaces behind each hinge.
Add pairs of shims on top afterward. Make sure the hinge-side jamb is plumb once you’re done shimming it.
Step 10: Shim the jamb on the latch-side
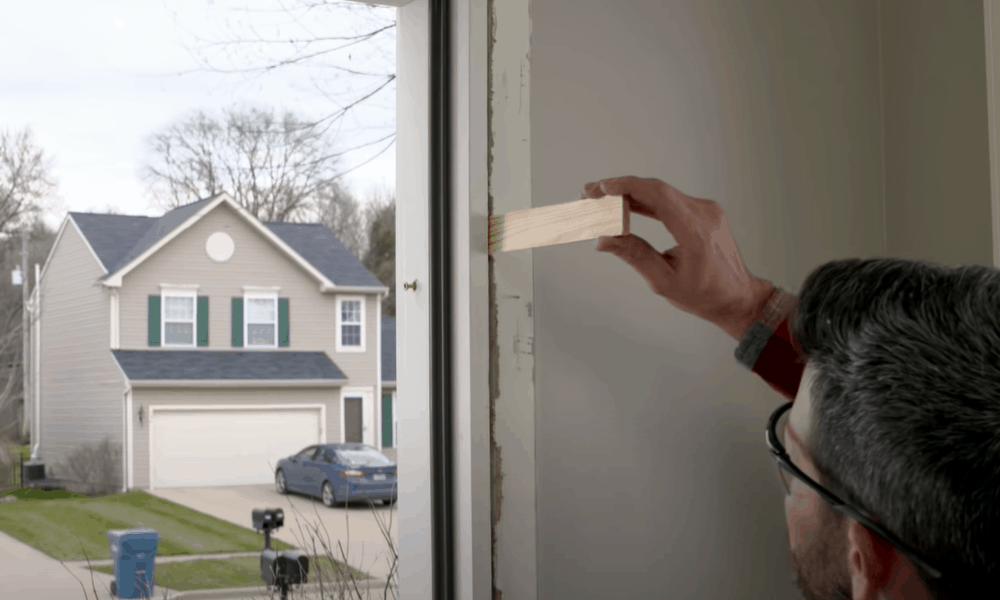
The end goal here is to make sure that the sides are plumb and straight once they are shimmed and that the goal is centered in the opening.
To achieve that, shim at the bottom, middle and top of the jamb on the latch side.
Keep on shimming until the gap between the doorjamb and door becomes consistent.
Then drive nails into the framing at each shim.
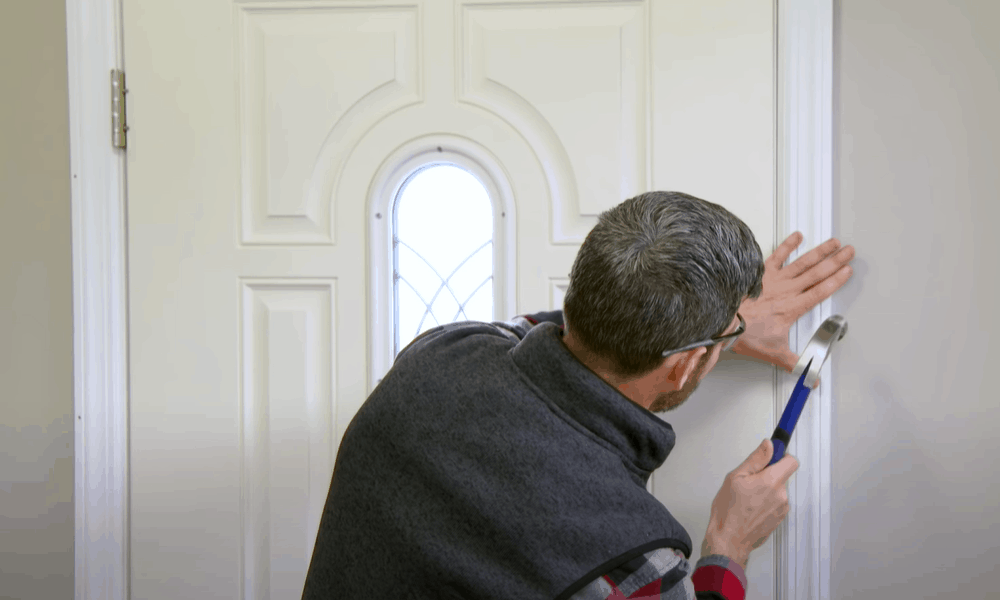
Step 11: Change the hinge screws
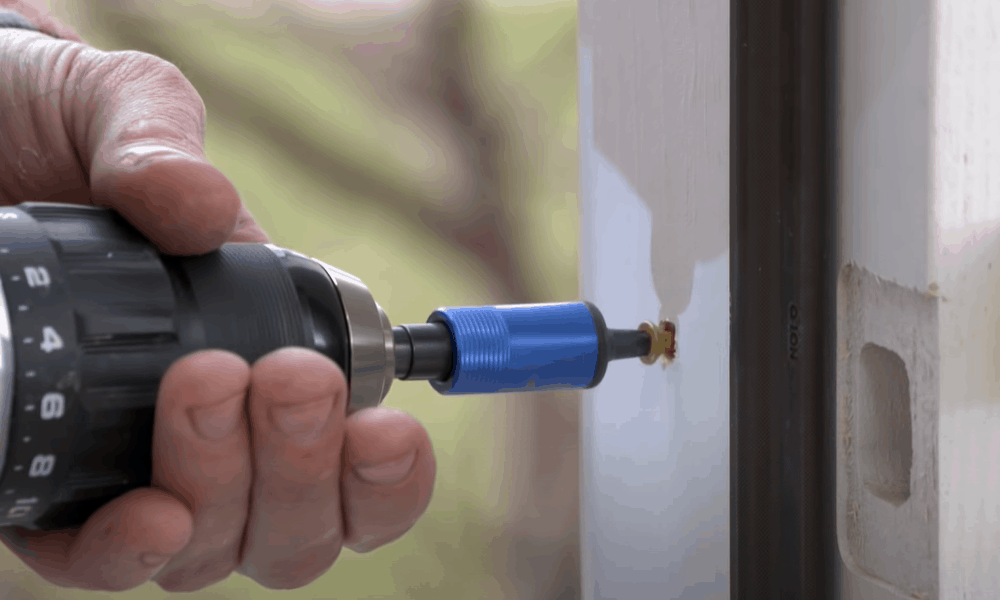
Use a three-inch screw in place of each screw that you’re going to pull out from the hinge.
On the top of the exterior trim and along its sides, hammer in additional casing nails at a distance of 16-inches from each other.
Pro Tip: If the door is exposed to elements of weather, install a drip cap on its top.
Step 12: Fill in the space between the framing and the door jamb
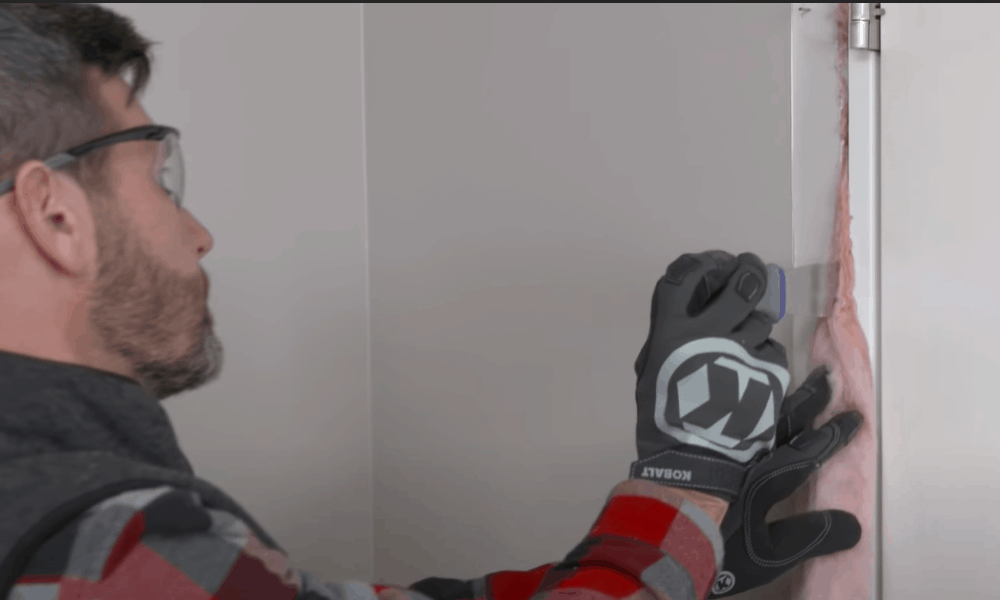
Insulate the space with minimally expanding foam insulation. Once the foam has expanded after leaving space behind, stuff that space using a piece of wood.
Step 13: Install interior trim
You can reinstall the old trim or cut and install a new one. Use a beveled transition to cover any gap if there’s any between the existing flooring and the new sill
Step 14: Apply caulk and caulk backer
-
Sale!
Home Entrance Anti-Slip Coral Fleece Door Mat
Original price was: $12.99.$9.99Current price is: $9.99.Select options This product has multiple variants. The options may be chosen on the product page -
Sale!
Semicircular Cartoon Welcome Entrance Door Mat
Original price was: $12.99.$9.99Current price is: $9.99.Select options This product has multiple variants. The options may be chosen on the product page -
Sale!
Anti-skid Water Absorption Bathroom Door Mat
Original price was: $12.99.$9.99Current price is: $9.99.Select options This product has multiple variants. The options may be chosen on the product page


Firmly press caulk backer into the trim gap. Apply the caulk between the door trim and the siding. Take a trim board, cut it, and then fit it under the sill and the screw. Make sure to screw it to the framing afterward.
If the gap is wider than 3/16’’, press foam backer into it and apply caulk over the foam backer, then, remove the door and varnish the trim, jamb and the door.
Conclusion
You might have concluded by now that installing a prehung door takes as much effort as the brain.
You have to carefully read and follow all the steps if you want to get over with this process in less than a day.
Watching the videos that we have recommended throughout the article will also guide you if you hit a bottleneck.
Still, if you have any questions about the process, please feel free to get in touch.