How to Remove a Door from Hinges? (Step-By-Step Tutorial)
Are you looking to replace or repair a door? Perhaps you want to clear a particular entryway for practical or aesthetic reasons? If you answered yes, the first step is to remove the door from its hinges.
This project has challenges of its own but with the right instructions and supplies, it is something you can pull off. Speaking of instructions, below we show you how to remove a door plus tips on making this task a success.
Tool for Removing a Door from Hinges
You will need the following supplies to remove a door:
- Hammer
- Screwdriver
- Putty knife
- Pry bar
- Reciprocating saw
- Locking pliers
Step-by-Step Guide on How to Remove a Door from Hinges
Follow these simple instructions to remove a wooden door off its hinges. If you are looking for instructions on removing a sliding door, you will need to follow a different procedure.
Step 1. Secure the door
- Start by closing the door to keep it from falling when you remove the pins or screws.
- Have someone help you hold the door in place, especially if you are dealing with heavy wooden doors that can cause damage or injury if they accidentally fall.
Pro tip: If you do not have a second pair of hands to help, try sliding a block of wood in the space underneath the door for support.
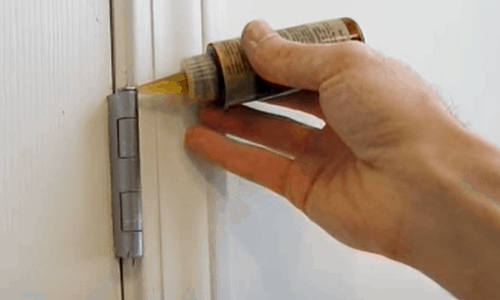
Step 2. Break any paint seal
- Painted hinges can be a pain in the neck and can make it particularly difficult to remove a door. The only way out is to spend a bit of time to cut away the paint seal.
- Slide a utility knife in the tiny space between the top of the hinge plate and the pin. Repeat this process to break the stubborn paint seal on all the hinges.
- Use the tip of the utility knife to scour the paint seal between the screws and the hinge plate.
- Breaking paint seal especially on older doors might require several attempts, so be patient.
Step 3. Lubricate the hinges
Lubrication can ease the job of removing pins and screws from hinge plates. Just remember that a little goes a long way.
-
Sale!

Swing Stop Bottom Adjustable Roller Flooring Barn Door Hardware
Original price was: $44.99.$33.99Current price is: $33.99. -
Sale!

Low Noise Floor Guide Adjustable Length Barn Door Hardware
Original price was: $15.99.$11.99Current price is: $11.99.Select options This product has multiple variants. The options may be chosen on the product page -
Sale!

Antique Big Rollers Steel Sliding Barn Door Hardware
Original price was: $187.99.$140.99Current price is: $140.99.


- Before attempting to unhinge the door, first, spray lubricant over the hinge plates and pins. For a less messy application, opt for a silicone-based lubricant.
- Close the door and allow the hardware to absorb the lubrication for easy removal.
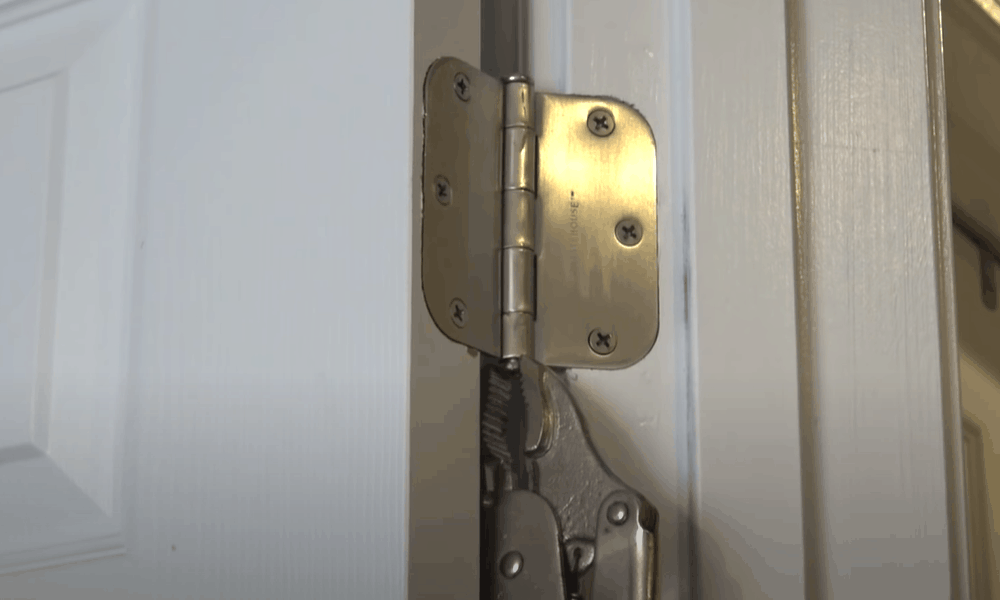
Step 4. Pry the pin
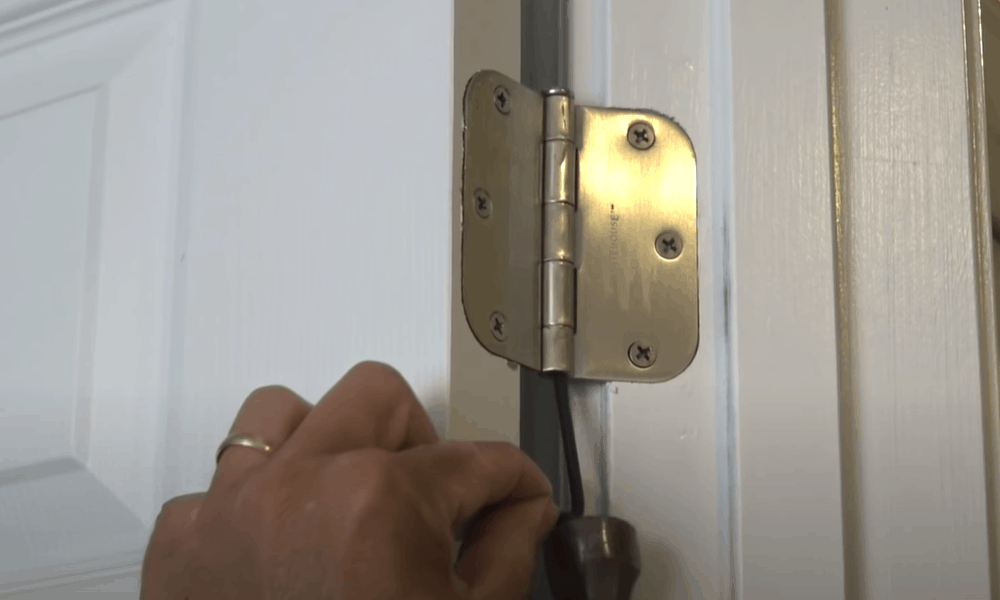
- Hinge systems come in different styles. Check if yours has a pin with a tiny hole at the bottom. If so, place the tip of an old screwdriver in the hole and tap the handle with a hammer to push the pin up.
- If your pin doesn’t have a hole, simply place the tip of the screwdriver at the bottom of the pin and tap it with a hammer to pry the pin out.
- As you push the pin from the bottom, the head should pop out upwards. Use a pair of pliers to pull out the pin from the top. If you do not have pliers close by, try pulling out the pin using your fingers.
- Some recommend using a nail instead of a screwdriver to push the pin up the hinge plate. However, because of the small striking surface of the nail, you risk injuring your fingers. Also, with an old screwdriver, you don’t have to worry about it getting damaged.
Pro tip: To prevent the door from toppling over and causing damage or injury, it is best to start by removing the pin in the bottom hinge then proceed to the second one. For doors with three hinges, start with the middle hinge, followed by either the top or bottom one.
Step 5. Take out the door

With the pins out of the way, you are now ready to remove the door.
- First, open the door partway. Then, with one hand on the knob and the other under one of the hinges, gently lift the door while pulling it to the side to release it from the hinges.
Pro tip: If the door is too heavy to simply pull it off the hinges, try sliding a pry bar under the door. This will take the weight off the hinges and make it easier to lift the door out.
Step 6. Unfasten screws from spring-loaded hinges
If the hinges on your door don’t have pins, you will need to use a slightly different technique to remove the door.
- Start by closing the door to keep it from falling when you unhinge it from the frame. Using a Philips-head screwdriver, unfasten the screws on the hinge side jamb by turning them counterclockwise. Be sure to start with the bottom hinge followed by the top one.
- To completely remove the screws from the hinges of an interior door, you will need to open the door at this point. With the screws halfway out, have someone help you open and hold the door in place.
- Pry the door out to release the screws from the jamb.
- If replacing or repairing the door, lay it on a workbench or sawhorses and take out the screws and hinges. Keep the hardware in a safe place if you plan to reuse it.
Step 7. Remove the trim
-
Sale!
Window Cabinet Drawer Handles Self-adhesive Door Knobs
Original price was: $12.99.$9.99Current price is: $9.99.Select options This product has multiple variants. The options may be chosen on the product page -
Sale!
Upscale Sliding Door Knob With Double-sided Tape for Kitchen Door Wardrobe
Original price was: $12.99.$9.99Current price is: $9.99.Select options This product has multiple variants. The options may be chosen on the product page -
Sale!
Round Stainless Steel Door Knobs for Drawer Cabinet Kitchen Cupboard
Original price was: $12.99.$9.99Current price is: $9.99.Select options This product has multiple variants. The options may be chosen on the product page


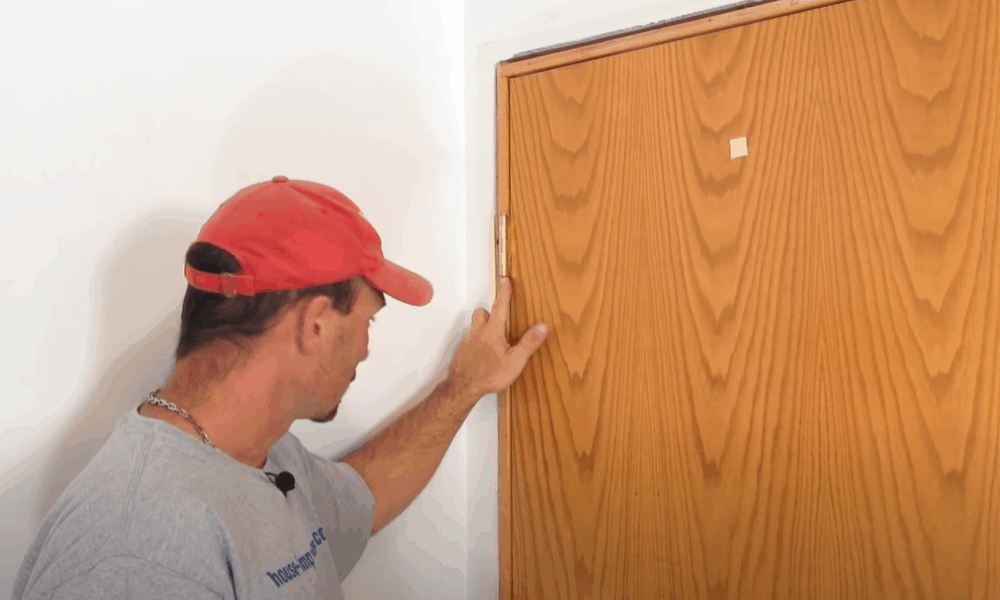
If you are looking to replace a door or for some reason, you do not plan to reinstall the door, you will have to take out the trim. This is the casing that surrounds the entryway to give it a finished look.
- The trim is usually held in place with paint and nails. You will need to break the paint seal first. Run a utility life along the intersection between the trim and frame, then between the trim and wall, cutting the paint all around the door.
- With the paint seal broken, pry off the old trim. Insert a small pry bar or putty knife in the space left behind by the paint seal then lift the trim to separate it from the wall. Be careful not to damage the old trim if you plan on reusing it.
Pro tip: To avoid damaging the wall, pivot the pry bar on a block of wood as you lift out the trim.
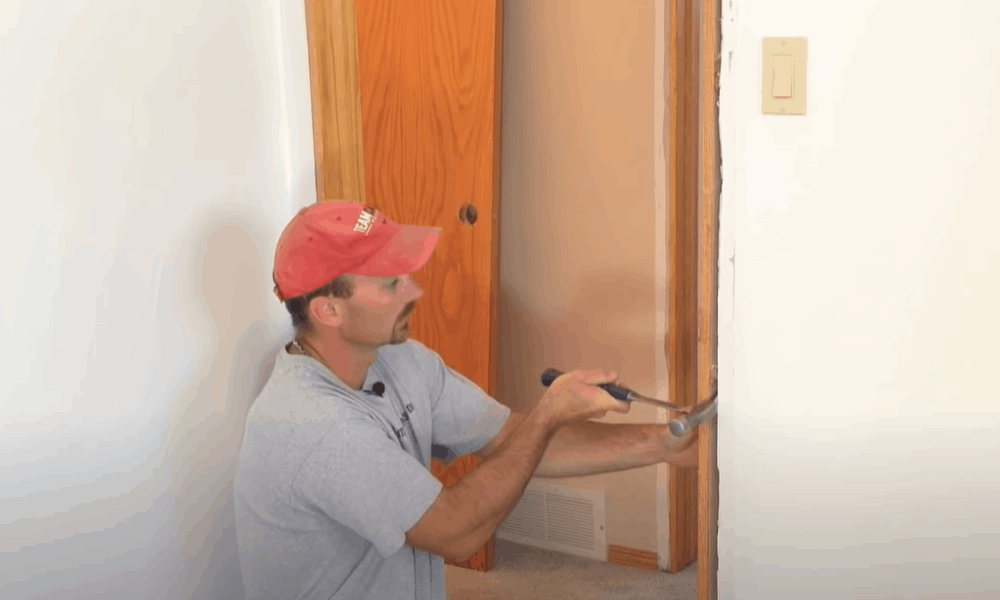
Step 8. Remove the door frame
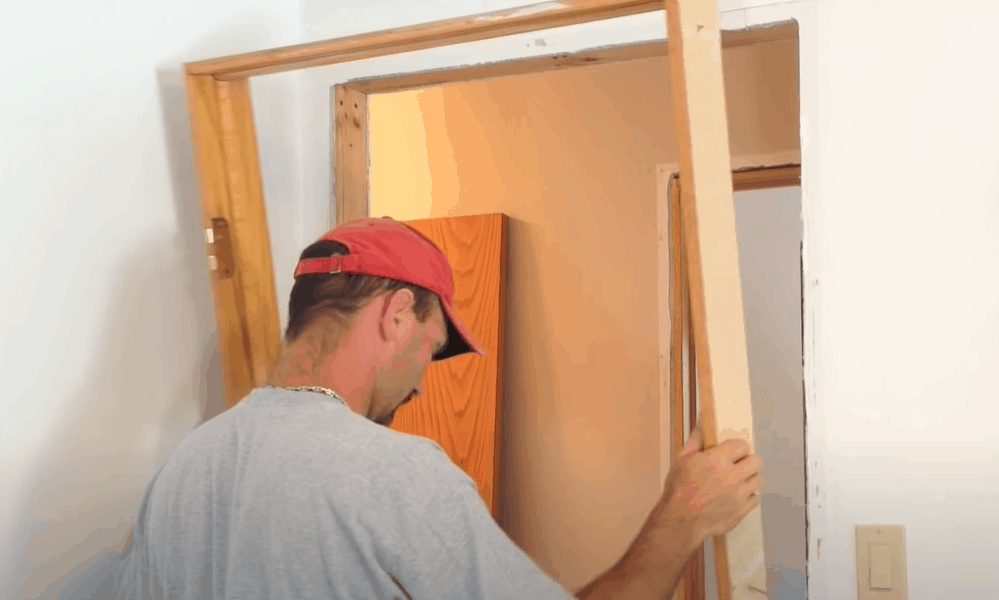
Next, you will want to take out the door frame. This step is necessary if you wish to replace the door or need to do a major repair or reno.
- Like the trim, the frame is held in place by nails. If you do not plan to reuse it, the most efficient way to get rid of the frame is to cut each of the jambs horizontally at the center. The rest of the frame will collapse in, making it easy to pull out the pieces of wood.
- Alternatively, slid a reciprocating saw between the frame and rough opening to cut the nails holding the frame to the wall. This might take a bit of time but you will minimize the chances of cutting into the drywall.
Congratulations! You have successfully removed a door from its hinges.
How to replace the door
If you plan to put the door back, follow these simple steps:
- Lift the door and slightly angle it toward the top. This is best done with two people.
- Align the door with the hinges, one hinge at a time.
- Insert a pin in one of the hinges, preferably the top one. Use a hammer to slightly tap the pin until it is halfway inside the hinge. Move on to replace the pin in the bottom hinge followed by the middle one.
- Open the door partway to check that it works properly. Then, tap the pins to completely push them into the hinge. The head of the pin should sit flat on top of the hinge.
Pro tip: If the door won’t align with the hinges after several attempts, place a block of wood or pry bar under the door. With the door lifted, insert a pin in the hinge that aligns first then move on to work on the other hinges.
Extended Tips
Here are extra tips to help you get the most from this project:
- Use hot water to remove paint from door hinges
If you are unable to remove the pins off painted hinges, you will have to unscrew the hinge set from the door and frame. Then, soak the hinges in a stainless steel pan containing water and baking soda.
Bring the water to a boil or until the paint starts to peel off the hinges. Remove the hinges from the pan, wipe out the remaining paint with a rag, pat to dry and allow it to cool. You should now be able to tap out the pin using a screwdriver and hammer.
-
Sale!
Semicircular Cartoon Welcome Entrance Door Mat
Original price was: $12.99.$9.99Current price is: $9.99.Select options This product has multiple variants. The options may be chosen on the product page -
Sale!
Anti-skid Water Absorption Bathroom Door Mat
Original price was: $12.99.$9.99Current price is: $9.99.Select options This product has multiple variants. The options may be chosen on the product page -
Sale!
Classic Friends Welcome Rubber Carpet Door Mat
Original price was: $12.99.$9.99Current price is: $9.99.Select options This product has multiple variants. The options may be chosen on the product page


- Use vise grips for pins caps
Some hinge pins come with caps at the top and bottom. To take out the pins, you will first have to remove the caps. An easy way to do this is to pull out the lower cap using a pair of vise grips, also known as locking pliers. Then, push out the pin, as usual, using a hammer and screwdriver.
Minimal DIY skills and the right tools are all you need to remove a door
There are many reasons why you would want to take out a wooden door from its hinges. At first, it might seem like a daunting task but as you can see, all you need is basic DIY skills, the right tools, and the right set of instructions to complete the project. As always, when handling heavy doors, it is best to get someone to help you maneuver the door. Good luck with the next steps you plan on taking after removing the door!