10 Easy Steps to Plane a Door

Is your door ‘catching’ around the edges? Planing can enlarge the gap between the door and jamb, making closing and opening a complete breeze.
The job involves taking out the door from its hinges first before shaving the edges and while this might sound daunting, it is actually a task you can pull off on your own.
All you need is the right tools and techniques. Below, we outline instructions on how to plane a door.
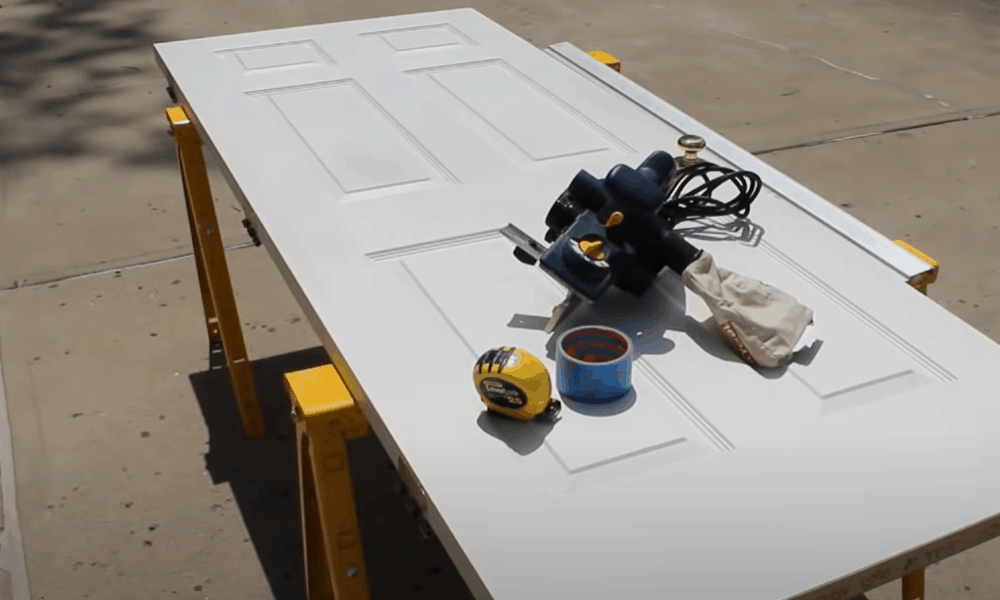
Tools for planning a door
Here are the supplies you will need to get the job done:
- Pencil
- Tri square
- Hand plane or power planer
- Painter’s tape
- Worktable or sawhorses
- Chisel and hammer, or pair of pliers
Materials
- Paint and primer
- Stain
- Sealer
- Sandpaper
Step-by-Step Guide on how to plane a door
Follow these steps to plane a door like a pro:
Step 1. Find the problem area
- When dealing with a binding door, it is not always obvious which area needs to be trimmed down. Before removing it from the frame, open and close the door a couple of times while checking where it rubs against the jamb.
- Look for areas where the paint has rubbed off. As the door grazes against the jamb, the paint is likely to come off around the areas where the door is raised.
- If possible, close the door all the way then inspect the gap between the door slab and jambs, header and threshold or floor. Ideally, the gap should be even, measuring about 1/8 inches. Notice the areas where the gap in between is comparably smaller.
- Close and open the door several times while looking for spots around the door that feel unusually tight—this is likely where the door is binding.
Step 2. Mark the identified problem areas
-
Sale!

Swing Stop Bottom Adjustable Roller Flooring Barn Door Hardware
Original price was: $44.99.$33.99Current price is: $33.99. -
Sale!

Low Noise Floor Guide Adjustable Length Barn Door Hardware
Original price was: $15.99.$11.99Current price is: $11.99.Select options This product has multiple variants. The options may be chosen on the product page -
Sale!

Antique Big Rollers Steel Sliding Barn Door Hardware
Original price was: $187.99.$140.99Current price is: $140.99.


- Once you identify the areas that need shaving, mark these out for accuracy.
- Using a pencil, mark two points to identify the start and end of the section that needs to be planed. It is a good idea to mark these points at the front and backside of the door for extra precaution when you plane.
- Use a tri square to draw a vertical line connecting the two points. This will help you shave the door only at specific points.
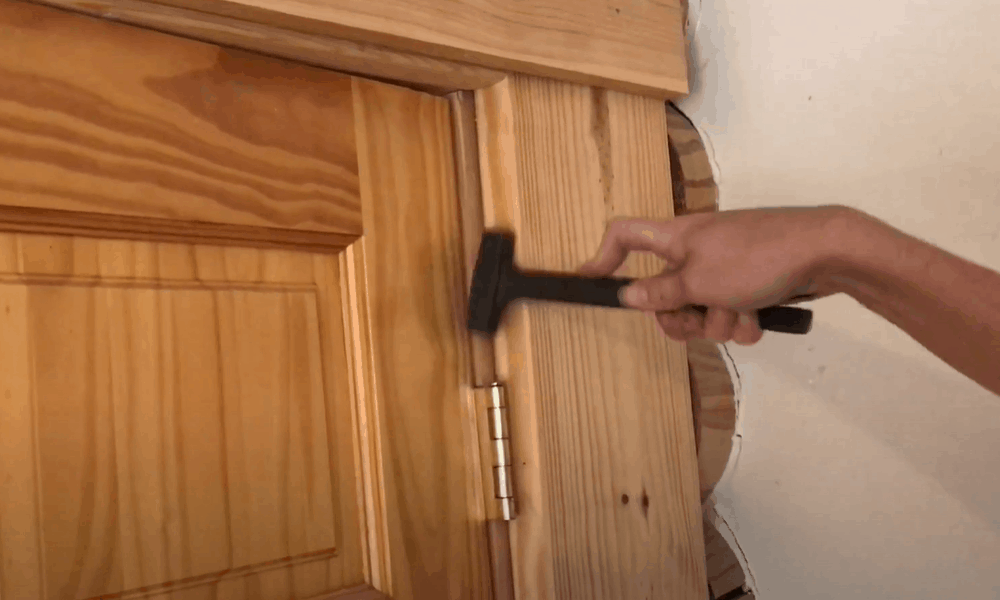
Step 3. Unhinge the door
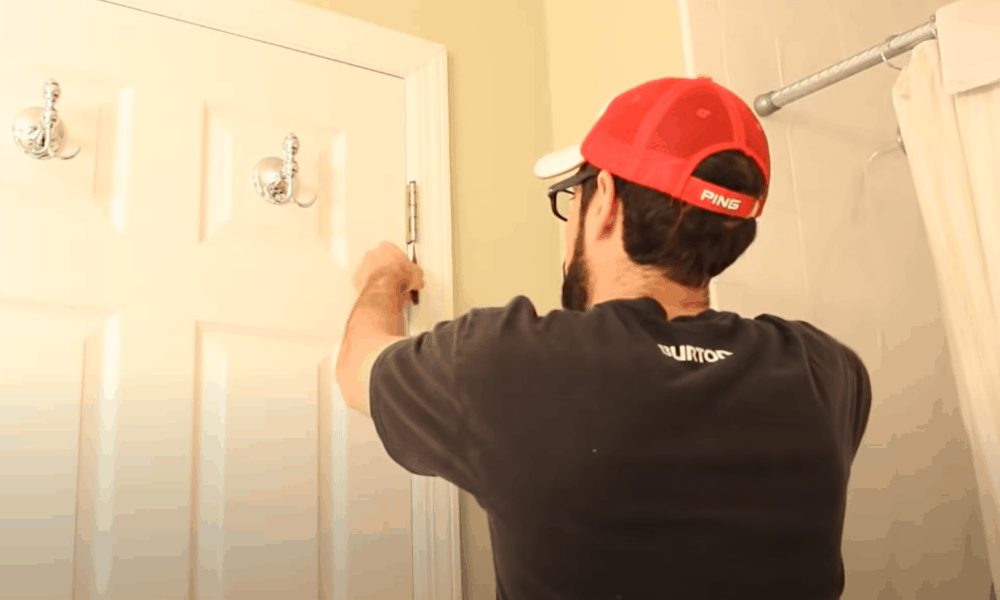
- If you only need to plane a small area along the edge or at the top of the door, removing the door might be unnecessary. In this case, simply use a doorstop to keep the door from moving then proceed to trim.
- To plane larger areas or along the bottom of the door, you will need to remove the door from the frame.
- Use a screwdriver to unfasten the hinge screws. Release the door from its hinges and leave the hinges on the frame.
- If the hinges consist of a pin instead of screws, use a pair of pliers to pull the pin out from the top of the hinge. Start with the bottom pin then do the same for the upper pin.
- Alternatively, you could hold a chisel against the bottom of the pin and hit with a hammer to push the pin out of the hinge.
Pro tip: As you unhinge the door, have someone hold it for you to avoid injury.
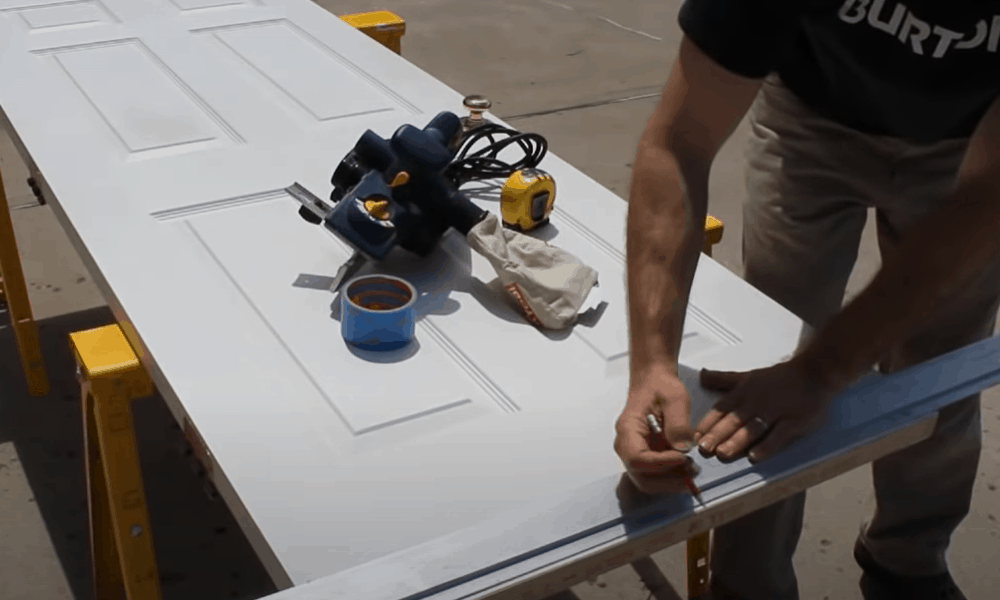
Step 4. Prepare the door
- If you want to plane the top or bottom, it is easier to work with the door lying horizontally on a raised surface. So, place the door on a worktable or sawhorses and clamp it into place.
- If planing the lockside, your best bet is to hold the door in between your legs with the target area facing you. Ask someone to help you secure the door in this position.
- Check for nails along the edges of the door. If you run the planer on one of these you could ruin the blades or even injure yourself.
- Place painter’s tape on both sides of the area where you want to plane. This will keep the door from splintering and prevent the planer from scraping the paint. Painter’s tape is a good choice as it won’t peel off the paint as other types of tapes would.
Step 5. Select the right planing tool
- You can use one of several types of planers to trim a door that won’t close but all generally work the same way. At the top, the tool consists of a knob and hand handle that you use to move the plane over the wood. At the bottom is a slanted blade that does the trimming.
- A hand plane is the most common and will get the job done with a bit of muscle power. To plane smaller sections, consider using a block plane, which is comparably smaller than a hand plane.
- Power planes are best for experienced DIYers. Their main advantage is that they offer precise depth adjustment so you if you want to trim 1/16 of an inch from the wood, for example, you can select this setting and therefore get the job done faster.
Step 6. Adjust the blade accordingly

- Both hand and power planes allow you to adjust the angle of the blade. The only difference is that the power tool comes with visible calibrations so you can select the one that best meets your needs.
- If you are using a simple bench plane, fasten the wheel below the handle to obtain a suitable angle. Ideally, the blade should not stick out at a steep angle because you only want to shave off a bit of wood.
Pro tip: To avoid digging into the wood or taking out more than is necessary, set the plane in such a way that the blade barely peeks out from the bottom surface.
Step 7. Use the right planing technique
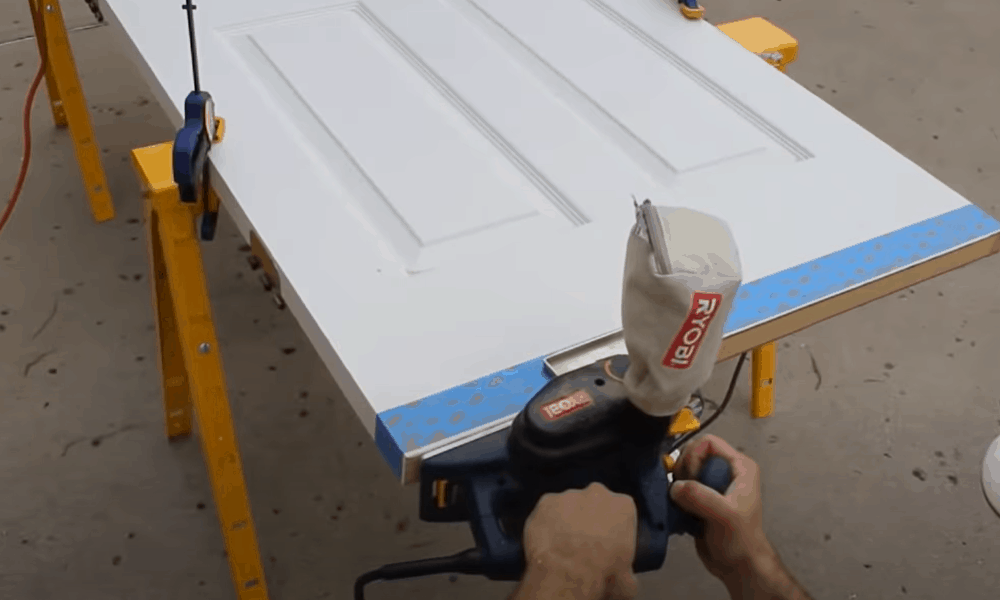
- The technique for planing vertical and horizontal edges is slightly different. For vertical edges, plane along the wood grain. For horizontal edges start from the sides and work your way toward the center.
- Firmly keep the bottom of the plane flat on the wooden surface. Raising the tool might result in irregular cuts, defeating the whole point of planing.
- If you are using a bench plane, hold it with both hands. Using steady but light pressure, move the tool across the problem area you identified. The goal here is to shave only a small amount of wood from the door
- If working on the top or bottom edges of the door, run the plane from the outer edges toward the center. If the problem area is along the length of the door, move the plane along the wood grain. The wood grain usually runs from the top to the bottom of the door.
- As you plane, use a tri square regularly to check that the edges are level with the face of the door.
Pro tip: For best results, after planing the door with the front side looking up, turn it over then work on it with the backside looking up. This will ensure uniformity on both sides of the door.
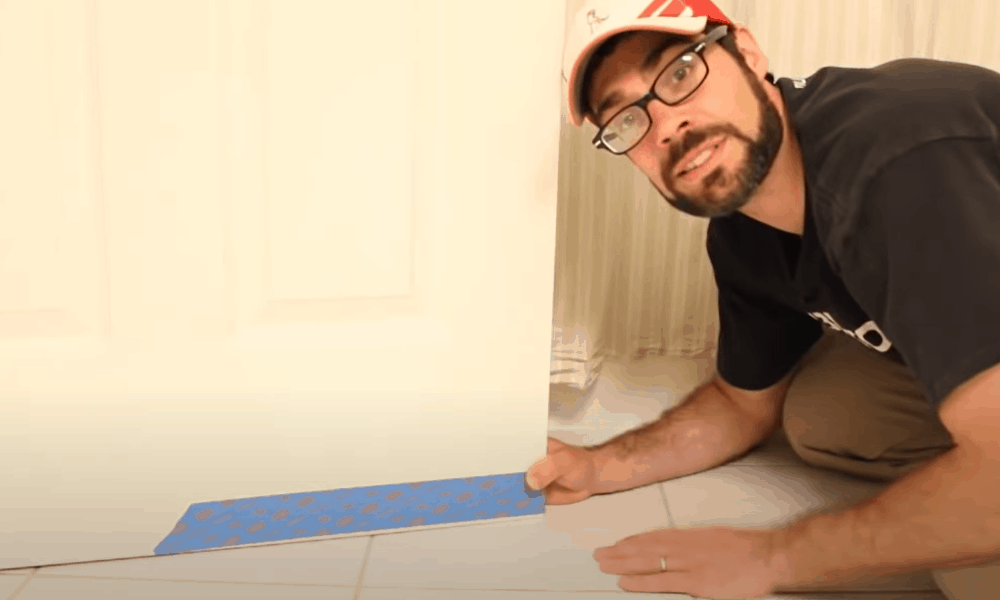
Step 8. Rehang the door to check for fit
-
Sale!
Free Punch Glass Door Sliding Door Knobs Suction Cup
Original price was: $12.99.$9.99Current price is: $9.99.Select options This product has multiple variants. The options may be chosen on the product page -
Sale!
Window Cabinet Drawer Handles Self-adhesive Door Knobs
Original price was: $12.99.$9.99Current price is: $9.99.Select options This product has multiple variants. The options may be chosen on the product page -
Sale!
Upscale Sliding Door Knob With Double-sided Tape for Kitchen Door Wardrobe
Original price was: $12.99.$9.99Current price is: $9.99.Select options This product has multiple variants. The options may be chosen on the product page


- You might have to hang and rehang the door several times to check if it still binds. This might seem like a lot of work but it ensures that you do not shave too much wood, which could lead to other problems with the door.
- Unclamp the door from the worktable and secure it back to its hinges. Open and close the door several times to check if it still catches. If it does, take it down and plane further to your satisfaction.
- When planing the door a second time, use the same technique explained earlier. Do not be tempted to use hard strokes just to get the job done. Take your time.
Step 9. Prepare the door for reinstallation
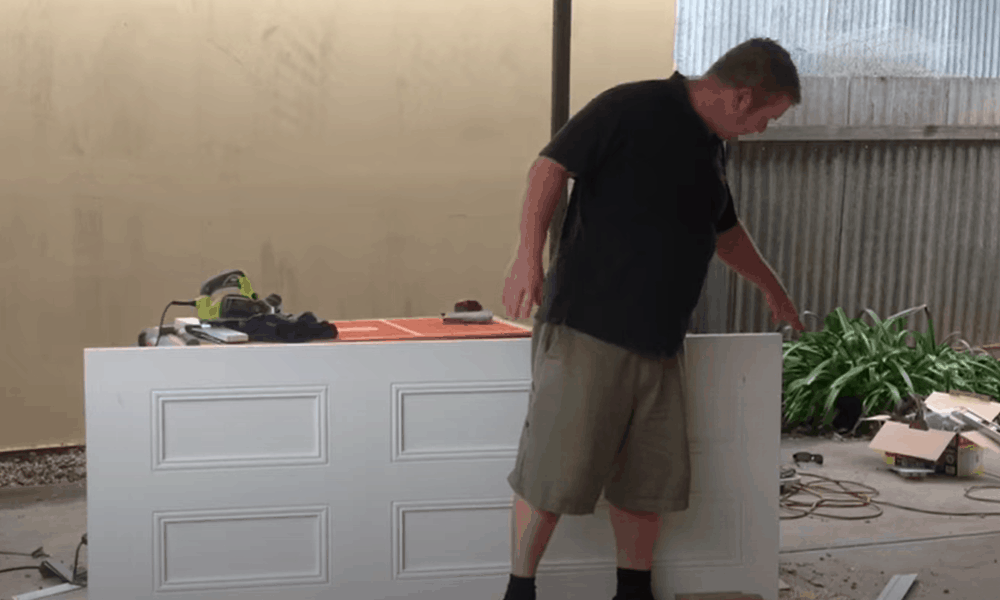
- Once the door opens and closes without sticking, you will still need to unhang it for painting and sealing.
- Use rough sandpaper to smooth out the planed zones and even out the gorges and cuts. Follow this up with fine-gritted sandpaper for a smoother finish.
- If the door is painted, apply a matching primer and paint to the planed area. If it is stained, apply a similar color of stain and finish with a sealer to protect the wood. Allow to dry.
Step 10. Reinstall the door
- Push the door into the frame opening. Replace the hinge screws or pins as required to secure the door. Reinstall any hardware you may have removed.
That’s it! You have successfully planed your door and it should work without any problems at all.
Extended Tips
Here are some extra tips to help you get the most out of this project:
- Opt for a power tool to complete demanding tasks
If you must shave off more than 1/8 inch of wood, a power planer would be more efficient. Just focus on trimming the wood little by little until you achieve the desired levelness.
- Use a multi-tool if the door won’t come out
If for some reason you are unable to unhinge the door, consider using a multi-tool to fix a door that binds at the bottom. The only downside is that the tool works best when shaving wood off small areas.
-
Sale!
Home Entrance Anti-Slip Coral Fleece Door Mat
Original price was: $12.99.$9.99Current price is: $9.99.Select options This product has multiple variants. The options may be chosen on the product page -
Sale!
Semicircular Cartoon Welcome Entrance Door Mat
Original price was: $12.99.$9.99Current price is: $9.99.Select options This product has multiple variants. The options may be chosen on the product page -
Sale!
Anti-skid Water Absorption Bathroom Door Mat
Original price was: $12.99.$9.99Current price is: $9.99.Select options This product has multiple variants. The options may be chosen on the product page


It only takes a few hours to repair a binding door
A binding door is downright annoying but the good news is that it is an easy fix. Be sure to use the right tools for the job—a basic hand planer works just fine but if you need to shave off more wood, an electric planer might be the way to go.
Do you have any questions or comments about fixing a sticking door? Leave them below—we’d love to hear from you!